Wednesday, November 04, 2020

Family Cookbook & Beef with Basil

A flavorful, fast, new favorite dish of ours.  Beef and Basil with a splash of soy sauce.  Serve with rice and a favorite vegetable side and you are done.      

My cast iron skillets are the best.  I have had this one for a few decades and nothing sticks to it.   I have a 14" cast iron pan that I got a few years ago, we call it the big ass pan!  It's so heavy! But it has seasoned up so nice.  


We made the beef and basil in the smaller 10" pan and put the rice in the rice cooker while I was gathering up the ingredients for the dish.   The rice was done just about the same time the hamburger was done.  The rice stays warm for a long time after cooking, so no need to try to time it perfectly.  


After this batch, we added a lot more basil to the finished dish.  Of course, I didn't take a picture of that dish, but oh well.  Just imagine more green! 


In 2016, Steve and I wanted to create a little recipe book for our families.  The idea was to include as many handwritten recipes from family members as possible to help keep the memories of those who had passed still alive in those pages.  We gathered recipes from our immediate family, scanned and deciphered as many as we could.  

We quickly discovered this was a huge undertaking for even a small book.  The recipes from grand parents sometimes had no instructions only ingredients or had just a list of ingredients and no measurements.  We had to pour through online recipes to figure out the proper measures, baking times and even modern day ingredients.  Some of the recipe cards were so stained and soiled that you knew it was a family favorite.

I called on family to send in original recipe cards, made some of the dishes and photographed them for the book but the hardest job was putting it altogether - the cards, text, photos, etc.  The brunt of that work was done by my husband.  I have to mention that because he worked tirelessly for over a month to get that recipe book gift ready.  The cookbook making site we used (Heritage Cookbook) is a membership site but gives a month free.  So we hustled our fannies to get that book perfected and done in that month!  


Of course I made sure that some of my favorites were included and I love that they are now all contained in that book. I don't know about you, but I have a hard time trying new recipes.  Even though these were family favorites, I still didn't venture past the ones I knew very often.  The other night however,  Steve suggested we try one from his brother in law.  Goodness, how did I miss this recipe?  Beef and Basil.  So easy and it sounded great. 

Well, it's in our rotation now and I really love the simplicity and flavor.  I think we've made this a dozen times already.  


Recipe:  
Ground Beef with Basil 
1½ pounds ground beef
½ cup fresh basil
2 -3 cloves of garlic
1t soy sauce 

Brown hamburger in your pan.  Add crushed or sliced garlic (I've done it with both) when hamburger is close to being done.  Then add in chopped basil and soy sauce.  Stir. 
Serve over rice. 


...for the leftovers we added in some chopped green onion.  Next time I think we'll fry them up with the ground beef, maybe near the end.


I know, you had to read all that to get to the recipe.  You probably already make a version of this, but adding in the fresh basil is wonderful.  It's so fragrant and completely makes this dish.  I made a salad and we had that, too.

Fresh basil is usually easy to find in the grocery store, if not in your garden.  Fry up some hamburger and add it in.  You will love it. 

Have a great day,
Kristin 

P.S. I had written this months ago, but never posted.  Basil was growing like crazy in gardens around the country, but now that it's November, it's not as easy to find in your backyard.  So go get some at the grocery store.  This recipe is a nice, warm meal for a chilly day.  Enjoy! 

Monday, September 28, 2020

KNS Christmas Store - Greeting Cards

Hello! Hello!!!

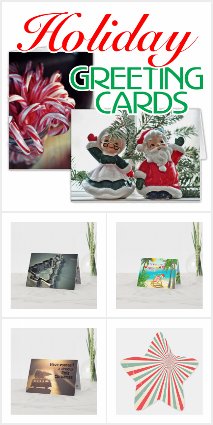
KNS Gear has been gearing up Christmas Season and Zazzle is having a 40% off sale until October 1st, 11:59pm Pacific Time.  Our Holiday Greeting Cards and Holiday Postcards have been updated this year and most now have a design on the inside or backside of the postcard.  These distinctive design elements makes our cards stand out.  The interiors are beautiful and have been made with you in mind.  The colors are light enough so that you can easily write in pen.  

Our Holiday Greeting card section (link below) shows all of our seasonal cards plus has a lot of seasonal envelope stickers and seasonal address labels.  Steve and I have purchased one of almost everything we have made to insure that the quality of the product to our customers is top notch!  So far we have been VERY satisfied with the quality of the items we have purchased.  We truly believe that you will be extremely happy with your purchases.

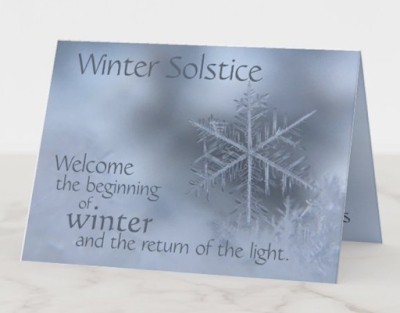
Here are a few individual cards both the outside and the inside, so you can see what I'm talking about. Up first is our Winter Solstice card.  We have this in both a greeting card and a postcard.  The exterior says "Welcome the beginning of Winter and the return of the light." 


The inside of the card has the beautiful crystal snowflake photograph and the customizable text space.  You can change that to your name of course! 
To see the card in our shop, click link below

 Here is the second Winter Solstice card that we created, with the same sentiment on the front but with a different photo on the front and different interior design.  


To see the card in our shop, click link below

The next card that I got a screen capture of is the truly unconventional card of the season.  I discovered this photo and thought it was perfect for a holiday card - maybe a chef or home cook would enjoy a card that reflected their interests.  Maybe someone who is known for having the holiday dinners would love this card design.   


The sentiment inside the card is completely customizable and can say whatever the buyer wants.  I put on there, "May we enjoy each other's company again, soon." as that is what I was thinking.  I miss my friends and family and I cannot wait to share a meal with them again. 

To see the card in our shop, click link below


Here is the last card that I'm featuring in this post and it's the iconic red car with a Christmas Tree on the roof.  I find it funny that in this watercolor design, the tree has a few decorations already on it.  I hope they don't drive too fast!  


The inside of the card has a larger picture of the back of the car and the salutation is of course completely customizable. 


To see the card in our shop, click link below 

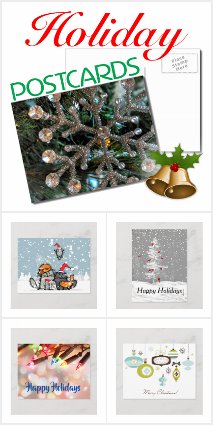
I have ordered about 50 postcards this past year and I love them.  They are not those thin flimsy cards you can buy for a Dollar each, or that you are receiving in the mail by the dozens during election season.  These postcards are thick, you can write with a Sharpie on them and it won't bleed through and still only takes a postcard stamp to mail.  

You can see the whole Holiday Postcard Collection by clicking the link below. 
Holiday Postcards

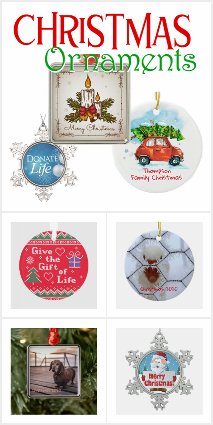
AND I know Zazzle will be having an ornament sale real soon, so I leave this collection for you to look at and ponder until a sale comes.  

I believe that one should take advantage of sales and not buy full price if you don't have to, especially with Zazzle.  Zazzle has a sale going on every single day for one type of product or more.  Sometimes the sale is 20% off -- sometimes, like this week, it's 40%.  If you sign up for Zazzle emails, you can get notice in your inbox as to what the sales are and how long they are on.  If you sign up for Zazzle Black, you pay a small fee once a year and get regular shipping free all year.

Here is the current sale and abbreviated details.  
A discount of up to 40% off the product net sale price shall apply when one or more qualifying products are purchased: Enter code CARDSFOR2020 in the promo code box at checkout...This offer only applies to qualifying products marked "Sold by Zazzle." Valid until 10/1/2020 11:59:59 PM Pacific Standard Time.

Thank you so much for stopping by.
Have a great day!
Kristin

KNS Gear is Kristin 'n Steve.  
That's us!  My husband and me.  

#KNSGear  #ChristmasCards  #WinterSolsticeCards  #WinterSolstice #ChristmasPostcards

Friday, September 25, 2020

Rubber band storage

 Rubber Band Storage


In true collector style I can't throw anything away that might be useful, so the rubber bands I'm talking about are not the rubber bands for your hair, I'm talking about the ones that come from produce or other types of packaging.  I have a whole doorknob full of them.  I see that we even had one that has a US flag attached to it.  I guess I didn't realize that until I photographed it.  

We get those very small diameter bands, that are very thick, from broccoli.   The other common type we get are the teeny tiny thin ones from green onions.  No junk drawer for these beauties,  they are on full display 24/7, right on the pantry doorknob in the kitchen.  

I used two of the broccoli bands just the other day.  I was taking a frozen cube of soup to a friend and we weren't going directly there, so I needed a little freezer pack.  Since we haven't been going anywhere I took all of the freezer packs out of the freezer, no sense wasting valuable freezer space.  While searching the freezer for something other than ice cubes, I found two 8 oz blocks of frozen cheese. The cheese worked perfectly to pack the soup and the rubber bands of course, held it altogether.  I seriously felt like a fool presenting my friend with this cobbled together gift but it worked! The soup arrived just as frozen as when I packed it.  


My friend didn't want the cheese, so I came home with the cheese and the two rubber bands, just in case you were desperately wondering.  

I don't need to extol the virtues of rubber bands, but it is nice to be reminded how handy they are.  

Here's the question begging to be asked!  So where do you keep your rubber bands? Do you have a specific spot, are they in a drawer, in a cup, hanging on a binder clip somewhere?  Do you throw them away?  Tell me.  Inquiring minds want to know.


Have a great day!
Kristin


Friday, September 11, 2020

Vote! November 3rd, 2020

Vote!
Vote!
Vote!


On November 3rd, 2020 - this year - please vote!  I have my own opinions on which way I'd like to see the votes go, for President that is, but that doesn't matter.  What matters most is that YOU vote.  Everyone that is eligible to vote should do so.  

Our country is on fire, literally from wild fires on the West Coast to protests in our streets.  Your opinion matters from your local government to the President of the United States.  

If you cannot vote in person or would rather not because of Covid-19, then request a ballot.  Many states allow for early voting and from past experience I found that the polling locations were not busy during the early voting time periods.  They might be busier this year, but certainly not as crowded as on election day.  

Here is a link to see what the general rules are for your state as to early voting.  It should be triple checked at the local level because Covid-19 has created many changes, but at least this will give you a first look to see what is the norm in your state.  Early Voting by State


My husband, Steve and I have created some new designs for this time of year.  If you'd like to ask people to vote without handing out fliers and getting into political conversations about it, you can wear a shirt that says VOTE!  The retro vibe to the designs are fun to wear and might actually start a conversation.  

The title below each shirt is a direct link to that shirt's Amazon page.  We do receive a commission for each purchase. 
by KNS Gear

You can decide if you want to discuss the political atmosphere of the country or just encourage the person in front of you to go vote and register their own opinion.  

by KNS Gear

We are all for protesting, as peacefully as possible, as we do not encourage lawlessness.  If you have something to say and are an ally of the Black Lives Matter protests, the Women's Movement, the Covid-19 lack of transparency or any number of issues that are present right now, go get yourself a Peacefully Protest shirt.

by KNS Gear

by KNS Political Gear

My dear Steve is the main designer behind the shirts we have on our site -- he asks input from me and I help narrow down font choices or placement.  In this series I suggested the tie dye design.  Other than that, this is all Steve!  

I am so proud of the designs we produce.  If you'd like to see more of our designs check out KNS Gear on Zazzle and Amazon.  We have hundreds of designs from transplant to photographs and you can get those designs on t-shirts, tote bags, canvas or even kitchen dish towels.


Have a great day!
Kristin


Monday, August 03, 2020

A Rose and a Thorn

Photo by Zara Walker on Unsplash

Last night my husband and I started what I hope to be a new layer of our day with each other.  We named our Rose and our Thorn of the day, then talked about each of them for quite a little while.  I didn't come up with this idea all on my own, it was something that I heard on a TV program. 

I'll be Gone in the Dark, a book and an HBO documentary about Michelle McNamara (a writer, well known for her true crime interests), the Golden State Killer and the stories that surround the cases. (It's an incredible documentary if you are looking for something excellent to watch.)  In the 5th part of the documentary the daughter tells one of her Aunts that she has her rose and thorn for the day.  The sister then explains that Michelle had her daughter Alice come up with a rose and a thorn for her day and they'd discuss it when Michelle tucked her in at night.  The rose being a good thing that happened during the day and the thorn being something that was a tough part of the day.  

I thought that was a neat idea, a lot better than, "How was your day, dear?"  Steve and I are, like most folks, at home all day with each other.  We both do our own thing for most of the day.  He works on his computer - online businesses that we have, working on a book of his own, putting together special projects for friends or family and who knows what else.  He can keep himself busy!  So between the two of us fairly busy in the house, we don't get a chance to sort out our day until we both come together to watch some TV later on at night.  


The rose and thorn might be another way to talk about what we've been up to during the day but also a way to talk about a frustrating aspect of the day.  Sometimes it's nice to be able to talk about something that bothered us but not want to dwell on it, or bring it up when there seems to be no need.  The rose and thorn idea helps to be able to talk about the good and the bad without it being too much.  (At least in theory.)  We both agreed that each day the rose can't be that we are so happy that we are together or that we love each other so much!  Although, on our first day, I did say that my rose was one of the cats.  So I can't use that as my rose again for a long time.  The cats are endlessly entertaining, this is a known fact.  

We are only on day one.  I hope it continues.  We aren't going to write them down or anything, just discuss.  I think it'll be nice.  Something new for our pandemic life. 

Have a great day! 
Kristin


Sunday, August 02, 2020

Mushroom, Ricotta and Gruyere Sandwich

Mushroom, Ricotta and Gruyere Sandwich


This pandemic has kept me busy in the kitchen, that's for sure.  My husband and I used to go out to eat at least once a week with friends, I was a trivia host twice a week right at the dinner hour, and there was always some reason to stop by some place else for a dinner to go.  We always seemed to have leftovers in the fridge - really good leftovers. 

Now all of that has changed.  As it has for many of you, I'm sure.   I have spent hours looking through Pinterest, Foodgawker and other assorted places looking for new ideas on what to eat.


I have a giant library of great recipes, but with my MSG and L-glutamic acid avoidance, most of those recipes have to be tweaked a lot or I need to find new recipes.  The past month I have been researching ricotta cheese recipes. I picked up a 3 pound tub of ricotta and gathered together all of the recipes that used it.  I can't have any kind of tomato sauce, so white cheese all the way around. One of my first ricotta recipes we tried was this one - Mushroom, ricotta and Gruyere sandwiches. 


The above picture shows the middle of my prep -- the mushrooms and onions are almost done, the ricotta has been stirred and is ready to be put on the bread, and the Gruyere has been grated.


I didn't find any hearty rustic bread when I went to the store, so I opted for French bread.  I cut the bread in a long diagonal to get as much surface area as I could.  The 5th piece in the photo above, the one in the middle is the end slice that I couldn't just throw away, so I added all the fixings on it.  I thought it might tip over in the baking process since the bottom was rounded, but it stayed upright. 


Here you can really see the layers.  I tried not to overwhelm the bread with the toppings, mostly so we could pick these up and eat them and not have to use a knife and fork.  

I put a big dollop of ricotta mixture on the bread, spread it to all sides then took the bread to the pan with the mushroom mixture.  I used a spatula and gathered up some of the mixture and poured it over the top.  What didn't stick fell right back into the pan.  If more was needed, I did it again.  Doing it this way saved a lot of spilled mushrooms on the sheet pan.

Next up, the Gruyere.  I shredded my own and placed little bundles of cheese on top and made sure to spread the cheese to all edges.  

I slid the tray into the oven, on convection, for about 10 minutes and the photo below was the result.  My husband and I ate these for dinner and we loved every single bite.  The warm melty ricotta softened up the top of the bread just slightly, but created a rich, warm, creamy base.  The mushroom and Gruyere mixture gave more texture to the sandwich and so much flavor!  I forgot that we weren't eating a meat based dish.  The bottom of the bread was browned and crunchy. All in all, this was a fairly quick, absolutely delicious meal.  I do wish I had some chives, but sometimes you just gotta make do.  We are absolutely keeping this on our dinner rotation. 


Mushroom, Ricotta and Gruyere Sandwich
An open faced sandwich with sauted mushrooms, ricotta and Gruyere cheeses - then baked for a few minutes to become warm and toasty.

Yields 4+ sandwiches
snack, appetizer, light dinner or even a hot brunch item

Ingredients
1 T olive oil
1 large onion, diced
8 oz mushrooms, sliced
2 cloves garlic, minced (or crushed)
1 c ricotta cheese
2 T chives, chopped
4 slices thick sliced bread (rustic style, French baguette)
1 c shredded Gruyere cheese
salt
pepper


Preheat oven to 425 degrees. Use a non stick liner or parchment paper to line baking sheet.  Or you can use a non stick cooking spray.

Slice French bread diagonally for the open faced sandwiches.  Cut the bread while the onions are cooking.

Heat olive oil in a large skillet - cook onions until translucent and then add in mushrooms.  Stir often until cooked and browned. 

Mix in minced or crushed garlic and cook until full incorporated, about a minute or so, stir constantly. Season with salt and pepper, if so desired. 

Combine ricotta with 1 tbsp. chives, then season to taste with salt and pepper. (I didn't have chives so I minced up some green onion tops)

Brush one side of the bread with olive oil, if you desire, and place oil side down.  I didn't do that for ours.
Spread a spoonful of the ricotta mixture on the bread, top with the mushroom mixture and then top with Gruyere cheese. 

Bake the open faced sandwiches for about 15 minutes, a little less if you are using convection, until the cheese on top is hot and melted.

Top with extra chives if desired.  

Serve immediately.  

adapted from: Hello Little Home

Sunday, May 31, 2020

Spring DIY Postcard Swap


Cat at the Beach
by Kristin Corlett

This is my second postcard swap with the folks at iHannah, a blogger, crafter, positive influencer from Sweden.  I joined this swap just a week or two before the deadline, but being in the beginning stages of the lockdown from Covid-19, I was so grateful to have something creative to do.


The Spring Post Card Swap 2020 was an event by the creator of the Studio iHannah blog and this was the 10 year celebration!  She's been hosting this handmade postcard swap twice a year for 10 years.  If you want to be notified the next time the swap comes around, sign up for her newsletter at the iHannah blog

It looks like I have 11 cards posted here, but I only mailed out 10 for the swap.   Last time I created the postcards, I created scenes for a lot of them.  This time was a bit more scattered in thought, but circles, stripes and squares were common in the cards.


The card at the top of the post, Cat at the Beach was a striped card that somehow turned into the adorable cat looking over the fence.  It's a favorite of mine.

This one above with the CAMP sticker on it was circles and squares mostly with a few fun bits tossed in to make it more interesting.


I think this one with the sunset picture and the gift card envelope was my color blocking card.  It was one of my last cards for the swap and I really wanted to use the gift card picture.


These next two, the one above and below were put together with all of the little bits that I wanted to use, but couldn't find a place for them.  Also, I do recall that I was on the couch and most of my pictures and cut outs were in the other room, so yep, this is what I had around me at the time.  On the postcard above, I have used a Fast Jax Trivia answer slip.  No trivia shows for the near future with everything closed down, so it was nice to put one of the slips in the postcard collage.


This card was a two sided card - I think I sent this off to a person that lives in Germany, but I can't be positive  We have a mini donut place here in Jacksonville, Florida called the Mini Bar.  A bit of their advertisement on this card, plus a bowl of ice cream - chocolate, my favorite!  The striped background is a portion of a gift bag.   I am nearly positive that my cat chewed on the bag, so it couldn't be used anymore for gift giving!


The LOVE!  That's about all I wanted this one to say -- love.  I didn't want the message to be lost in the collage, so I added complementary colors on the remaining edge.


I received a message today that someone received a card with a recipe on it -- I wonder if it's this one?  This was from the little monthly cookbook that Martha Stewart used to put out.  It's a great size for the postcard project.


These two postcards with the olives are my top favorites!  One was striped and the other blocked.  I love olives, so much so that my husband and I came up with our own Olive Tapenade recipe.  I swear, it's the best thing out there.  It's here in my blog - called Olive Tapenade, our way.


Funny about this one - I put a recipe for Potatoes Au Gratin on it and I made that dish last night, but not from this recipe - I had forgotten about it already!  Mine didn't come out as awesome as I wanted, so I'll have to look at this recipe again.


The 11th card -- stripes are once again the theme.  I found this page of hand drawn people and little blurbs about what they were doing throughout the day.  I thought it was fun and quirky.  So glad I was able to get one of those into the swap postcard.


I finally dug my sewing machine out of my closet and was able to add a little bit of stitching to each card.  I love sewing paper with the sewing machine.  It's easy to do, but if you sew fabric and try to use the needle that you used for paper, you will be disappointed.  The needle will be quite dull.  So make sure you have a new needle for your fabric.

That's all for today!
I hope you are staying well.

Have a great day,
Kristin


Friday, May 29, 2020

Bread Bag Tag Lampshade

Bread Bag Tag Lampshade
by Kristin Corlett


This is my bag tag lampshade!

Bread bag tags. An obsession?  Prolly. Not really, but I do think about what I can do with them very often.  I've been a collector of bag tags for a decade or more and have recruited many family and friends to help in the collection as well.  I just recently asked my neighborhood to help me collect so I can finish the lampshade. 

What started this whole idea of a lampshade was this photo on Pinterest.  I was completely drawn in.  I needed to make it.  I had to!  I have scoured the internet and the only thing I have found is that this was from the Concordia student design show 2006.  Just this photo, no instructions on how to make it, nothing.  In fact I don't even know if it is a lampshade.  Looks like I'm going to have to do it myself.  


This is the Pinterest photo -- I found it on flickr

I think if there had been a How-To for making the lampshade I might have started this project about 4 or 5 years earlier.  Since I had to start from scratch I spent a lot of time thinking about what would work. How much time you ask?  Years.  I have been teased by many that I was never going to do anything with all those tags.  I want to do a lot of projects and never do them, so I can see why this one would also be a lost cause.

But... it wasn't!

I had several unsuccessful attempts to get holes punched through the bag tags.  The tags are strangely brittle when a hole is punched into it and they end up splitting or breaking.  I tried heating them up so that the punch might not split the plastic, but that didn't work either.  I finally decided that a wood burning tool was going to be the ticket to small holes and no breakage.  Turns out I was right!  I spent only a few days on the project seen here.  Once I got going I was on fire!

The little bits and pieces left over

Here is how I made my bread bag tag lampshade, which by the way, most of those tags are from friends and family that have helped me collect them.  It gives me so much JOY to know that people collect these for me.  If only that they think of me as they toss that tag into the drawer or ziploc bag.  Thank you to all who have contributed to my very long term project. 


Sourcing the Tags

Tags can be sourced in a few ways - friends and family can save the tags for you and send them to you every so often.  You can find some being sold on Etsy and right at this moment there are a few rolls of blue tags for sale on eBay.  I have been told that if you ask some restaurants that use a lot of bread or veggies that come with those tags, they might save them for you.  (Think diner/breakfast places)  I had a friend in a restaurant that would gather them when she worked, but she only gave me white tags.  You may have other ways to gather the tags and I welcome your suggestions in the comments.


Finding a Lampshade

The Pinterest photo that I was using as my inspiration, had the bag tags definitely attached to white lampshade.  You couldn't see through to the other side of the shade, so it had to be laying against something.   I also realized that the shade had to be the same dimensions at the top and bottom if I wanted to do a pattern.  I also wanted the shade to be round or oval so that the tags would easily go around, instead of trying to conform to a hard edge, like a 90 degree angle.  So I found a 9" round linen shade and it turned out to be perfect.


Assembling the Tags

I had several misses when it came to punching holes in the tags, but my success came from a wood burning tool.  The tags splintered when I tried punching holes in them so I knew I needed something hot.  A basic woodburning tool had a long thin attachment that I thought would be perfect and it was.  Thankfully the tags I used for this project were big enough for my fingers to hold the tag and put holes into the sides without burning my hands and fingers.  The plastic cooled fast enough that when I flipped the tag around to do the other side, it wasn't hot anymore.


I purchased jump rings from Amazon and used those to attach the tags to one another.  


In order to keep my fingers and hands from being all cut up and sore, I used two different tools to open and close the jump rings.  I already had a pair of needle nose pliers so I used those and I purchased a pair of pliers that had a hollowed out area for the rings to fit into and make it easy to clamp them shut.   Sometimes I pushed too hard and closed the rings into a tiny spiral, but after a few tries, I found the perfect pressure to use to get them to just touch together.


Finding a Pattern

I followed the pattern that was the Pinterest inspiration, but not the colors, as I didn't have all those colors.  I used the colors that I had the most of and then tried not to repeat the same color way again as I went around.


My lampshade is 2 of the same color with a one tag shift as it proceeds down the lampshade.  It creates a nice diagonal line.  I thought about doing mostly white (since that's the color I have the most of) with the colored pieces randomly placed in the design, but I really wanted this first one to be as precise as possible.  I think my next project will be mostly white, so I can continue to play with the bread bag tags and not have to worry about running out of the colors I need.


Order of Operation

1. Separate the tags into colors. Further separate to size and shape, although I didn't do that.  It would be helpful though to know exactly how many of the shape/color you have available for your shade.

2. Start!

Decide how you want your tags to line up.  There are tabs that protrude out and corresponding places that go in to accommodate those tabs.  I discovered when looking through my tags that most had writing on a specific side, so I chose to have the writing be on the backside.  There were enough pieces that had the writing on the front side to make the shade look interesting.  So that's how I decided which way to face the tags.


3. Heat up burning tool and make it just hot enough to go through the tag but not smoke. Carefully push the heated element through the tag in six different areas.  Two at the top, two in the middle and two at the bottom.  I did one side first, then flipped it around and did the other.  I poked the wood burning tool through the backside of the tag so that the front facing side would be without scratches or blemishes from the tool or from scraping the wax off.
I used the pliers with the rounded shape to take the plastic off of the tags after the burner went through it.  The little plastic bits popped right off.  I usually did three or four tags at a time.


4. Attaching the tags together was fairly easy once I got the hang of it.  I opened up the jump ring by holding one side and using the flat pliers to force the ring open.  Then I put the tag on and attached to the next tag and closed the ring.  I held on to the left side of the jump ring with the needle nose pliers and held the right side with the flat pliers.  Then I used the flat pliers to gently squeeze together the ring.  Sometimes I had to squeeze on two different sides to get it to come together perfectly.


5.  Continue.  

For my 9" diameter lampshade I ended up with 28 tags across by 6 rows in length.  I haven't done the last several rows on my lampshade as I ran out of a couple of colors, but if I do end up completing the shade, I figure it will end up being 9 rows.


6. The holes on the very top row will be the only ones that are actually secured to the lampshade.  They are secured by pushing through an open jump ring (as open as you can) through the shade right underneath the top wire of the lampshade.  Secure one of the tags and push the jump ring closed with pliers.  Continue all the way around the lampshade.

7.   I had to change out a couple of rows to make the diagonal pattern I had come together perfectly.  Since I purchased the lampshade after I had the tags together, I really didn't know how many I needed.  Now I'd get the lampshade first so I would not have to redo a bunch.  However, the two ends came together perfectly and there is no hitch in the pattern or colors.  It looks like one continuous pattern.

8.  Put shade on lamp, plug it in and behold your own bread bag tag lamp shade!