Tuesday, March 31, 2015

Getting it together


To say that I'm in the best mental health of my life is an understatement.  I honestly don't know when my emotional well being has been so peaceful.  I worked a long time on trying to improve myself, I will admit that.  I feel like I was way too emotional and would burst into anger over nothing among other things.  I certainly didn't handle stress very well and I would attach to people in an instant if I thought they might like me for more than 5 minutes.  I was my own roller coaster ride for a couple dozen years, that's for sure.

I really have to credit the entire process of going through a liver transplant with my husband (at the time), Tom.  All the years of self-help books that I read cover to cover, all of the positive affirmations, all of the daily washing of being good to myself, learning how to control most of my emotional outbursts and desperately trying to handle stress so that it didn't build up inside,  all came together when we learned Tom was sick and was needing a transplant.  I didn't realize it at the time, but I was going to need every every word I ever read and every safe place I ever envisioned to get me through it and the years following transplant.  I knew Tom was going to get a new lease on life with the liver transplant, but I didn't know it was going to profoundly change my life as well.

The best combination of things I ever did was get married to Tom, who needed a transplant, who was transplanted at Mayo Clinic Jacksonville and ultimately we decided to move to Jacksonville to be close to Mayo. That combination of events brought me to the happiest place on Earth and it wasn't Disney!  After Tom's transplant I started attending the support group meetings.  I have talked many many times on my blog about how much I love my transplant community here in Jacksonville, Florida.  Sometimes I think the support group I've attended for the last 10 years actually did all of the reshaping of me, but I'm sure I had something to do with it, too.  I was able to use all that I learned in those books and help the patients and the caregivers get through pre/post transplant and in turn, I could see all of that good working on me, too.  One hand washes the other.  I help them, they help me and on it goes.  Despite all of the health problems that so many have, the support group was and is an incredibly positive experience.  It's my favorite day of the week, Support Group day.
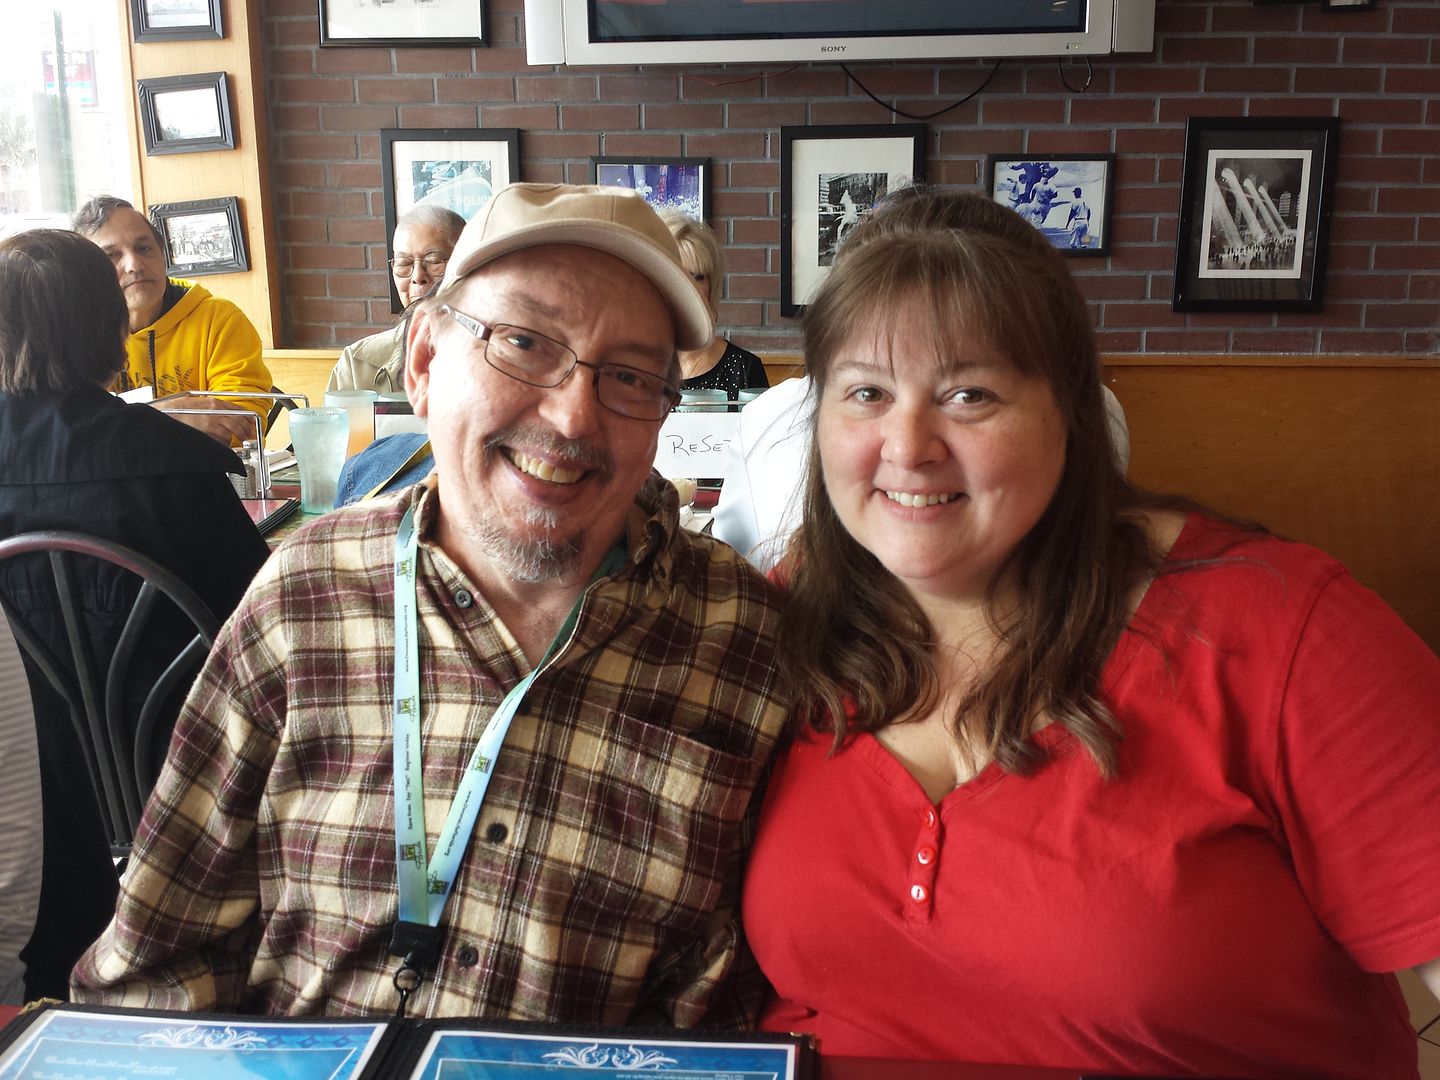
Kristin and Steve at lunch with the support group

Even in the midst of being the happiest I'd ever been, I still needed more change.  I had to get out of my marriage.  Tom was the one who got me to where I needed to be, but we weren't going to go further. I spent years doing everything possible to make it work but ultimately it wasn't to be. I talked about that a few years ago, also right here on my blog, so I won't get into all that again, but our marriage had run its course.  Steve and I got together shortly after and I discovered that my puzzle finally had all the pieces!  He was a transplant recipient, he was active in many organ donor awareness projects and and and I could go on for days!!  We had met nine years earlier and were friends in our support group, but this new time in our lives the stars lined up.  We knew right away that together we were something special.

The Love Bubble had formed.

to be continued....


Have a great day!
Kristin


Come visit our website which will get you to our store.  We have transplant and caregiver shirts, mugs and tote bags.  We decided to start our designs with what we know best and that's transplant, but we won't stop there.  Steve and I are having too much fun getting ideas and running with them, so  pop on over and see what we have to offer.  When you do get to Zazzle - always get a coupon code! You'll see it at the top of every page.  They have a sale all the time, so don't ever purchase at full price when you don't need to.

KNS Gear website --- and yes, KNS stands for Kristin and Steve


Thursday, March 26, 2015

Cat's Log: it begins

My dear love lost his little black kitty Kobe, in November 2014.  She sat on Steve's lap as much as possible and when she wasn't on his lap, she was at his feet.  Theirs was a friendship the likes of which I have never seen before, so when Kobe got sick and eventually passed, it was devastating to Steve.  I loved little Kobe, too, but she was everything to Steve.  We decided to take some time before getting another cat or two.  We both knew we couldn't live without a kitty in the house on a permanent basis, but we knew we would need to wait a little while.  

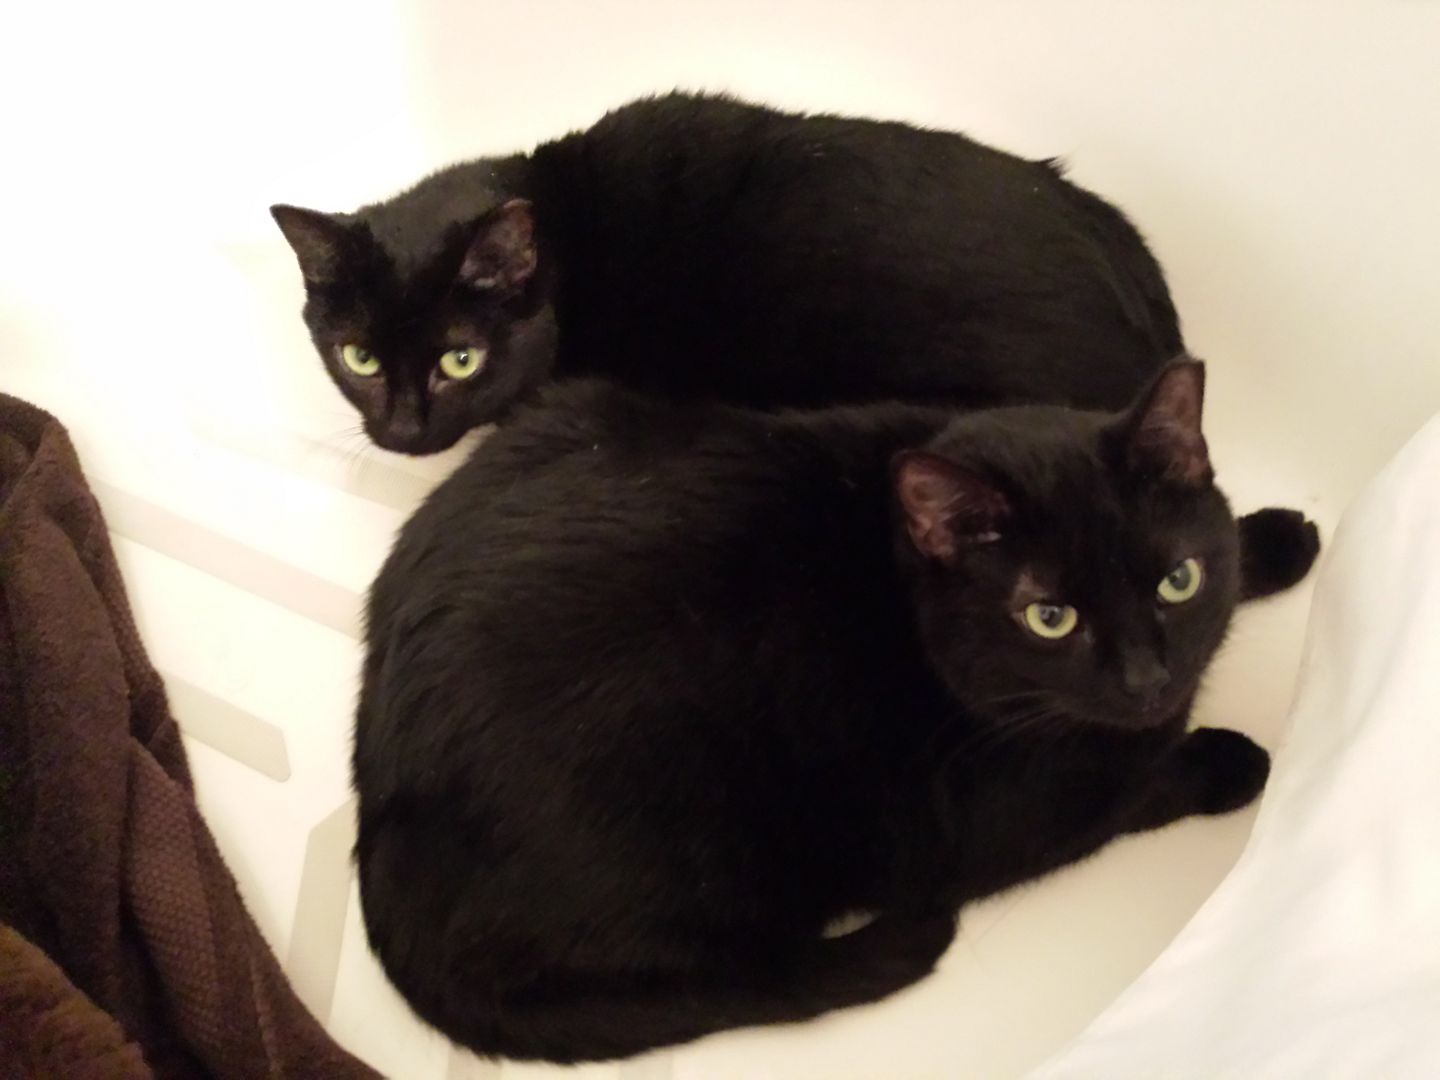
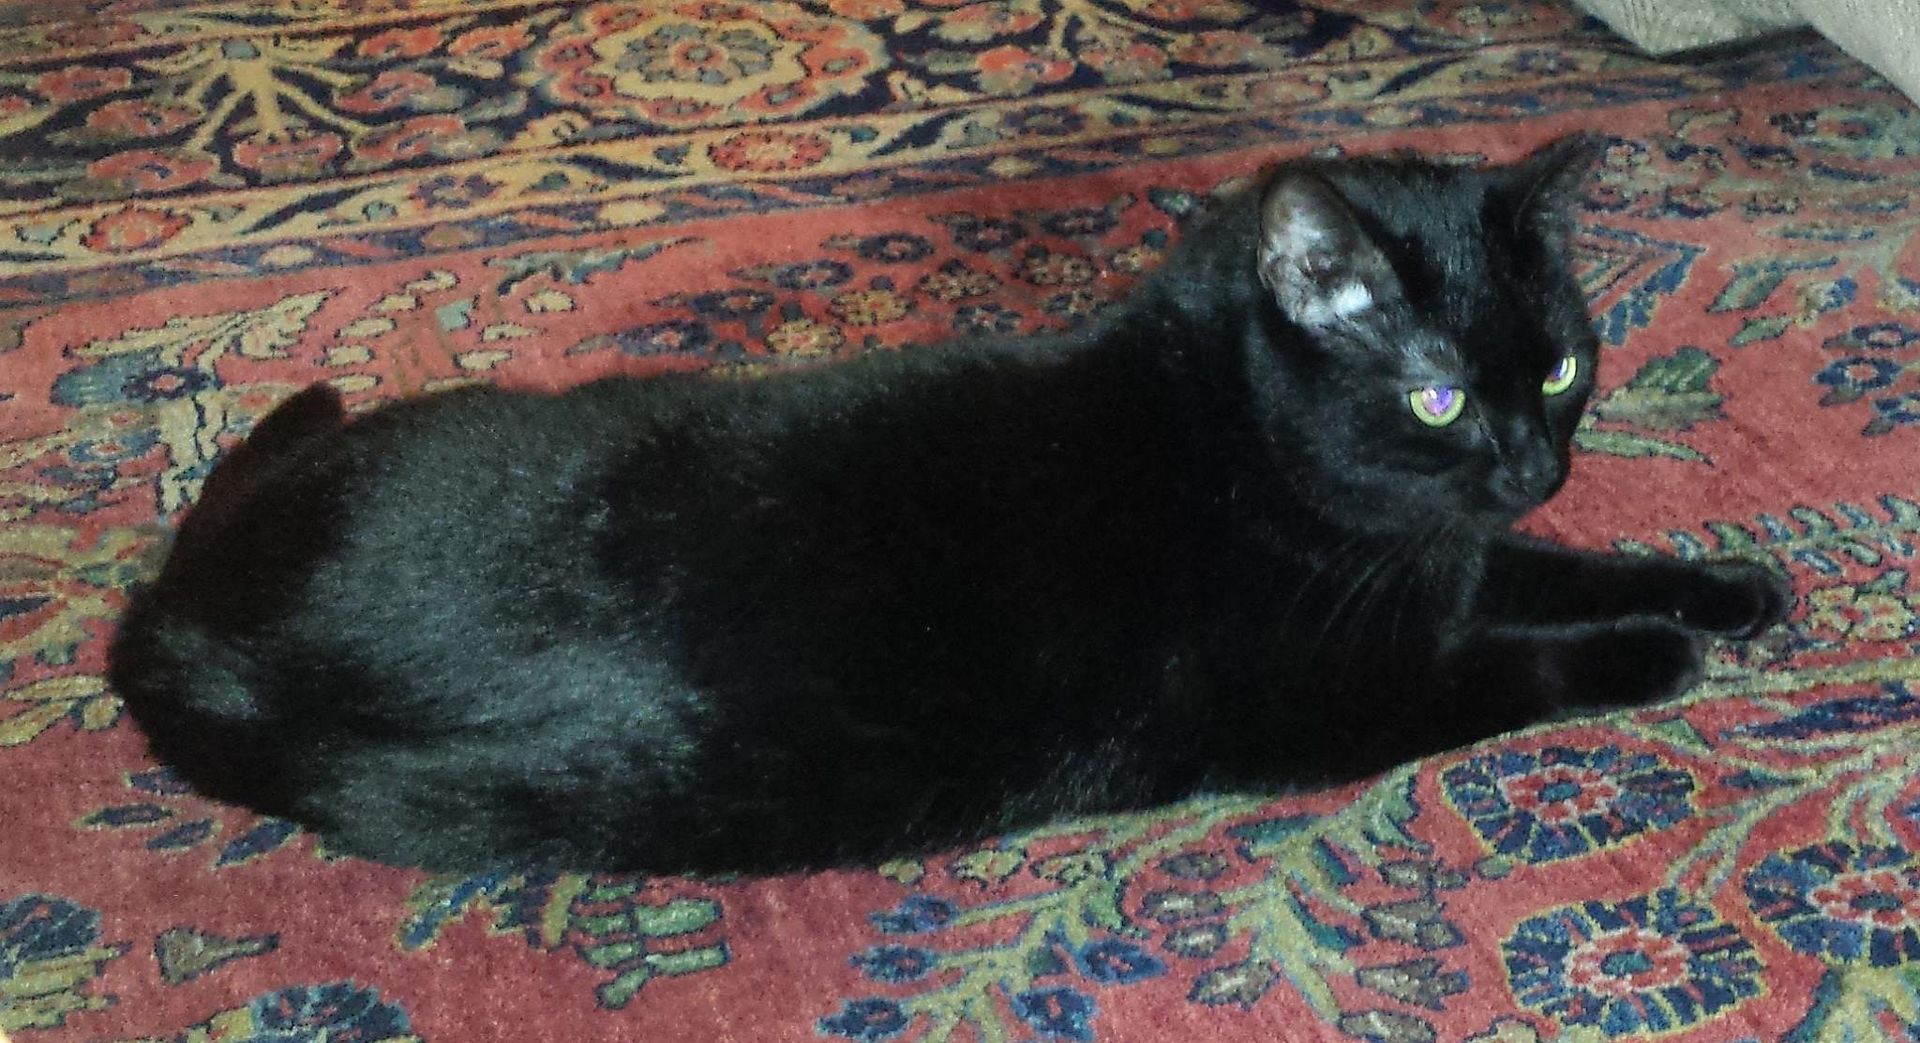
After several months we started looking for kittens, but there just weren't any to be found.  Then we started asking around the local vet offices, as that's where Steve had found Kobe.  Finally we ended up finding Kats 4 Keeps, a local kitty haven for cats.  We browsed through the online photo albums of the kitties they had and went to see them as soon as we could.   I know I fell in love with a couple of real friendly cats, all about 2-5 years old, but the two yellow eyed, black sisters just kept nagging at me.  They had been in the shelter for 2 of their almost 3 years.  They weren't terribly sociable but one of them, Nessa, loved to be petted and would roll on her back and let us rub her belly.  

Steve and I went back home and discussed all the possibilities and decided that we needed to give Lettie and Nessa a home... they weren't kittens and they weren't sociable so they must be exactly what we needed.

Here is the beginning of their story.


27 March 2015 -- Well, we won't get them until tomorrow, but these are our new kitties, Nessa and Lettie, (their names at the adoption center, but we'll change them). It feels rather strange getting two more black cats after having Kobe for 13 years, but these two sisters were so sweet, are best friends, and have been waiting two years to be adopted. So I feel like we have rescued them again. We probably could have come home with almost any one of the cats they had up for adoption, but these are now ours. (BTW, while shopping at Petco for supplies, we saw two baby kittens up for adoption. We very nearly ended up with 4 cats.......but then we came to our senses..............)


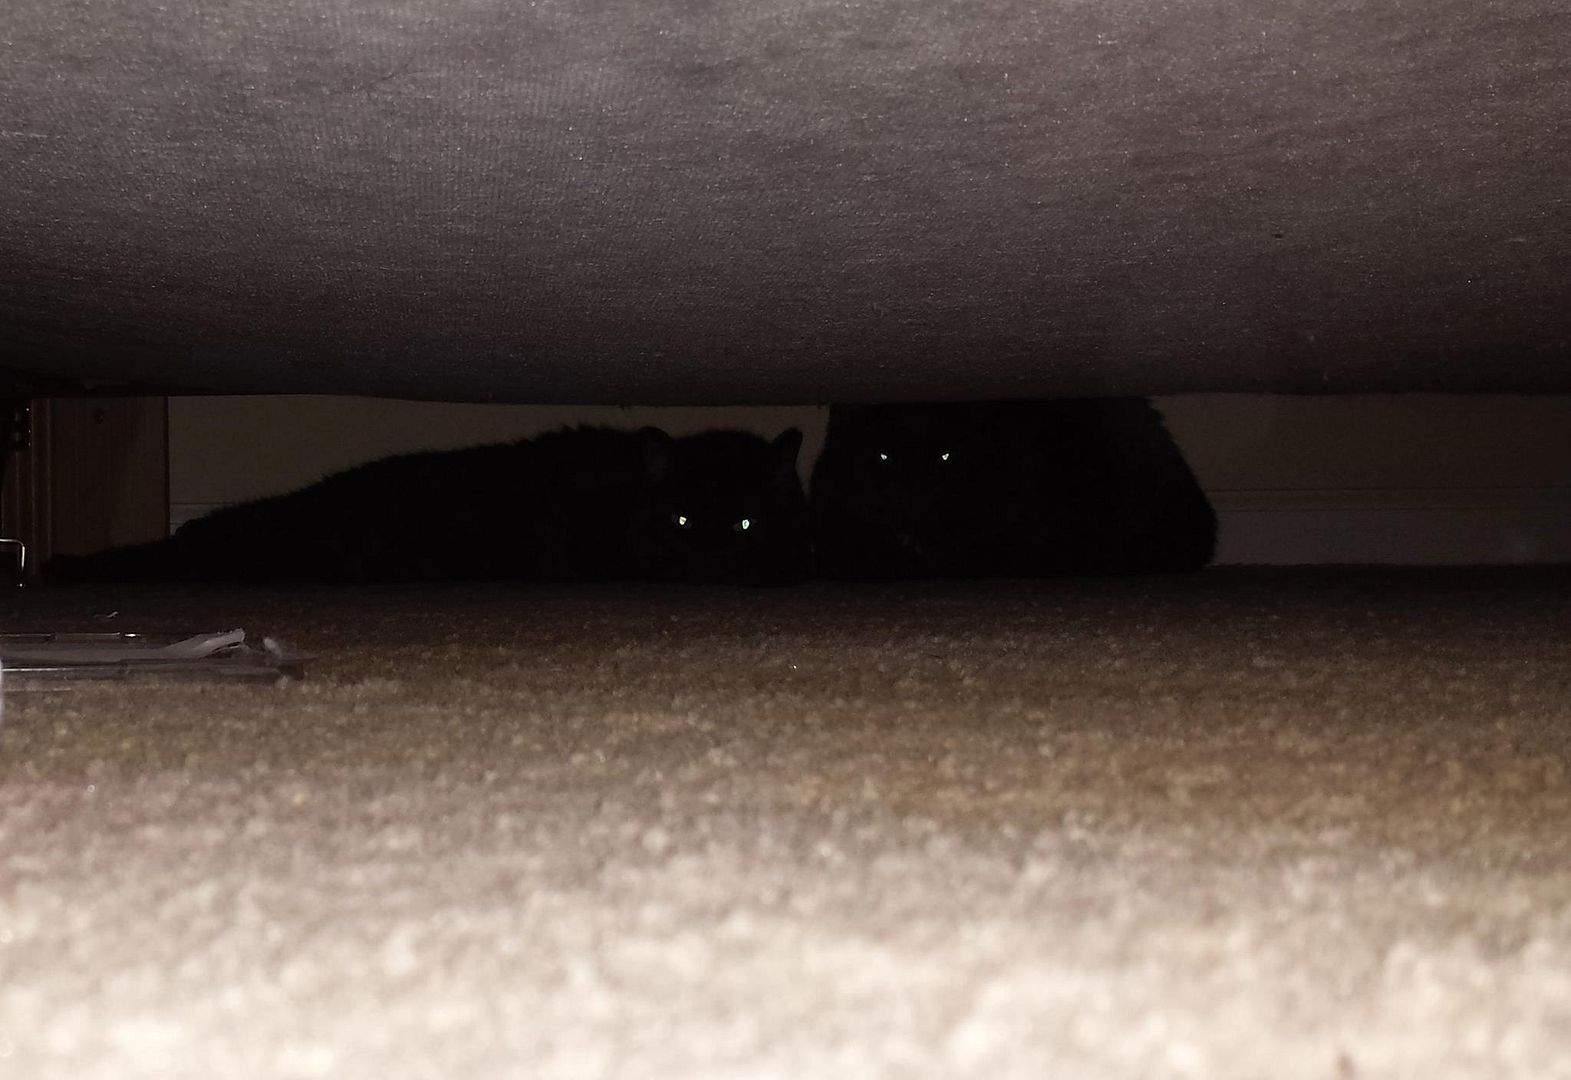
28 March 2015 -- We brought the girls home and as soon as we opened up the cat carriers, they were gone.  We put them in a small bedroom/office which was supposed to be a nice transition period for them, but it wasn't.  They hid in the furthest depths of the room, in spaces we didn't know even existed.  I couldn't have that so the next day I moved them to my bathroom.

They protested and were quite agitated.

I found these notes as the days went on.


Cats Log: Day 2
...of our forced incarceration with two lunatics. We hid in the smallest space available in the big room most of the day and night. Today we were forcibly removed and placed in a bathroom. We could only find hiding space under the bathmat and an animal bed, which we refused to lay in. Under is the key to effective hiding.


Cats Log: Day 3
Prison, despite the luxuries now offered to us, has failed to trick us into stepping beyond our open door. Now given the opportunity to roam freely about the prison, we choose to remain in our cell, regardless of the cold discomfort of a bathtub. Our only solace is an upside-down cat bed to shield us from the lunatic prison guards…but yet they continue to torment us. Luckily we have discovered a new hiding place in the cabinets under the sink. Surely it will take days for them to find us here.


Cat's Log: Day 4
I believe my cellmate Nessa has begun to conspire against me with the prison guards. She is beginning to show signs of affection towards them. Either she is being brainwashed without my knowledge or this is a highly clever ruse to fool our captors into befriending her so that she might get treats and a clean litterbox. Hmm...whichever the case, I must continue to be cautious. If taken once more from my cell and forced into the prison yard, I shall have no choice but to escape into solitary confinement under the sofa where I can rediscover the peace and quiet of my former self. -Letti


Cats Log: Day 5
One of us managed to stay hidden for over 20 hours without discovery. It was so much fun hearing them call for me and search high and low for me! It was a good time. Kristin finally found me in her bedroom closet. Damn! I thought I could stay undiscovered until they finally went to bed. Harrumph we will do our best to foil our guards again tomorrow.


Cat’s Log: Day 6
The torment continues. While one guard seems to take great pleasure in my agonizing confinement, the other photographs us like we were on some sadistic Guantanamo-style photo shoot. I think they enjoy my pain. Later, back in my cell, the photographer brings us treats, in some sort of good guard, bad guard ploy to gain my trust. Let me assure you, they have failed. -Nessa


Cat's Log: Day 7
The female prison guard took us from our most comfortable bathtub accommodations and tried tossing us under some table. Nessa and I both hightailed it out of that trap and found our own places to spend the day. The prison guard told us it was just a temporary reassignment as she needed to shower - whatever that means! Nessa went back to her spot, in the bathroom sink, but I am staying here, under the desk, until ... well, just until. - Lettie


Cat’s Log: Day 9
It has now been just over a week since our internment. Yesterday, a new form of torture: complete isolation. The guards left us alone in the prison the entire day, cell door unlocked and open……free and yet not quite free…..in just another attempt to confuse us and weaken our minds. They left…simply left. No sound. No movement. No harassment. It was eerily blissful…or maybe blissfully eerie. At night they returned. Retreating to our cell, we feared what torment might next await us, but there was none. What is this mind game they are playing? An hour passed. Nothing. Then suddenly one of the guards comes in to offer me treats and affection. I gobble the treats and feign interest in the affection…the chin rubbing, the back scratching, the belly rubbing. Oh damn, why does it have to feel so good? Soon after the other guard comes in, offering yet even more affection. I fear they are beginning to break us. -Nessa


The saga will continue ... stay tuned.


Monday, March 23, 2015

Wisteria Tree

Spring in Jacksonville!


It's Spring here in Jacksonville, FL.  It's actually been pretty overcast the past couple of weeks, so our spring is surprisingly moving quite slowly.  Last year Spring flew by here in about a week.  We may actually get  2-3 weeks out of this one.

My neighbor has this gorgeous Wisteria Tree in their front yard and I've noticed that it's fading quickly.  I thought I'd better get a photo or two of it before the blooms go away completely.


The petals gathering in the tall grass under the tree was nearly as beautiful as the flowers.


I'm in the midst of making wedding plans and these flowers make me think of bridesmaid dresses. ha ha No bridesmaid of mine will wear anything like this though, I promise.


What a beautiful tree.

Have a great day!
Kristin

Our online store has opened and Steve and I are working together to design and sell a variety of gear online! Visit KNS Gear to see all our stuff. We're starting off with organ donation and transplant tees an d mugs, but there's lots more to come, including fun and funny, spiritual, event and topical products. Stay tuned!

Just want to mention that all these designs are available in both men's and women's shirts, including tees, long-sleeve tees, hoodies, polos, and more on the Zazzle site. They are also available in a variety of colors, depending on the design.


Sunday, March 22, 2015

Barbados Wall Art

Artwork for the kitchen.  That was the next step in our kitchen update.  Since I have still have millions of things packed away and sitting around in the garage and in storage closets, I thought the best place to look for art was right at home.  Not to mention that the whole idea behind the kitchen redo was to update with very little money shelled out.

One day as I was going through my closet tossing out never worn or never-going-to-wear-again clothing I spotted a potentially good art piece.

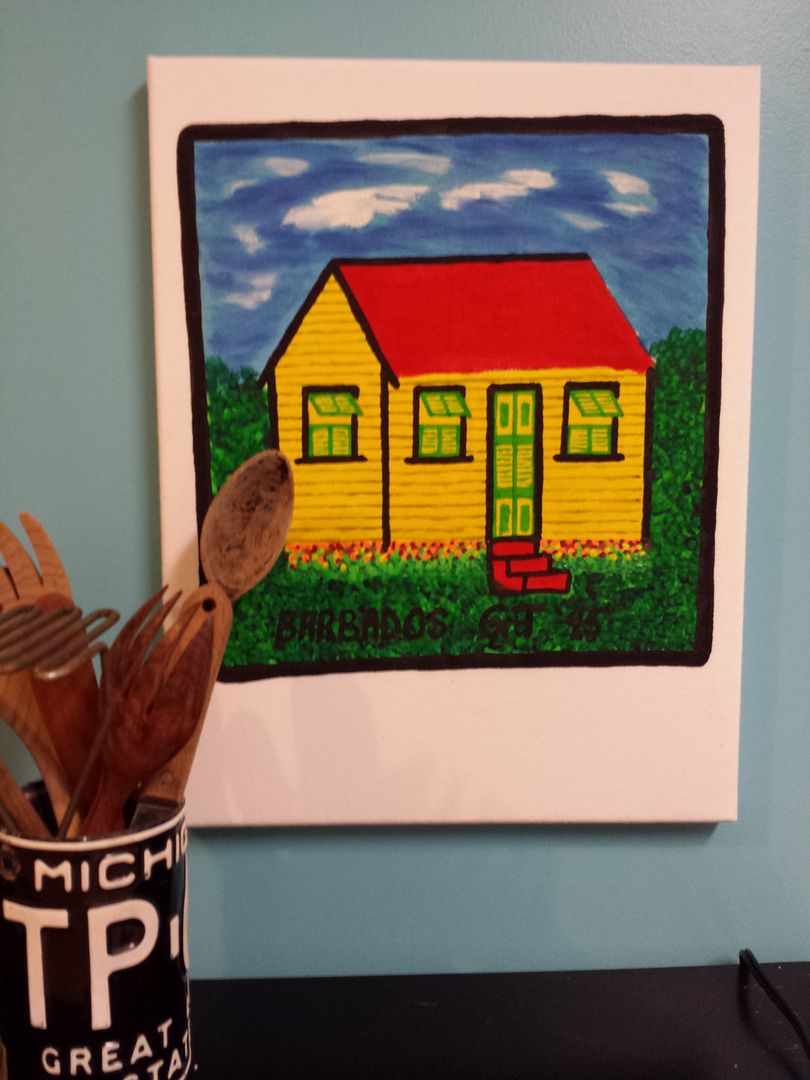
In 1995 as one of the stops on a cruise ship vacation, my ex-husband and I spent a day in Barbados.  I purchased a hand painted T-shirt from this guy painting and selling his wares on the beach.  I thought the picture was great - a simplified version of a Bajan chattle house, but I knew I would never wear it.  That prediction came to be true and that lovely painted shirt hung in my closet nearly 20 years.


Steve suggested that the colors in that painting would look real good in the kitchen and would go right along with the quirky beach theme we had going on.  So I thought - sure!  I'll get a plain stretched canvas and staple that T-shirt right to it!  I'm not sure why I never thought of that before!

I got a coupon for Michael's and took the shirt with me. I wanted to make sure the design fit.  Not to mention, if  I only took measurements with me, I might still bring home the wrong size frame!

I have two very nice and hardly used staple guns, but who knows what box they are still packed in, so I asked around and found a friend who loaned me hers.  Thanks Patti!


I cut the back off the shirt and lined everything up.  The collar of the shirt was so close to the painting so I had to make sure that was pulled as tight as possible at the top, so it wouldn't show.  That's where I put my first staple.

Then I continued pulling the fabric, trimming, rolling a little edge so the staple would hold onto a couple of layers and not rip.


After just a few staples I realized the design had gotten off course and was no longer centered or straight.  Ah well - it's the islands!  On the islands the standards are relaxed a bit.

Or so I told myself.

The finished product - and it really does look nice in the kitchen.  Steve loves it, too!  I'm honestly just really happy to have it out of the dark closet and able to show it off.

The little utensil cup in the foreground is a 1979 state of Michigan license plate, turned into kitchen container.  I have all of my unusual, oversized and wooden utensils in here.  Just another item I have squeezed into Steve's little kitchen.

We are still thinking about getting window blinds and door hardware for the cabinets, but the kitchen is so much better now, that all the other stuff can wait.

Have a great day!
Kristin

Visit our brand new design store on Zazzle
for organ donation, caregiver and transplant recipient t-shirt designs.
Other designs and topics coming soon
KNSGear


Tuesday, February 24, 2015

Mini remodel for the Kitchen


A long long time ago, over a year now, I approached my boyfriend, Steve, with the idea of painting his kitchen countertops.  He agreed with full knowledge that if it turned out horrible, it would probably still be better than what he had!  I blogged about that here.  Thankfully he is a really good sport and he was on board real quick.

Once he got a look at those shiny black countertops I just knew I had him hooked into a full scale redo of his kitchen.  The thing is though, that I am more talk than I am action a lot of the time.


I told him that if we left the wallpaper up when we did the countertop that we wouldn't have to tape anything off, since we'd be removing the wallpaper anyway.  I just never really committed to how long it would be until that dreaded wallpaper would actually come down.


My poor Steve lived with that wallpaper another 10 months, with the black enamel paint swooshed around the edges without a care in the world.  My Mother came to Jacksonville in August of 2014 and I asked her if she would help us with the wallpaper removal.  (My Mom likes to have a project and I like to use that to my advantage when I can)  She chose instead to help me move out of my extremely cluttered and not yet packed rental condo instead.  She was right - I needed every bit of her energy to get me moved out my condo -- so much so that I enlisted six other friends, plus Steve to help! That was indeed a giant job and I'm glad she convinced me that was the more urgent task.

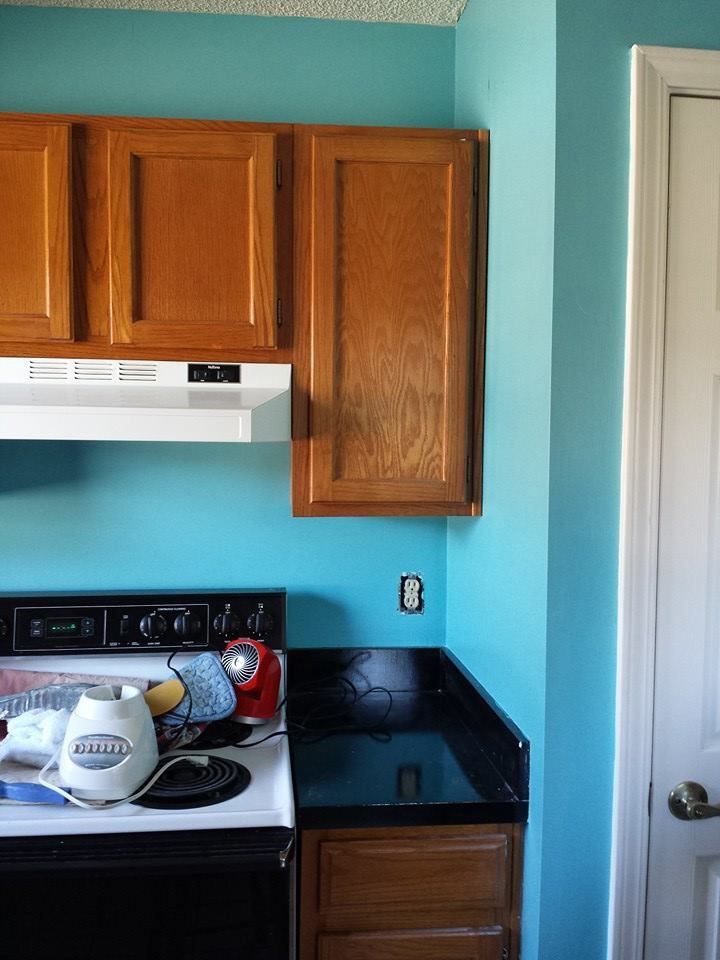
By November I was determined that my slacking days were over and Steve and I deserved to put that gorgeous blue-green on the wall!   It turns out that the wallpaper came off much easier than I would have ever imagined.  We used a steamer and putty knives and for the most part, it peeled right off the mostly bare sheet rock.  We were very fortunate indeed.

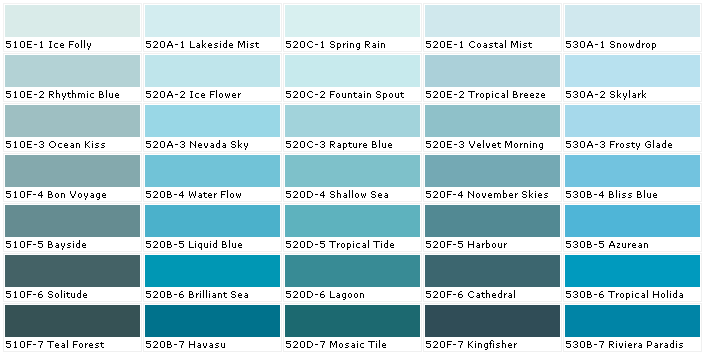
  • The wall color is Home Depot Behr interior semi gloss - Tropical Tide #520D-5.


  • It was only a couple of days after the wallpaper all came down that the color portion of our project was finally put on the wall.  We spent two evenings spackling and sanding, getting the walls as smooth as possible before putting on the paint.  I'm sure glad we took so much care because the walls look fabulous!

    Next up -- painting the cabinets.  I painted a sample board with two different colors of Annie Sloan Chalk Paint - Old White and Old Ochre.  The white was just too close to the white of the appliances and the pantry door and trim - it made the color just look dirty rather than complementary.  The Old Ochre on the other hand was dark enough to to compliment all the white and blue-green, but also gave a decidedly beachy look to the whole kitchen.  It just worked!

    I'm not sure if you can see the difference in the photo below, but one side of the interior panel has been sealed with the Annie Sloan Clear Soft Wax and the other side is only the chalk paint.  I could have gone for a polyurethane finish on the cabinet doors, but I love the look and feel of the wax finish, so we went that direction.  To keep the cabinets from looking too fussy or shabby, I used only the clear wax and did not use a darker wax to distress the corners or darken the edges.  That just wasn't the look we were going for.  I do love, however, the way the clear wax darkens the paint color just a bit and highlights the grooves and ridges of the painted wood.   I will have three coats of the wax on the cabinets when the kitchen is totally finished.  The panel below has just one coat of wax.


    In redoing the cabinets, I only needed the tools below.  A little over 1/2 a quart of paint and a chip brush to paint all of the cabinets.  I like the chip brush because it creates more texture on the surface of the door.  That gives me more spaces for the wax to penetrate and more places for the light to give highlights and shadows, which ultimately gives more interest to the door.  I used a small detail brush for small paint touch ups, too.  Clear wax was my next product and  I used a 1" chip brush to get the wax into the corner details on the door and a soft white cloth to distribute the wax on the rest of the door.  I probably only used about 1/2 the can of wax, possibly less.  The cabinets cost us right around $50 to repaint and finish.  Cool, huh?!


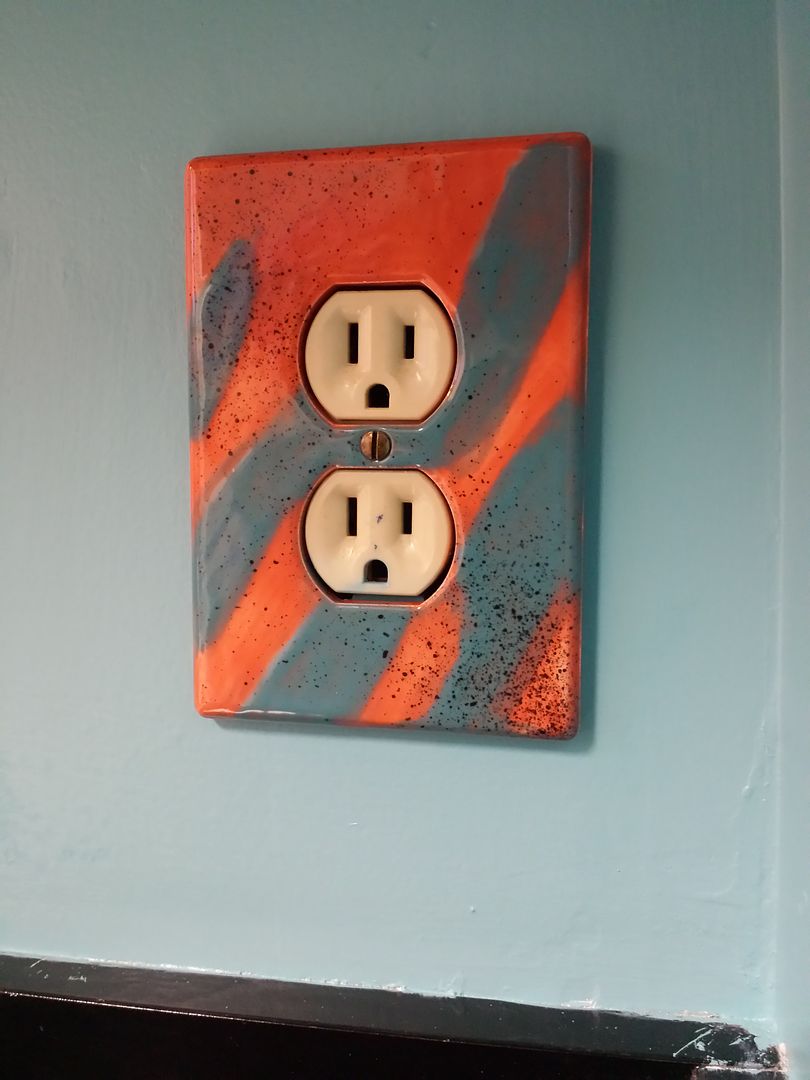
    When I went to Michigan last year my niece Zora and I went to a paint your own pottery place.  I made an outlet cover especially for the kitchen and it actually turned out great!  Here it is installed...


    Soooo, when you put all of that together...

    You get a kitchen that is completely transformed from 1980's wallpaper and wood to the 2015 beachy cool using dark colors and light cabinets and appliances.  We think it really works.


    We still need to get cabinet hardware, but since his kitchen never had them, we will need to investigate and find a style that fits the space available.  I think that door pulls or handles will really feel like the jewelry in the space.  We also are thinking about shades for the windows, but haven't been too eager to tackle that yet.  There's a big window on the wall you can't see, on the left, so we need to make sure whatever we choose looks appropriate for both windows.


    In this picture I excluded the fridge, so the kitchen doesn't look so cluttered!  We have a ton of magnets, photos and information on the fridge and I couldn't even think about taking them all down for a picture.  This is the best I could do!

    In my eyes, the kitchen is done, done, done.  I want to show it off and if I have to wait for us to decide on window treatments and door hardware, it could be another year!

    So here it is -- our Before and After


    Steve and I have gotten hundreds of likes on the pictures we've been showing on Facebook the past few days and we really appreciate all of the cheers and nods of approval.  Thank you so much!  I can't begin to tell you how much it means to have that positive vibe coming from the Universe!!

    We love you all and the kitchen!  Thanks for stopping by.

    Hope you have a great day!
    Kristin

    Monday, January 12, 2015

    Pinterest is not an obsession of mine


    No really, Pinterest is not an obsession of mine.
    The moon is laughing at the cat. I'm sure I'm the cat in this instance.  I'm totally not giving in that I have an obsession.
    It's true I have over 5000 pins and even truer that I have an additional 6000+ likes, but who's counting?!

    I am a very conscientious Pinner and that's the reason I have so many likes.  I make sure to follow each link of a pin that I want on my boards and make sure they go right to the photograph and/or the exact page of that information I've pinned.  I don't want to lead anyone to spam links or to the front page of a blog when what we all wanted was the recipe on how to make that really awesome looking casserole that promised to have the neighbors love you even when you forget to bring your trash bins back from the curb! Seriously, don't you hate it when you see something Fabulous and it links to nothing?


    So when I'm in the looking mode, I just click on the little heart as I scroll through.  Later when I have time and desire, I go back and investigate the liked photo.

    Recently I discovered that my likes had gotten a bit out of control. Over 6K? That's crazy.
    So this past week, while my dear boyfriend has been sick and the TV volume has been so low it might as well have been on mute, I decided to sort through and investigate those likes.

    The internet is really an awesome place.
    I love how enchanted I am with every new idea.


    Honestly, I had a blast going through so many of the liked pictures.  I daydreamed about my ledge of Mason jars, filled just slightly with sand and a perfectly lit votive in each.  About how my front entry could be so clean and organized and how I might get out the sewing machine and make some Valentine bunting for the mantle I'll build with reclaimed pallets.

    Sooo, I do dream a bit, but it's a lot of fun.

    I have a DIY board for kids stuff.
    I don't have kids.
    I don't live near my nieces.
    I'm never going to make any of those things, but I. had. to. pin. them!


    I have little hearted more main dishes than I will ever be able to prepare.  
    At this moment I have 272 pins on my New to Me Recipes board. That means I have never tried that exact recipe and more than likely I have never had it at all.
    My New to Me Recipes don't stop with that board.  I pulled out a few key categories and they have their own board like - Pasta (New to Me), Desserts (New to Me), Macaroni and Cheese, Quinoa, Potluck Foods, Drinks and Gluten Free.


    I do have a board titled  Good Food - I've made it.  That's for the recipes that I've tried and I've liked.  Chances are I've liked it a lot!  The Graveyard Taco Dip was really good - but the fun part was making all the little headstones and the tree.  Mine looked FABULOUS!  I was so excited.  I took it to potluck and not a drop of it made it back home.  It was that good.  Buuut, it's not in my Good Food list yet.  I've gotta do that.

    I don't have a board for the ones we didn't like.  If I find we didn't like something I just take it off completely. The Good Food board only has 28 pins on it.  Now I know I've got a lot more than that, but just like the investigation part - sometimes it takes a little bit of time to get everything organized.

    So that's what I've been doing with some of my time lately.  I doubt I'll be spending a whole lot of time on Pinterest in the next couple of weeks as Steve seems to be doing a whole lot better today, so I won't need to be finding quiet work for awhile.  This house could really use one of those 1950's Housewives with the sparkling cleaning products to help us out.

    Enjoy exploring around Pinterest.
    Have a great day!
    Kristin

    Tuesday, January 06, 2015

    Another kitchen update - wall color

    The Kitchen Re-Do

    It's been nearly a year since we painted the countertops black and planned on getting the wallpaper off and get some paint on those dull walls.  I peeled some of the paper off many months ago and that's about as far as I got.  One day, in that small span of time between Thanksgiving and Christmas I got a wild hair to tear apart the kitchen. I don't know what I was thinking!  It was just after Thanksgiving that we tackled the wallpaper removal process and amazingly it wasn't too bad!

    The bare sheet rock walls had not been primed, but the builders made huge swaths of paint or primer or something around the cabinets, the ceiling and the door frames and trim. So really we only had to deal with a couple of spots that were just drywall.  We spent two days just filling in the divots, holes and other uneven spots and sanding everything as smooth as possible.  It was well worth all of the work - the walls look awesome now that they are painted.  


    As soon as we finished painting the kitchen we were in a frenzy to get ourselves ready for Christmas events with our transplant community.  Then, I got a dreaded cold followed six days later by Steve getting the dreaded cold.  Needless to say, the kitchen has remained in a state of not-quite-ready-to-be-photographed-bliss. This photo above, that I shared with Facebook, is all that I have right now.  

    Now that we've lived with the kitchen for a few weeks, in it's unfinished state, we've pretty much decided that I'm going to need to paint the cabinets a nice creamy white/off-white.  I have Annie Sloan Chalk Paint already purchased, so that's what I'm going to use.  It'll be so much easier to use than latex and a whole lot less smelly.  I have a small door in the same wood that I'm not using - I took the door off my medicine cabinet in the bathroom - so I can paint that and show Steve.  If he likes it, like I'm sure he will, then I'm going to get going.  I am not going to wait another year to get this project finished.  

    The paint color that we used on the wall is: 
    Home Depot Behr Brand - Tropical Tide #520D-5. 


    I wanted to go one shade darker than this, but Steve wasn't sure.  I love the color we did choose as it's even better in that room than I imagined.  We had originally thought about going more blue, like the Liquid Blue in the next column, but I was really afraid it would look too much like Dawn Dishwashing Liquid!  The green/blue really was the right choice for us.  

    I will give another update, with a lot more photos in the coming weeks.  I'm over my cold, Steve is too.  We're anxious to get the house put together again.  It's been a work in progress since I moved in over 6 months ago.  It's time.  It's beyond time.

    I hope you have a wonderful start to your New Year 2015. I'm looking forward to this year.
    Kristin


    Wednesday, May 21, 2014

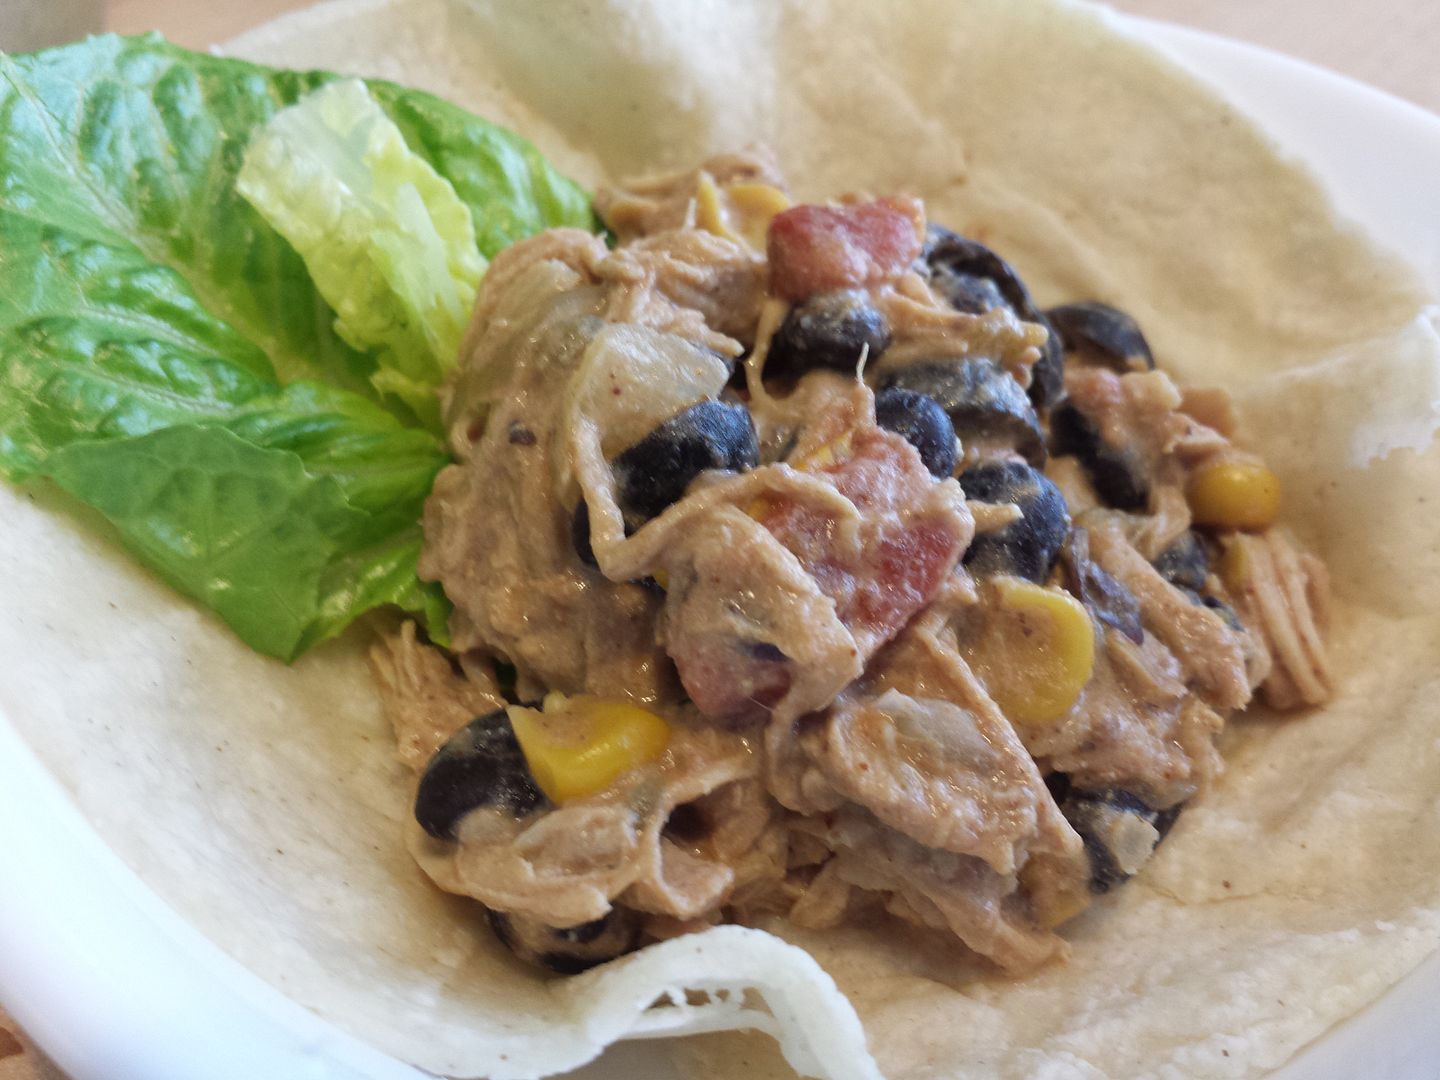
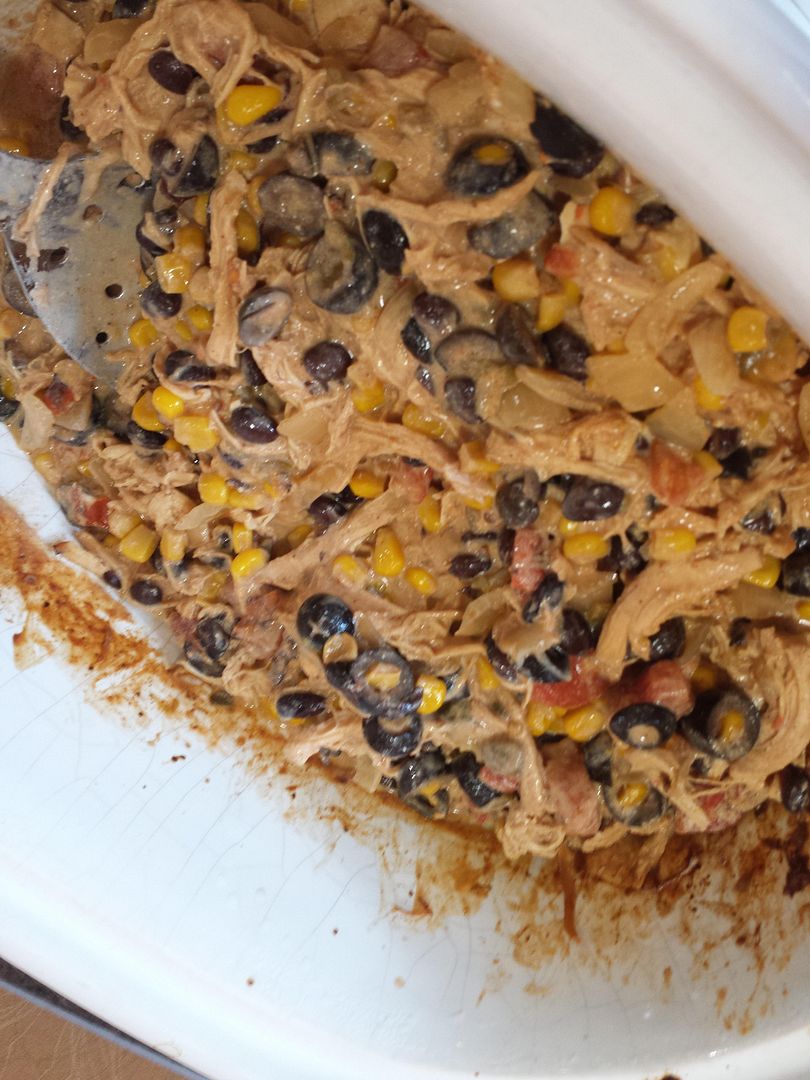
    Crockpot Mexican Chicken with cream cheese


    Food has always been a part of my life, but now it's become something other than just getting something on the table.  My boyfriend Steve and I cook together most of the time.  That's something that my ex-husband and I rarely did, so it kind of made cooking a chore.  Steve and I look up recipes, talk about them and stand in the kitchen together creating them.  He's got a huge list of potential dinner ideas from all of the dishes we have made together this past year.  If we find something interesting that neither one of us has made before, it doesn't matter!  We forge ahead anyway.  We are comfort food people, not necessarily adventurers when it comes to our dinners.  We make things like salisbury steak, pork chops with grilled onions, meatloaf, flatbread pizzas, leafy green salads chock full of veggies and kielbasa and sauerkraut.   Steve has introduced me to Vietnamese and Thai food (when we go out to eat) and I have introduced him to high quality bacon, for the best BLTs at home!  It's win win, that's for sure, and we have such a good time.
    Some of the things we find that we'd like to try are of a quantity that's too much for just the two of us, so the potlucks that we go to each month are the times when we pull out the crowd pleasing meals.  Usually, these crowd sized recipes are untried -- yes, yes, we experiment on our friends.


    At our latest potluck we made it a Mexican theme.  I am a fan of Mexican food, but I don't like anything hot, so I have to carefully order my food at restaurants.  No hot stuff, no salsa either.  My goal for our potluck was to make something that had  great flavor, tasted like it came from a Mexican kitchen and would still be stove hot and tasty when everyone finally got ready to eat.  If you want something to stay hot for a potluck, it's gotta be made in a crockpot.

    My Mexican food repertoire includes chips and cheese, chicken nachos, chicken taquitos and tacos.  Not really innovative or exciting, right?

    What does a girl do when she's short on talent?

    Google!

    Pinterest!

    I searched both for "Mexican crockpot meal" and only found a few that fit my no-hot-stuff, no-salsa requirements.  The one I ultimately chose seemed really iffy for some reason.  I couldn't quite put my finger on what I thought was wrong with it, but I was just sure it was going to be bad.

    This is real good news to all of you that have stayed with me this far into my ramblings, huh?!

    As I mentioned earlier, I do tend to bring brand new, never been tested recipes to potluck.  Thankfully I have only had one fail in all the years, but I was positive this was going to be fail number two.

    In actuality, we were lucky to bring home any at all!


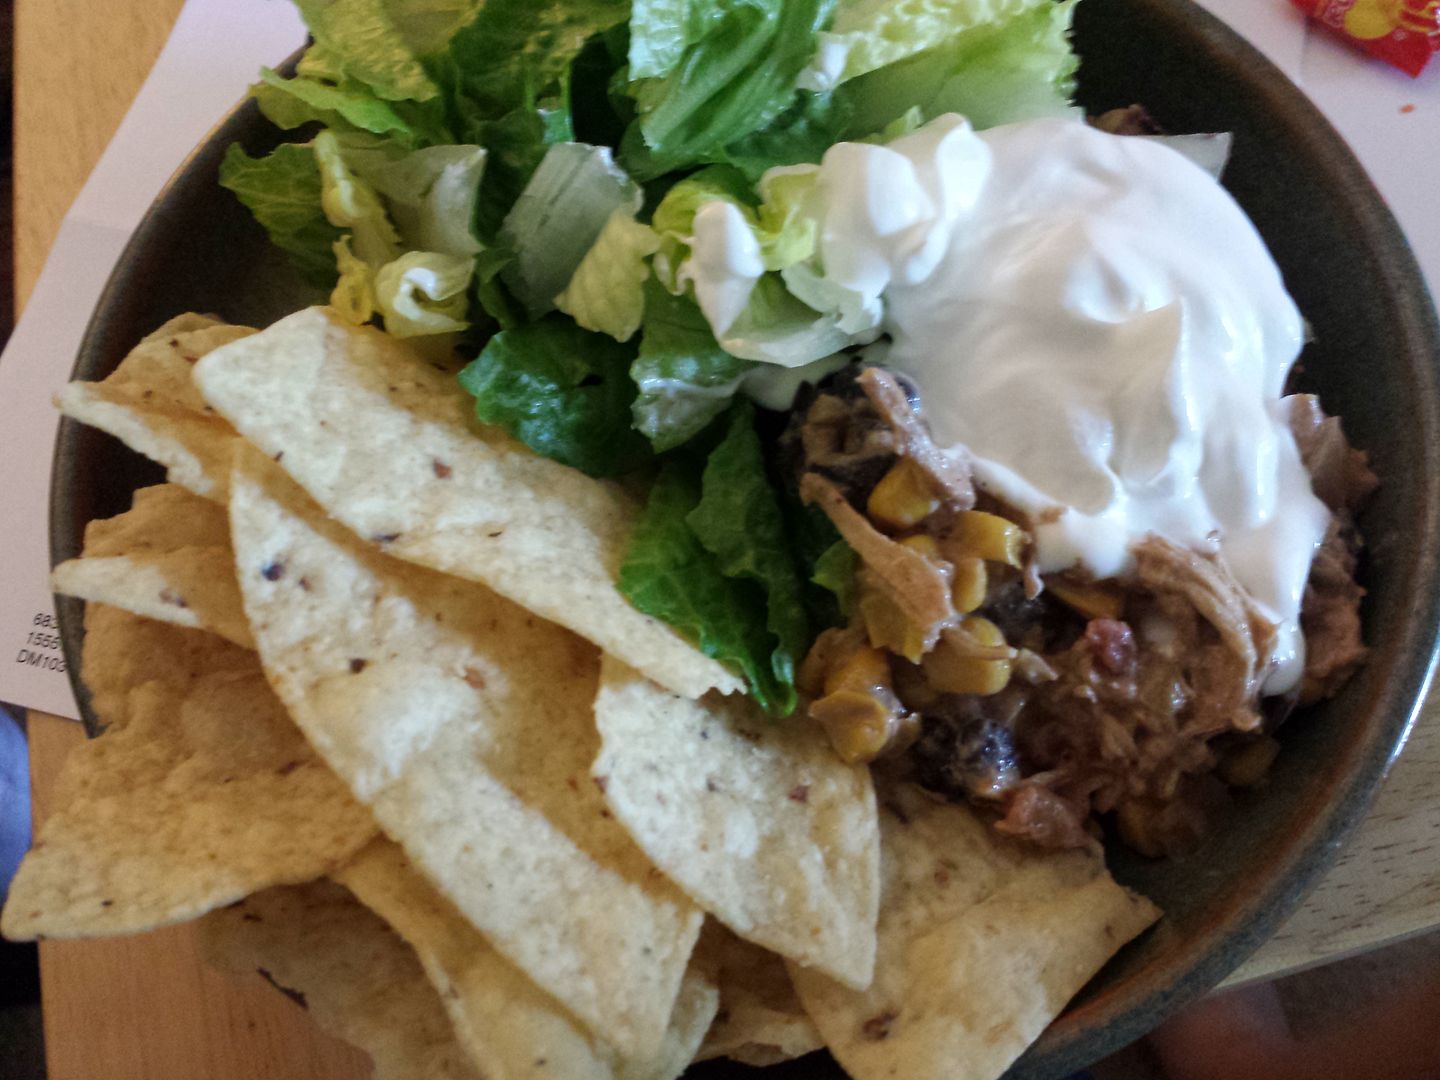
    I got a little carried away with the sour cream in this photo! This is the way we ate the leftovers - sort of a deconstructed nacho.  Chips, lettuce, sour cream and the crockpot chicken.

    Mexican Cream Cheese Crock Pot Chicken

    2 Chicken Breasts, boneless/skinless
    1 (15 oz) can Black Beans, drained
    1 (7 oz) can Green Chiles, chopped
    2 (15 oz) cans Diced Tomatoes, undrained
    1 (8 oz) can Corn, drained
    1 (6 oz) can Sliced Black Olives, drained
    1 yellow Onion, chopped (about a cup)
    1/2 an envelope Taco Seasoning
    8 oz Cream Cheese, cubed

    ***Now that we've made this a few dozen times we have altered the recipe.  Now we add these -- an additional 15 oz can of black beans, an additional 8 oz can of corn (or frozen), a 20 oz can of chopped green chilies instead of 7oz and 4 more ounces of cream cheese.  We also use additional taco seasoning to taste.

    ***We have decided to make our own taco seasoning instead of using the prepared envelopes.  2 Tablespoons of taco seasoning = one envelope of store bought (1 1/2 oz)  I will have to post the recipe to the taco mix.  I'll link to it when I get it written.


    Now the hard part
    Put all ingredients into the crockpot, except the cream cheese.
    Turn on crockpot.
    4-6 hours on High or 8 hours on Low.

    I decided after seeing this photo that we needed to add in another can of diced tomatoes. (It's now reflected in the recipe)  The dish needs just a bit more color.

    When chicken is tender, take out of the crockpot and shred.  Add back to pot and add in the cream cheese.  Cook for an additional 30 minutes.

    Stir well and serve over rice or quinoa OR serve with tortillas OR serve with tortilla chips.


    We used already cooked and shredded chicken, as I had cooked up a bunch the day before in my pressure cooker.  So I added in some homemade frozen turkey stock cubes that I had in the freezer to make up for the lost liquids in already cooked chicken.  I'm sure a 1/4 cup of chicken or vegetable stock would be fine, too.  Since my chicken was already cooked and shredded, I was able to avoid the "burn your hands shredding the chicken" step in the recipe!  It was still full of flavor and tender.

    I didn't realize there were so many choices of diced tomatoes, when we went to pick out a can at the store.  I chose the fire roasted diced tomatoes and they gave a nice flavor to the dish, but I'm sure any kind you like will work well.


    The dish was a hit and I will make it again.  I might even make it just for us and freeze half of it.  We liked it best as deconstructed nachos with our crispy tortilla chips.  At potluck we served it with corn tortillas so it could be an entire gluten free meal for our GF friends.

    Thanks for joining me!
    Have a wonderful day!
    Kristin


    Sunday, April 06, 2014

    Donate Life - Infant organ donors


    I wrote this article for the Jacksonville Transplant Alliance April Newsletter.
    I decided that I wanted to share this story with more folks than just those in our transplant community.


    April is National Donor Awareness Month and if you are receiving this newsletter you might believe that we are preaching to the choir.  You already know about donor awareness, you know to tell your family about your wishes, you talk to people about being a donor, you talk to people about your transplant or the work you do in the transplant community, etc.  What you might not know is that there is another organ donor group that want to donate and are having difficulty doing so.  
    Parents who want to donate the organs of their newborn babies, who for whatever reason, did not survive birth or were born with a defect causing them to live only a day or two, are often told that it is illegal or unethical to donate their organs.  Recently a family learned, eleven weeks into the pregnancy, that their child was going to be born with a brain and skull defect and that the child would not live much past birth.  This family decided to carry the baby to term so that they could donate the organs and tissues.  It took this family up until two days before she gave birth, to find a place that would accept the child as an organ donor.  It shouldn't be that hard.
    Some families want to donate their baby's organs and tissue but then also want to have the rest of their body used in research to understand the disease process of babies.  Families are comforted knowing that their child did not die in vain and that the pregnancy ultimately resulted in saving other infants.  In my research I learned that actually determining when an infant no longer has brain function, is actually a difficult determination.  Their brains just aren't formed well enough to be able to test for the tell-tale signs of activity or inactivity.   This is where the illegal or unethical concerns come into play.  
    Between 2008 and 2013 only twenty-one infants under a week old were declared eligible to be organ donors.  There were certainly more than 21 infants needing lifesaving organ transplants during those years.  With a little more education going out to the OB-GYN doctors and patients, we can help the effort to get more neonates eligible for donation.  Although some research has been done, doctors and transplant surgeons need to continue to work together, and discover tests that will determine when an infant is brain dead or if a stillborn baby can be eligible for donation.
    (source)


    Have a great day!
    Kristin

    Saturday, March 01, 2014

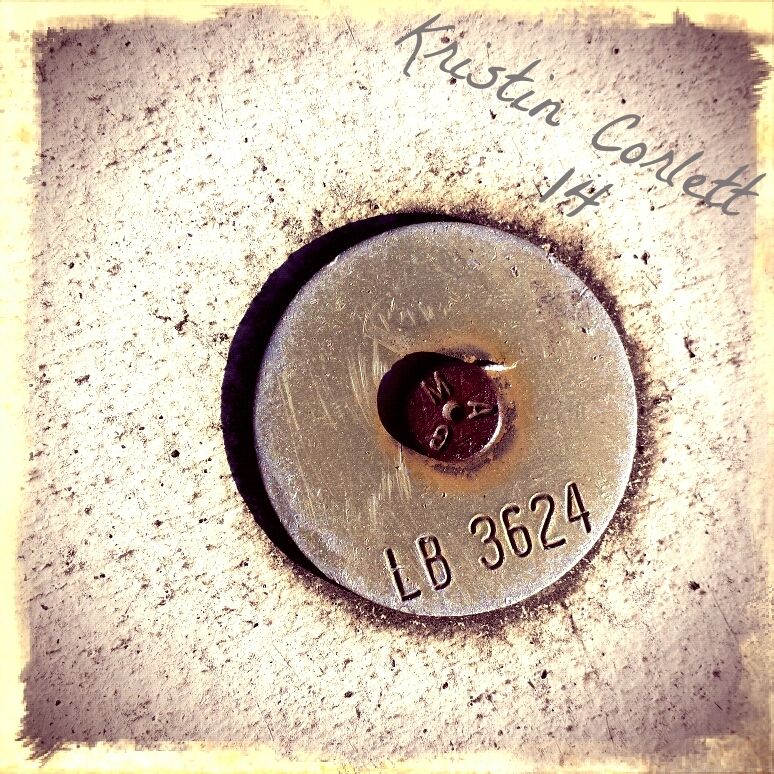
    POTD - LB 3624


    LB 3624
    By Kristin Corlett
    © 2014

    I took a photo of a screw/washer combination. There were dozens of these in the poured concrete sidewalk. I have no idea why they were there.  However, when I posted this on Facebook, one of the comments suggested that they were benchmark leveling markers.  It looks like they very well may be.  

    It looks like when I changed the font I lost my ©20 before the 14.  So Kristin Corlett 14 should be Kristin Corlett ©2014.  Ahhh, technology will drive you crazy if you let it.


    I took this photo with the Retro Phone App for Android.  It is my absolute most favorite camera app and it's free.  You can use many different camera settings to get different looks but the orange camera is my favorite.  


    called The Orange Box

    It gives this scrubbed edge to each photo
    gives a red/purple color cast
    severe scratches and damage to the film and frame.
    high contrast

    Have a wonderful day!

    Kristin

    Thursday, January 30, 2014

    Painted kitchen counter tops

    Steve's home has been a bachelor pad for 13 years.  Right after he moved in he got into a car accident that required months of rehab. Not too many weeks after feeling better from the accident he started getting sick from a failing liver and kidney.  He was fortunate and received a liver and kidney transplant, but his recovery was slow.  Needless to say,  he didn't get a whole lot done to make his house his style.  His health has been his focus and his house has just sort of evolved around him.  It is an incredibly comfortable place, but I know he wants more of his personal style in it.

    His kitchen still has flowered wallpaper,  the countertop is a green speckled laminate and there is so little counter and cabinet space that we have started using one of the bedrooms as a pantry.  We now call it The Food Room.


    I think it is fairly common for a woman to come into a man's space and want to change it.  I know I've done it before!  I've been with Steve for over a year now, friends for nearly 7 years and I haven't bugged him at all about his decorating. However, after hearing him talk about the damaged spot on his kitchen counter again, I thought I would mention what my Mom did to her counter years ago.  She just got out a can of Rustoleum Enamel in black and painted out her bright blue laminate.  It made such a difference!   It also made it possible to put off a full renovation for a dozen years or more.

    I suggested this to Steve and he said to go for it!
    So go for it we did.

    A leaky container of Lime-Away destroyed this section of the counter.

    I took everything off the counter of course and took before shots, then I went through the process of prepping the surface for cleaning.   I first washed with hot soapy water, then went over every square inch with a super Magic Eraser and then washed/rinsed the counter with vinegar and water.  I let that all dry real well and then wiped the whole thing down with a cloth soaked with rubbing alcohol to get off anything that could possibly be leftover.  It may have been overkill, but I wanted it to be clean and grease free.

    When that dried, I taped off the sink with blue tape.  We will be removing the wallpaper next so there was no need to tape that off.  Whew!  I blue taped some stove parts and a line or two on the fridge.  It took only a few minutes with so little counter top.


    I purchased a quart of Rustoleum Enamel in black, a small foam roller that was prepackaged with its own tray, a refill foam roller for coat #2, and a small 1\4" nylon craft brush.  To save cleaning time, I covered the paint tray with aluminum foil.

    I used the small brush to paint the tops of the backsplash and to cut in all of the corners where the backsplash meets the counter.  Then I rolled out the paint with the roller.  I made sure I got quite a bit of paint on the counter since it really seemed to level out and become nice and flat.  The final pass with the roller should all be in one direction, giving a seamless look.  I managed to ignore this step on one of our sections and it looks a little uneven.

    This is what the damaged spot looks like now.  I didn't sand and try to get it smooth because I didn't think it would actually smooth out since it was the fiber board and not laminate.  It's just so much better now that it's painted. Water no longer is absorbed in that area.  

    Did I mention you need ventilation?

    This is oil based stuff and it smells to high heaven.  Try not to breathe it in any more than you have to.  If you can prop a window or door open and get a cross breeze going, you're going to much happier for the next couple days.


    The second coat can be applied after 24 hours.  I wish I could put on a third coat on the counter area that looks uneven, but honestly, unless you know it's there, no one is going to notice.

    I should mention that Steve helped with every step of this makeover.  He cleaned, put away and painted.  I didn't do it all myself, even though that's the way I wrote it!

    We have let the counter cure for 3 days now.  Probably longer than most people would, but it's given us time to eat out!


    So, all in all, this was an incredibly easy project.  The fume factor is the hardest part and lingers for several days.  However, I would do this again without hesitation!

    We aren't done with Steve's kitchen.  The wallpaper is going next, painting the walls after that and who knows what else.  I'm hoping to use chalk paint and paint the cabinets.  All this is just pennies compared to the gut job it really needs! But I do think he is really going to love the new look for many years until he wins the lottery or something.


    If you have any questions about painting your laminate,  just ask!

    Have a great day!
    Kristin


    Tuesday, January 21, 2014

    Palm Trees at Sunset


    Target Shopping Plaza
    around 4:50pm
    Eastern Time
    Jacksonville, FL
    20 Jan 2014
    Retro Camera App
    © 2014 Kristin Corlett

    I was out shopping for Valentines this afternoon and when I came out to the car, the sky looked gorgeous and the palm trees were perfectly silhouetted against the sky.  I wasn't sure how I was going to get a good shot, considering I was in the middle of a parking lot.  So I decided to tip the camera up so that the sky took up most of the frame.  The seagulls were flying around working on getting some dinner, it seemed and they made a perfect entrance into my shot.

    Enjoy!
    Kristin

    Monday, January 20, 2014

    Chocolate Covered Everything

    It's all the fault of my local grocery store.  Steve purchased a couple bags of the melting chocolate just after Christmas and was waiting for some good looking strawberries to come in.

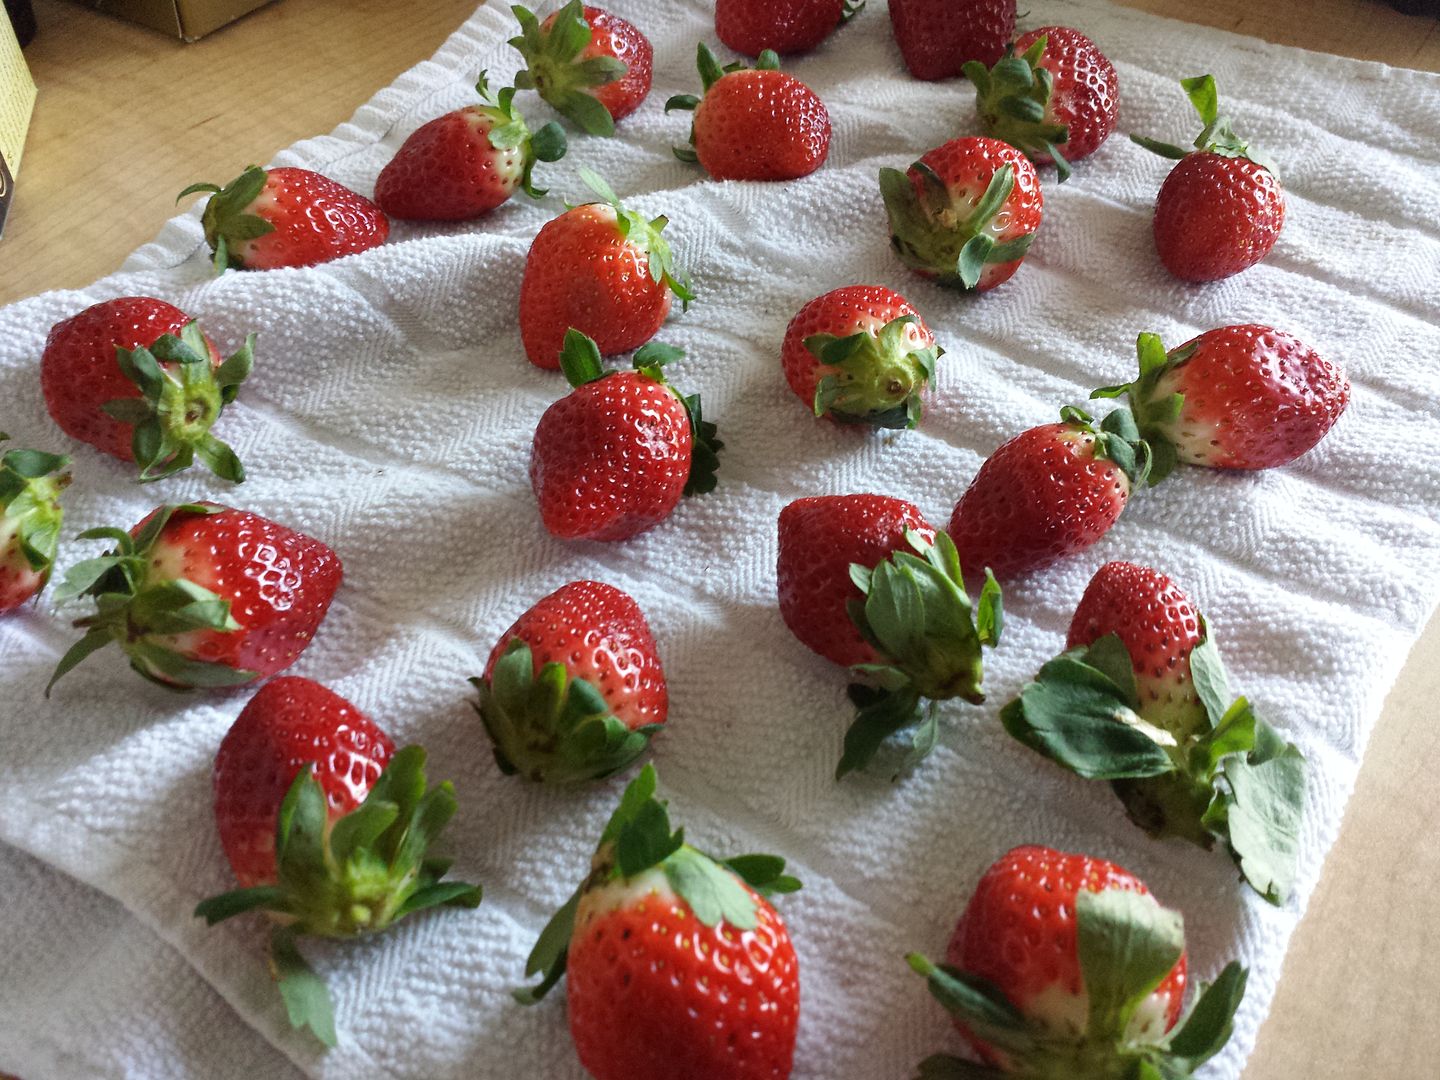
    The other day the strawberries looked pretty good!  The tops were all white, but for the most part the strawberries looked delicious.


    The strawberries have been washed and are hanging out on the counter, drying, while the chocolate is melting.   Steve is such a chocolate lover that he actually has a little electric chocolate melting pot.   I had never seen one before, but I have to say, it made the process of dipping the strawberries (and everything else) very easy.   Personally, I'd never used melting chocolate, so I wasn't sure what the difference was between that and chocolate chips.  Holy Smokes!  The melting chocolate was so much easier to use.  Probably using the little chocolate melting pot helped, too!, as the chocolate never got too hot or too cool.  It was perfect from beginning to end.


    In order to dip the chocolates we had to grab the green tops, which revealed all the white on the strawberries.  It didn't make for a great photo since nearly all of the red was now covered in chocolate, but believe me when I tell you that the strawberries were real good.  I can't wait until the Florida strawberries are in season.


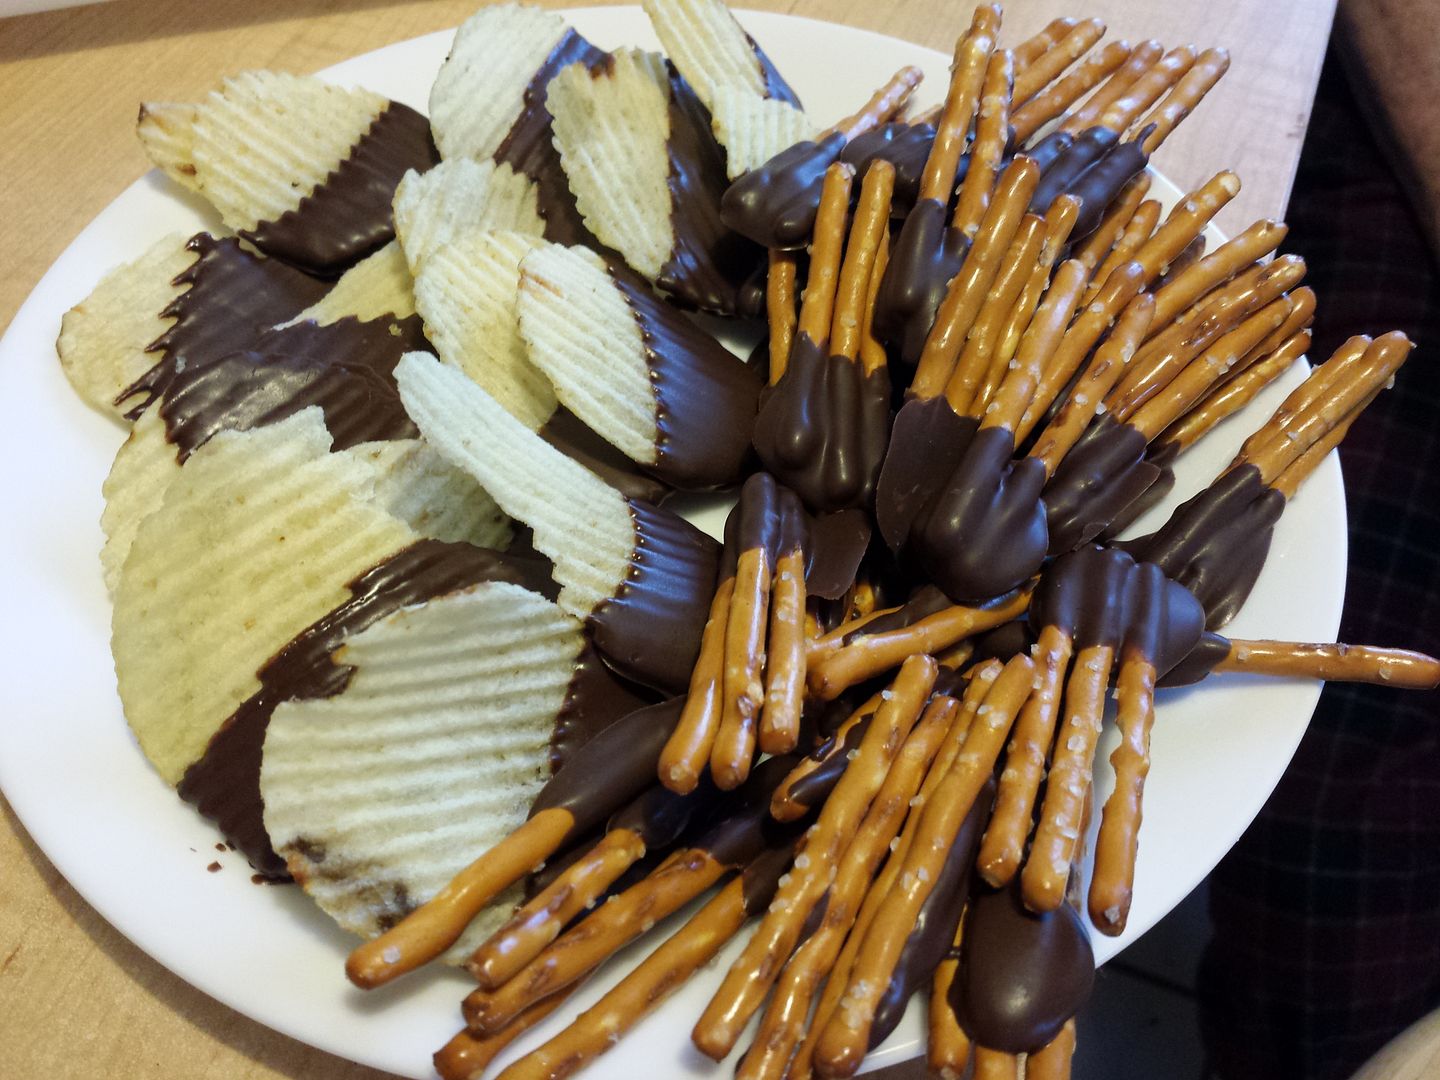
    Who ever heard of leftover chocolate, right???  Well, we had half a pot of chocolate when the strawberries were done.  Looking around the kitchen we found an open bag of pretzel sticks and half a bag of potato chips.

    At first we started dipping the pretzel sticks individually.  After about a dozen of them, I started dipping three at a time.  Oooooh, that was the ticket.  Three sticks welded together with chocolate.  So good.

    The potato chips were up next.  I'm now a fan of chocolate covered potato chips.  The Ruffles were real salty, compared to the pretzels, but my oh my, I liked them a lot.  Rarely does something have too much salt for me.

    We still had some chocolate left, but our arms were tired and we both were a little nervous we'd eat all of our goodies in one sitting.  Oh I jest!   I spooned out the chocolate into quarter size drops on parchment paper and when the chocolate cooled I put it into a ziploc bag for use on another chocolate dipping day.

    When strawberries come in season in your area indulge yourself and dip some of them in chocolate for some extra fun!

    Have a great day!
    Kristin