Showing posts with label Make Do Mondays. Show all posts

Monday, June 22, 2009

Make Do Swiffer

I posted this for Make Do Monday, but it's also fabulous for Works For Me Wednesday! So I'm linking to it as well. Works for Me Wednesday has several hundred folks participating, all giving their great tips on what works for them with housework, family get togethers, dinners, kids snacks, toy purchases, making gift baskets - whatever! This week Kristen at We are That Family is talking about her best tips for traveling with kids. It's quite a list! So go take a look.

I've been totally out of Make Do ideas for the past few weeks, but yesterday my sister sent me an email with her Make Do (complete with pictures!) Thanks Alison!!

The whole idea around Make Do Mondays is...as Ann Kroeker says on her blog, "...we discuss how we’re simplifying, downsizing, repurposing, buying used, and using what we’ve got. It’s a carnival celebrating creative problem-solving, contentment, patience and ingenuity."


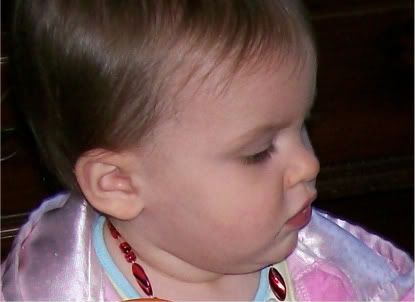
First off, I'll start off with a cropped close up of my darling niece, Stella. I haven't seen her since Thanksgiving...oh be still my heart, I miss this child. She's sporting some lovely beads!
Here is what Alison sent...The story goes that I like to Swiffer but the pads, wet or dry, are so expensive and I think they don't go as far as they should. The wet dry out too quickly and the dry get covered up so fast it is annoying, but I love getting under furniture with the wand. So here is my solution when I'm feeling desperate.
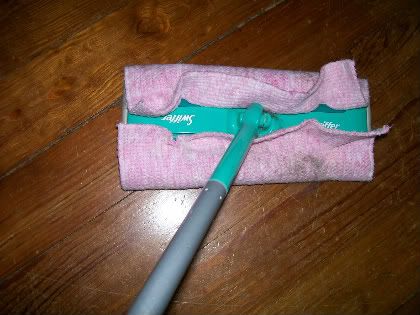

I use disposable wipes you can buy in the huge rolls for about $4-5 (75 ct). Sure they may be a bit smaller, but they do the job and are cheap! Then, for dusting, I put a washable dust cloth on the Swiffer head and spray some dusting polish on it. Works pretty well. I think it is a pretty creative way to get around the expense.
Alison
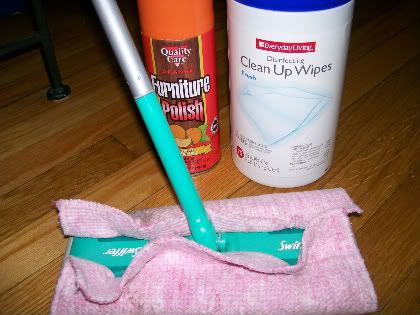
Kristin here...I have to say, you might not want to use furniture polish on floors as it can make them very very slick. Test a small area first, if you do decide to try that method. (Actually, if you are just putting a little on the cloth it probably won't make the floor super slick, it probably just helps to attract the dust bunnies. I would highly discourage spraying the polish on the floor.)

You can also use a spray bottle and spritz the floor with water and go over them with that microfiber cloth and the floors will clean right up. This is how I wash my floors.
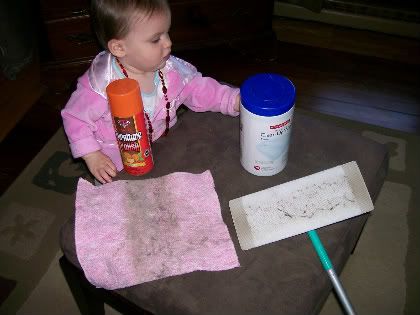
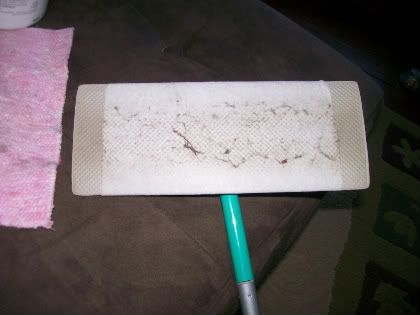


It looks like she got a lot of dirt off of her floor. The cloth goes in the wash and the disposable wipe in the trash.
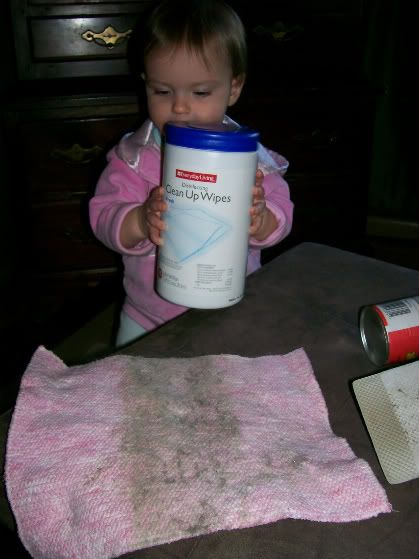
I think Stella thinks mom needs to make another pass with the disposable cloths. :)

Thanks so much for stopping by my place for Make Do Monday, if you have a chance go on over and check out what others are doing for Make Do Mondays. I hope this little trick will help you clean house and keep more dollars in your pocket!

And now that it's Wednesday, check out Works for me Wednesday participants!

Have a fabulous week!
Kristin

Monday, April 27, 2009

Sesame Oil

I love a great idea & Make Do Monday's hosted by Ann Kroeker is a place where you can certainly find some great ideas on how to make do with what you have. "It’s a carnival you can visit to celebrate creative problem-solving, contentment, patience and ingenuity," says Ann.

Today I am going to tell you about creative problem solving. I have some antibiotics that I'm taking and they are like swallowing a piece of chalk. Neither one of the pills have a smooth coating on them and the first few times I took them they both got stuck. It's like they were Velcro.

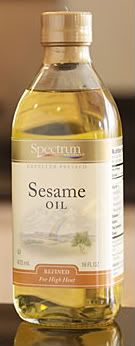
I had a bottle of Sesame Oil and remembered that it was a very light, plain oil. So I got out one of my tiny dishes and poured a little puddle of oil into the dish. Then I tossed in my pills, rolled them around a bit, popped them into my mouth and drank a nice big glass of water. They slid right down. In fact, I've had nothing but smooth sailing since I discovered the "rolling in oil" technique.

Sesame Oil is such a neat product.

I looked around for a picture of the Sesame Fruit, the source of all things sesame, that link was all I found. I'm not sure it really is a Sesame Fruit, because it was the only one that looked like that. I'll keep looking because I want to find out for myself.


Sesame oil is used for oil massages because it soaks into the skin easily. One of my favorite authors, Victoria Moran, talks about warm sesame oil massages in her book Younger by the Day. She says that she does this a few times a week. You can read this particular excerpt here. She talks about using the sesame oil for scalp massages, too.

Sesame oil can be used for cooking and salads. It has a real high smoke point and you can even use the light colored version like the one pictured, for deep frying. Roasted sesame oil is much darker in color and should not be used for deep frying as it has a lower smoke point, but it is a popular choice for Asian cooking.

Edited to add -- PW (Pioneer Woman) talked about sesame oil today in her post about lunch. She said that she was going to be serving pasta (cold) so she wanted to use sesame oil to coat it and keep it from drying out or sticking. She also explained where to find the light oil and where you find the darker, roasted sesame oil. I found my sesame oil at a health food type grocery store. End of edit :)

I find it so interesting how involved I can get when researching some of these blog posts. I thought I was just going to tell you about my make-do and instead talked about massages and talked about one of my favorite books. The oil idea for troublesome pills is an excellent make-do idea. I hope if you ever have trouble with any pills like that, you can remember this.

Have a great day!
Kristin

Monday, April 13, 2009

Headboards

I love a great idea & Make Do Monday's hosted by Ann Kroeker is a place where you can certainly find some great ideas on how to make do with what you have.

"It’s a carnival you can visit to celebrate creative problem-solving, contentment, patience and ingenuity," says Ann.

This post also goes right along with Thrifty Thursdays from Tales from Bloggeritaville. A fun little time to hunt around the house, the garage, someone elses house and garage or even a thrift store or two to dig up some cool finds. Be sure and check out the other Thrifty Finds, too.


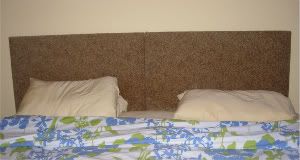
This is my bed. I pulled up the covers and gave the pillows a slight fluff. It's not terribly exciting or fancy, but boy is it comfortable. The duvet cover is from Pottery Barn. I found it on sale and we love it. It isn't a true match for our bedroom, but it is just so comfortable that it's perfect!

But that's not what my Make Do Monday is all about! My Make Do is the headboard. I've made three of these and they are so easy. I really like a padded headboard because I tend to sleep with one arm inbetween the bed and the headboard. So I like to make sure my arm isn't on a hard piece of wood or against the wall.

Here's how it works.

Purchase one sheet of plywood (4' x 8' - 1/2"thick)

For a King Size bed, I cut the piece into two pieces - each 3' x 4'

A Queen size bed I cut one piece 3' x 5' (but you could go 4' x 5' but I think I was having trouble finding the fabric I wanted for a 4' width, so I went with 3'.)

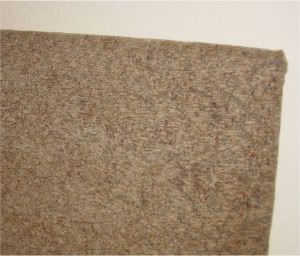
I purchased upholstery fabric, a very neutral color that went well with my yellow bedroom. Mine was real inexpensive - I think it was $3.99 a yard.

Also purchase batting. I chose a nice quality batting 1/2" thick I think. Honestly, I can't remember, but I know I folded it over, so it was doubled.

Staple Gun. Mine is a manual.

(I actually had my husband cut the pieces of plywood, but you can also ask the lumberyard to cut it for you for just 50¢ a cut. Well worth it if you don't have the tools.)


I set up my work station on my dining room table (when I had one) I put the fabric down first (right side facing the table) then the batting, then the plywood. I got it all centered and then pulled the fabric around the plywood and rolled the edges under to trap most of the batting and frayed edges of the fabric - then stapled. I did three or four staples in the middle of each side to make sure I got the fabric straight & fairly taught on all sides.

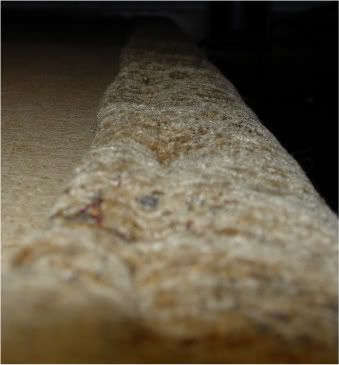
This strange photo is of the back of the headboard looking from the top down. you can see the rolled edges of the fabric. Some of the batting didn't get rolled in, but I just trimmed it afterwards.

EDITED to add: You do need to staple all the way around the headboard, not just a few in the center of each side. I sort of stopped mid instruction up there. Staple a few times in the middle of each side, then finish up all the way around. The corners can get really tricky with so much fabric and batting, so I cut out almost all of the batting in the corners and folded and stapled a lot. :) As long as it looks fine from the front, you can staple as much as you need to.

The headboard can be hung up like it is here (This was my bedroom in Daytona Beach) I wanted to add height to the bed since the room was so large. But in our bedroom here in Jacksonville, the space is small and the whole building was built using metal studs. I was so tired of dealing with those studs that I just stood the headboards on the floor. The headboards on the king size bed stick up two feet, while the one on the queen sized bed is only about a foot above the bed. This was a Make-Do for sure!


I used these fantastic hangers called Hangman Picture Hanging System. you can watch the video - at 2:22 is where he talks about this system, which I used on our headboard. These are just fabulous and sturdy and EASY! oh, and did I mention pretty inexpensive? I think they are $5 - $10 depending on the size you need.

I wanted a nice fabric headboard. I wanted it to be warm and soft and beautiful. I wanted it to be inexpensive and I wanted it NOW. I really wanted a new bed frame with the headboard, too LOL But once I realized I really could make the headboard for a lot less than I could buy one, I made it.

Plywood - $15 - $20
Fabric & Batting - $40 - $50

Less than $70 in my case.

My Make Do is a Make and Use! We've had the headboards for 5 years now, so it's been a long lasting Make Do, too.

Have a fabulous Monday!
Kristin

*The Daytona Beach bedroom - The whole bedding thing didn't work. I just want you to know that I'm not oblivious. I was trying to get a nicer looking cover on the bed so I started layering things. The house was for sale when this photo was taken, Tom was getting listed for his transplant, so bed-scaping was not high on my list LOL

The cat on the bench is Maggie. Mocha's sister.

Monday, April 06, 2009

Printable Blocks

I love a great idea & Make Do Monday's hosted by Ann Kroeker is a place where you can certainly find some great ideas on how to make do with what you have. "It’s a carnival you can visit to celebrate creative problem-solving, contentment, patience and ingenuity," says Ann.


I talked about Free Printables on my Works for Me Wednesday post the other day (ummm, that would be Wednesday!) but I found a few more things that are a bunch of fun and they are also Make-Do artwork, joy and fun. The only thing you do need to pay for is the ink and the paper.

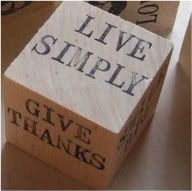
I love Paloma's Nest on Etsy. I purchased one of these little blocks for my mother for Christmas. I actually wanted to buy her several of them to make a little display, but for the price, one was perfect. I wanted one too - but once again, at $12 a piece, I really didn't need to spend that money. I kept thinking about those little blocks though. I still wanted one. (or a whole bowl full)

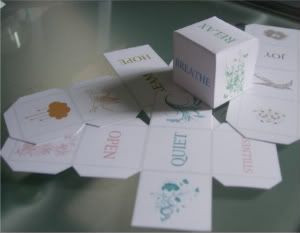
Yesterday I found a a blog that had a free download for these cute little paper blocks that you can print out, cut out, fold and use. FREE. I printed them out and that's when I realized that there were four blocks per page. So for the price of two pieces of cardstock and ink, I printed out these Printable Blocks from Kind Over Matter. I haven't cut them all out yet, since I just found them, so I'll be sure and post the picture of them when I do. (edited 4/6/09 - here is the photo!)

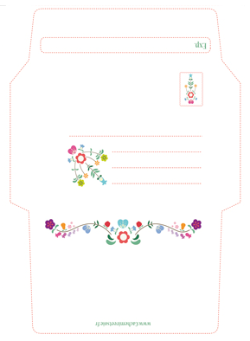
I also like to write letters and one of the things I liked so much as a kid were those cards that when folded turned into the envelope. You can write on one side and fold and tape it up and mail it out. I found an adorable printable agenda that has those envelope letters, ToDo lists, cards and all sorts of great items to print. Well, all of the words are in French, but that's half the fun! I have no idea what this blog says, but I look through it quite a bit. It's called Cachemire & Soie. Just moments ago I realized that I can translate the page into English. Well, I may keep it in French, it was more fun that way.

Please go visit these places to find your own fun printables but also be sure to head back over to Ann Kroeker's place to see what other folks have posted for their Make Do Monday.

Have a wonderful day!
Kristin

Monday, March 30, 2009

Repurposing Recycling

I love a great idea & Make Do Monday's hosted by Ann Kroeker is a place where you can certainly find some great ideas on how to make do with what you have. "It’s a carnival you can visit to celebrate creative problem-solving, contentment, patience and ingenuity," says Ann.

Ann purchased something that came in a great box - so she has reused that into her jewelry box. I don't think I could have tossed away the box either. Speaking of not being able to throw things away. I have a few items I'd like to share with you today.

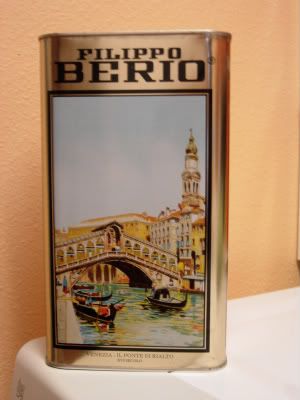
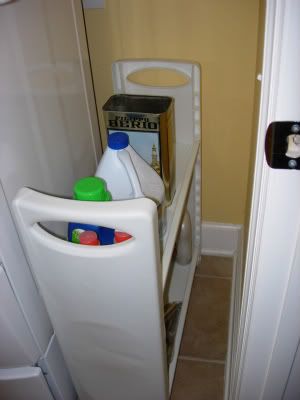
First up is this rather innocent looking tin. It's an olive oil tin to be exact. I purchased the oil in this tin for a very specific purpose. I needed a trash can to sit on my tiny little rolling laundry cart and I couldn't find a trash can small enough, cheap enough or square enough to put on this little shelf.

I looked for a long time, when one day when I was grocery shopping I saw the olive oil tins. It was going to take me a long time to go through all of the oil in that tin, but I thought it just might be worth it. So I bought it.

It probably took us a year to go through all of the olive oil, but after a few months I transferred the oil to another container...I couldn't wait any longer!

I cut the top off of the can with a can opener and washed the inside carefully with about a teaspoon of liquid dishsoap and a drop of water - this cuts the oil - and then rinsed it real well.

Tah-dah!

It's a trashcan!

It fits perfectly on my little cart. It holds lint from the dryer like a charm and doesn't ever look like I have a trashcan sitting next to my designer bleach bottle. haha


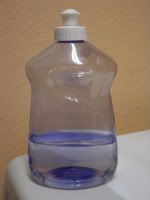
Another laundry item that I have made-do is this bottle of distilled water. This is a bottle from a small container of dish soap. I have filled it with distilled water and I use it to fill my iron. It doesn't leak and gives a nice controlled stream of water into the iron. It also holds quite a bit of water, so if I'm doing a marathon ironing session I don't have to keep refilling the bottle.

(Normally I put labels on plastic containers that contain liquid, but since this just holds water, I have not labeled it.)

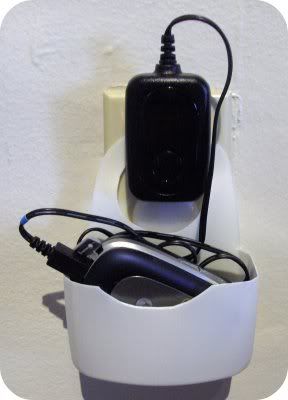
This whole post was inspired by this little gadget. I have always thought the charging stations for cell phones were so cool, but I don't have the counter space or the desire to fork out the money for something that is really not needed. However... When I saw this project at Zakka Life, I just knew I needed to make one.

I haven't yet - I don't have a container that is available right now, but I didn't want that to stop me from showing you all this tutorial. Please click on the link to Zakka Life to see the whole tutorial - it's really so easy.

I hope you have a fabulous Make-Do Monday!
Kristin

UPDATED: Zakka life has taken down the tutorial because of comments over safety issues. Sigh.

Monday, March 16, 2009

MDM - Zippered bags

I love a great idea & Make Do Monday's hosted by Ann Kroeker is a place where you can certainly find some great ideas on how to make do with what you have.

My Aunt sent me a message this weekend with the suggestion that I should talk about these wonderful bags. I'm just going to let her tell you about them. Here's my Aunt Marg...


You know those plastic bags that pillows and sheets come in, with snaps or zippers. Since I've always had 4 bedrooms, plus a pull out couch, plus needing extras for couches when more guests arrive, plus taking the boys off to college, plus nothing lasts forever. I have had a multitude of them.

One of the best uses is for family trips or sending the kids off to summer camp. They make great "DOP" kits (the toiletries and bags that return for camp are generally ready for the trash, or just for consolidating clothing.

I also once bought an underbed plastic container, and used it for storing either extra blankets or, now here's the best idea, wrapping paper/gift bags/ribbons and tissue paper. But it always got caught as I pulled out from the bed (the bed tends to sag over time:) and I always had to dig through all the stuff. I changed to using these bags. The King bags work for rolls of paper, the smaller bags work for gift bags, tissue paper and ribbons. And you can see what you've got!

I can store them in a closet, or still under the bed, and they are easier to access.

Also, you sometimes get dresses or suits in a zippered bag, that hang??? Great for rolls of gift wrap, especially xmas. I stick them in that when I get wrap on sale, and I'm set to go next xmas! I just hang them in the closet. If you've got one bag, voila - large enough!

You can put your tape and scissors in the small bags, and it's all good to go in one fell swoop, rather than searching the house for what you need and then replacing stuff in your kitchen or office...it's now in one place.

And you've used those wonderful bags, and not spent money on the Rubbermaid crates!


Thanks Marg! Thanks so much!

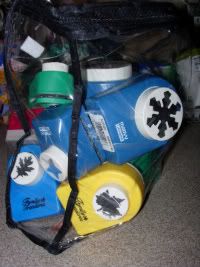
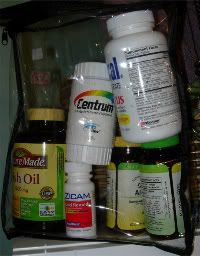
I used these bags to corral my curling irons, but I also used two of these bags recently when I went on vacation. I put all of my vitamins, eye drops, medication, etc in there for an easy see-through toilet kit for myself. I have a bag full of craft punches, shown above.

I have extra washcloths and hand towels in my cabinet for my rental condos - I put those in the zippered bags to keep all the kitty fur that roams around our house off the clean towels.

I have giant zippered bags, too. Those are from the pillows and mattress pads that I have purchased through the years. I put blankets, towels and in some cases, junk, into those large bags.

I love containment!

Thanks Marg for helping me out this week.

Ann Kroeker is talking about her closet this week and I'm sure there will be many others that will be on hand to show how they Make Do with what they have. Be sure and go over and take a look.

Don't forget to sign up for my Giveaway, while you are here -- I have surpassed my 500th post and am giving away a Target Gift Card to one lucky person. Go HERE to put your name in the hat!

Have a Fabulous Week!
Kristin
Monday, March 09, 2009

Breadcrumbs, golf tees and airplanes

Welcome to Monday!

Make-Do-Mondays are hosted by Ann Kroeker. She says -- "It’s a place to celebrate creative problem-solving, contentment, patience and ingenuity. It’s a carnival where we encourage each other not to rush out and get the next new cool thing if something we have on hand can get the job done." Several others are jumping on the Make-Do carnival, so be sure to go see what everyone is doing this week!

This weekend I had several make-do moments. The first was breadcrumbs. I was totally out of them and my husband wanted to have breaded chicken cutlets for dinner. So instead of running next door to the grocery store, I grabbed a few slices of bread and toasted them a few times in the toaster to help dry them out. Then an hour later I put them into the mini chopper to get them into smaller bits. Then I toasted them in a pan to continue the drying process. This would have all been fine and would have worked if I had realized earlier in the day - but the crumbs were still too damp so I needed to make-do another way. (The breadcrumbs were perfect by morning though - so we now have a new stash of breadcrumbs)

Second Make-do was to use quick cooking oats. I whirled them around in the mini chopper a few moments and got a nice crumb out of the oats. That was a lot less work than trying to dry out break quickly lol and the breaded chicken cutlets turned out real nice.

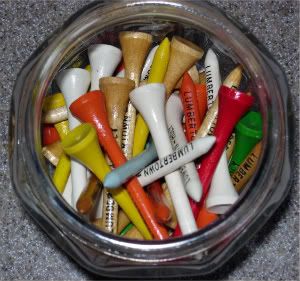
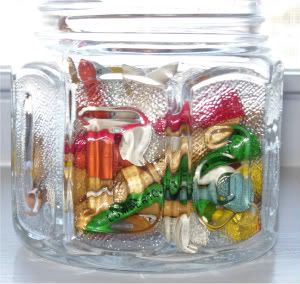
On to Make-Do number three. I was going through boxes that hadn't been opened in a few years and found an envelope with a about 30 colored golf tees. My husband isn't a golfer, so this was not a normal find. We also don't have a place to keep golf tees, since he doesn't have a golf bag or anything. When my husband owned a Lake Amphibian the golf tees were used to put into the weep holes in the airplane when it was parked. This would seem silly except that mud wasps LOVE to build their nests in these tiny holes - so the golf tees plugged the holes and kept the wasps out.

I thought the tees were a pretty bit of color, so I grabbed an empty antique Barbasol jar and put the tees in there. Now I have a colorful accent for my kitchen window.

This is a Lake Amphibian airplane. They are a boat hulled airplane that can land in the water and also land on a runway. My husband has owned one or more of these airplanes since he was 26 years old. Unfortunately he is airplaneless at this time. We had to sell the the last amphibian just before his liver transplant surgery in 2005. I have flown in one of these a few times. I've landed in the water, too. It isn't my thing. :) but I've done it!

I hope you have a wonderful Make Do Monday and that you can find some beauty in some unusual find in your home. (Be sure and visit the MDM carnival to get other great ideas.)

Kristin

Monday, March 02, 2009

Take it from the stash

Welcome to Monday! This is still a new blog carnival for me so I'm not used to getting this post ready for early Monday mornings. I'll get there!

Make-Do-Mondays are hosted by Ann Kroeker. She says -- "It’s a place to celebrate creative problem-solving, contentment, patience and ingenuity. It’s a carnival where we encourage each other not to rush out and get the next new cool thing if something we have on hand can get the job done." Several others are jumping on the Make-Do carnival, so be sure to go see what everyone is doing this week!


I have been thinking about what I will post for Make-Do-Monday for the past two days. I know that I make do with a lot of things, but as with so many things, I'm just so used to it that it doesn't seem to be a Make-Do type of thing!

Finally, I came up with something -- actually a lot of things and it all happened for one event.

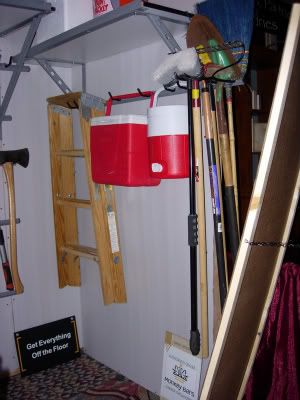
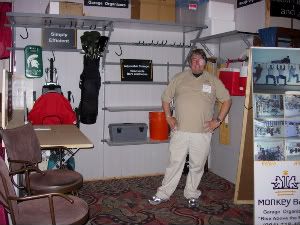
My husband just started a new business (friends and family - yes, another business!) and he had a booth at the Jacksonville Home Show this weekend. The business is a garage organizer system called Monkey Bars which you can see at Gorgeous Garage, if you'd like. So, he had to fill the booth with items typically found in a garage to show how the system was used. He kept telling me that he was going to go out an buy...a rake, a shovel, a cooler, a ladder and/or plastic bins and I kept insisting that he didn't need to. He felt his booth wouldn't be Professional Looking if he didn't have brand new items. He also asked me at one point to go to the store and get some cleaning supplies so he could put them on the shelves.

I was not having any of that. We have plenty of those items right here in our house and at our garage unit. I don't care if it would "just cost a hundred bucks" to get all new - we didn't need to spend a penny and we didn't need to duplicate our already bulging inventory of lawn and garden items. I had him go to our garage and gather the items he wanted to use, I picked out a few manly cleaning supplies from our closet (Sportman's laundry detergent - totally unscented so the deer can't smell the clothing - windshield washer solvent and Armour All) and then I gave everything a quick dusting or used a little Sparkle & a papertowel.

This should be a Mastercard commercial...

Shovel $0
Plastic Bins $0
Cleaning Supplies $0
______________
Happy Wife - Priceless

The booth looked real nice. It also looked real. We didn't have bright shiny stickers on the tools and the coolers had some scratches on them, but everything was in its place in the "garage" and lots of people came in and could see their own stuff sitting on those shelves. The booth looked very professional.

That's my Make-Do-Monday. I made do with the stash of items I already had, instead of buying new. Oh, and a Magic Eraser on the plastic of a standard cooler does wonders!! Those coolers looked brand new. I think the last part of the Make-Do-Part was keeping my cool and not jumping down my husband throat when he kept mentioning new, new, new. I made sure to stay calm and not raise my voice, which really did help him be more receptive to the idea of gently used.

Please go visit Ann and see what the others have posted. Thanks!

Have a great day!
Kristin
Tuesday, February 24, 2009

Buy once - Use twice

A long time ago in a land far far away, I lived in Michigan. My husband and I were hosting Thanksgiving for my family and his and I needed to get things ready to go. When I lived closer to my family, I would have just gone over to my mother's house and raided the closets and cupbards for the linens and dishes that I needed for Thanksgiving. Since I now lived about 80 miles away, it wasn't quite as easy to do. So I put on my creativity hat and thought about it.

What I needed most were tablecloths for the two large antique tables that I would be using. I was going to push them together to make one long dining table, so I needed something that would be consistant for the long expanse. I was also on a budget.

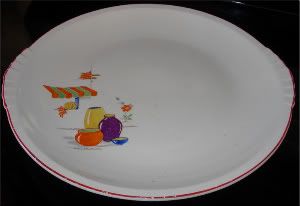
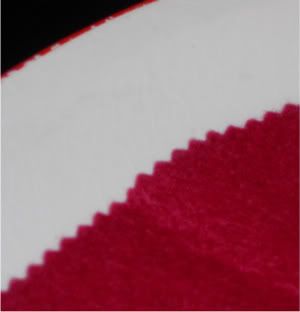
What I came up with was felt. Red felt and a little bit of cream felt. I bought several yards of it for about $3 a yard as I recall, and I also purchased a pair of pinking shears. The shears cost more than all of the fabric! ...but only by a little. I put the felt on the table, weighted it down so it wouldn't move and I cut the felt with the pinking shears around the tables. It was exactly the shape of each table. I used the red on the table tops and the cream was being used as hotpads on the tables, maybe even a table runner type of idea. I can't quite remember at the moment. I think I may have even cut out leaf shapes and put peoples names on it.
The tableclothes were a hit, to say the least and the dinner was fabulous as well. A few days later as I was finally getting the tables moved back to their original locations I realized that most of the felt was in great shape. Only a couple of spills of food in a few spots. I now had all of this felt and it was a shame to throw it away, which was my original intention.

I got out a dinner plate and a lunch plate - traced around them and used those two sizes as templates. I grabbed those mighty expensive pinking shears and started cutting out circles. Large ones and small ones out of the felt that was left, after I cut out all of the "spoiled" felt.

I made plate protectors for all of my heavy bowls that I stack together. I used some of them for my plates and platters that don't get used too often, but are stacked on top of one another for long periods of time. I still had lots of felt left over, so I made stacks of 20 - 10 small and 10 large for several family members for Christmas.

I used up every cent of the $25 I spent on the felt and the shears. It was truly one of my better ideas.

I have posted this for Make Do Mondays - hosted by Ann Kroeker. She asks us what we have done to make do with what we have, or how we wear it out or decide NOT to buy something because we really don't need it. This is a new blog carnival so be sure and go over and take a peek.


I thought this would be a perfect Works for me Wednesday post. Childrens birthdays, Easter dinner, St. Patrick's Day are all times when you might want to prepare a family meal and a nice felt tablecloth might just be the ticket for an inexpensive cover. Please go see more tips at WeAreThatFamily, the new host for WFMW.


...and this certainly turned out to be even more thrifty than I had originally intended! So it qualifies for Leigh's Thrifty Thursday at Tales from Bloggeritaville.

I will link to those posts as the days arrive.

Thanks so much for stopping by!
Kristin


Monday, January 12, 2009

Corral the curling iron


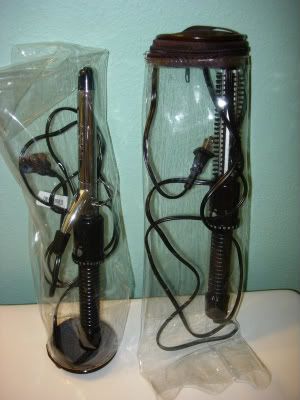
What are these strange contraptions, I bet you are saying... Well, let me tell you.

The items encased in plastic are my curling irons. I don't use them very often, so to keep them from getting dusty I put them in the plastic sleeves.

The main reason I wanted to use the sleeve was because of the brush style curling iron. It seemed like no matter where I put it, in my bathroom, something got stuck to it. It was a magnet for rubber bands, lint, thread, kitty fur and necklaces.

I purchased some fabric roller shades a few years back and they came in these nifty plastic sleeves. They plastic was really thick and one end had a zipper. I tried all day to figure out what to use those fancy zippered sleeves for, when it occurred to me! I'd cut the sleeve in half and store my curling irons in them. That was just the perfect solution.

The only drawback is that I can't place the irons in the sleeves until they are completely cooled. I could have used an oven mitt I supposed if I wanted to store then while they were still hot - but the great thing about the plastic is that I can see what's in there. I will forget that I have curling irons if I can't see them. If I had some lovely fabric covering up these irons, I'd have a whole basket of them because I'd buy more, thinking I didn't own any.

This is certainly a great Make Do Mondays post - because instead of going out and buying something to put my curling irons in, I made do with what I had in my home. I've also saved myself additional moneys in not purchasing any more curling irons because I can see what I already own and can remember that it's there. (Maybe if I curled my hair more often, I'd remember!)

Please go visit Ann Kroeker for more Make Do Monday ideas. She's talking about her Crock Pot today.

Thanks!
Kristin
Monday, January 05, 2009

The look of stainless

Here is the second edition of Make-Do Mondays hosted by Ann Kroeker. She talks about how a little duct tape has made their dining room table functional for years now. you can read all about it here.


I was changing the trashcan liner in my kitchen today (otherwise known as taking out the trash!) I reached into my cabinet for a bag and immediately knew what I was going to post today. Here's the set up...

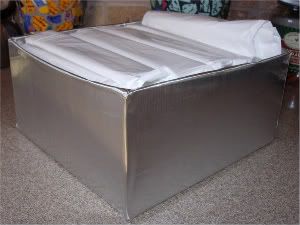
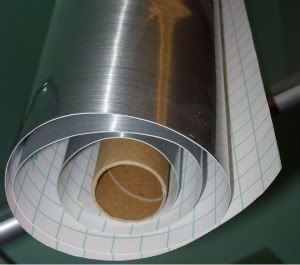
I was so tired of looking at the bright yellow box that my favorite trash bags came in, so I took a roll of stainless steel "looking" contact paper and covered the box. I like to keep the trash bags in the original sized box because, well, because they fit! I took the top off the box, so it makes it a breeze to add in new trash bags. I tried a cute basket, a little pail, even a small tray, but the box worked best.
I got the roll of contact paper at Home Depot, but that was only because I was there. I'm sure anyplace where you find contact paper will have this product. You can use any kind of contact paper to cover the box as long as it isn't see-through. The whole goal is to not see the original packaging.

I consider this a Make-Do because it turns something unattractive into something nice looking in a matter of minutes. I have plans to use the remaining contact paper for other box covering projects.

Have a great day!
Kristin
Thursday, January 01, 2009

Notepaper & Envelopes tutorial

I really like to write notes to people. I write out cards and sometimes I write long messages and other times I just write - "I'm thinking of you!" and mail it off.

I used to have piles and piles of cards. Boxes of cards in all sorts of shapes and sizes. Thank You cards, blank cards and birthday cards. The past few years I have watching my money a lot more than I have in the past. I still make impulse purchases, but a lot fewer. I haven't purchased a box of cards this entire year (2008!) and my card collection has been whittled down to nearly nothing! My sister gave me some cards for Christmas, cards that she made, so I'm reluctant to use those right away lol
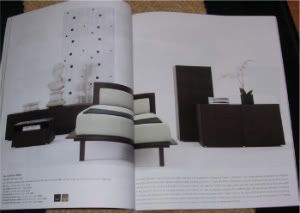
This is all leading up to this... I wanted some cards, paper, envelopes - something. The few that I had left had seen better days and I wanted something new.

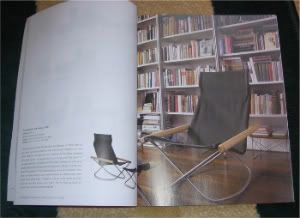
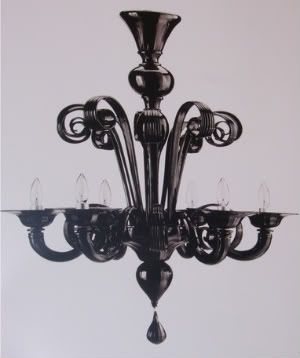
I was cleaning out my computer room when I came across the DWR catalogs...2 of them.

They have so many lovely pictures.

Lots of white space.

I have used magazine pages before as writing paper, but only occasionally. These particularly wonderful pages tend to have a beautiful picture on one side and then the other side has just a few pictures and plenty of space to write. So I spent about a half hour carefully tearing apart the Design Within Reach Catalogs. I used the full size page and then tucked all of those pages into a large folder.

Those pages are going to be my new notepaper or envelopes.

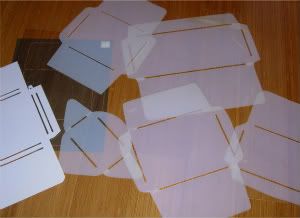
Envelopes are very easy to make. You can find envelope templates online for free (here and here) or you can purchase templates like I have. I keep them in a folder in my filing cabinet. It keeps them from being scattered all over the place.

My file folder of envelope templates is one of the few things that I can put my hands on even if I don't use them for months. The filing cabinet is a great place sometimes lol

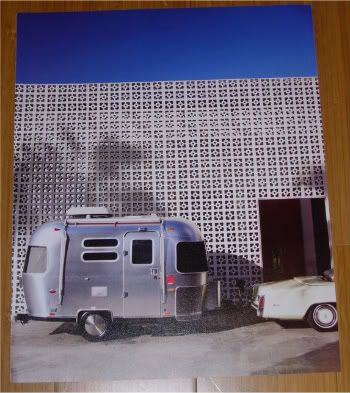
OK, so pick a template and then pick a magazine page that you'd like to see on your envelope. I liked this one because it had a lot of white area, that I could use as the front of the envelope and then it also had something very unique that would be great for the envelope flap.


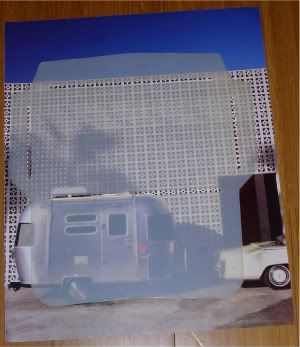
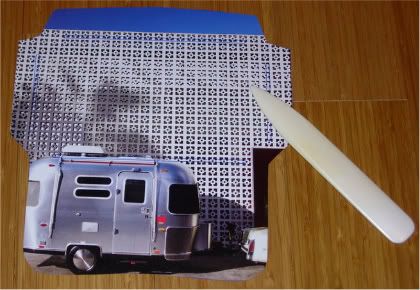
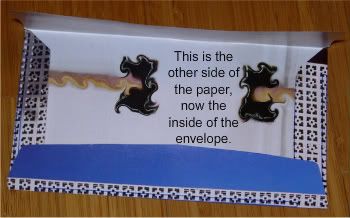
My favorite envelope template is the one I used below, because it has such a large area for the flap. It means that you can have one large image - rather than a regular envelope where the back is divided into a small piece and a larger piece.I place the template over the top of the page and move it around before I trace around the outside. In this case, I have the template upside down - the flap part is on the bottom. Then I cut out the outside and fold the sides in and crease the edges with your finger - or use a bone folder. If the paper is thin enough you really don't need to use a bone folder.

Fold the edges and tape the bottom corners. I've made the mistake of taping the folded over part to the inside of the envelope - there's no way to keep the contents in the envelope if you do that -- so do as I say and not as I do lol


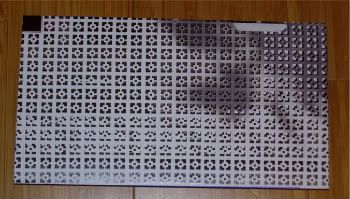
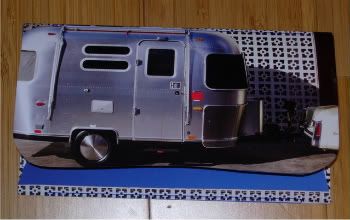
The front of the envelope looks like this. I love the shadow on the wall. I didn't notice as much in the big picture, but it really stands out now on the front of the envelope. The back of the envelope is the airstream trailer. I love how perfectly it fits. This is going to make a great envelope.

This is an example of how I'd address the front. I don't have any plain white labels, so these are small post-its. I'd use a bit of packing tape to secure the label to the envelope. Just make sure the address stands out from whatever the background is, so that your recipient actually receives the letter.

Also make sure that the back of the envelope is secured. I've used a glue stick before, but not all of them went through the mail and arrived still stuck - so once again, I'd use a bit of tape to seal the back flap.

If you want to reduce, reuse, recycle - this really is a fun way to do that.

The catalogs I used came from this company

I hope you have enjoyed this tutorial. If you would like to read more about how others are Making Do with what they have - head on over to Ann Kroeker's site. She's having a special Make Do Mondays carnival. I wasn't prepared on Monday, so I'm blogging about this today LOL

Have a wonderful New Year!
Kristin