Showing posts with label Favorite Things. Show all posts

Friday, May 29, 2020

Bread Bag Tag Lampshade

Bread Bag Tag Lampshade
by Kristin Corlett


This is my bag tag lampshade!

Bread bag tags. An obsession?  Prolly. Not really, but I do think about what I can do with them very often.  I've been a collector of bag tags for a decade or more and have recruited many family and friends to help in the collection as well.  I just recently asked my neighborhood to help me collect so I can finish the lampshade. 

What started this whole idea of a lampshade was this photo on Pinterest.  I was completely drawn in.  I needed to make it.  I had to!  I have scoured the internet and the only thing I have found is that this was from the Concordia student design show 2006.  Just this photo, no instructions on how to make it, nothing.  In fact I don't even know if it is a lampshade.  Looks like I'm going to have to do it myself.  


This is the Pinterest photo -- I found it on flickr

I think if there had been a How-To for making the lampshade I might have started this project about 4 or 5 years earlier.  Since I had to start from scratch I spent a lot of time thinking about what would work. How much time you ask?  Years.  I have been teased by many that I was never going to do anything with all those tags.  I want to do a lot of projects and never do them, so I can see why this one would also be a lost cause.

But... it wasn't!

I had several unsuccessful attempts to get holes punched through the bag tags.  The tags are strangely brittle when a hole is punched into it and they end up splitting or breaking.  I tried heating them up so that the punch might not split the plastic, but that didn't work either.  I finally decided that a wood burning tool was going to be the ticket to small holes and no breakage.  Turns out I was right!  I spent only a few days on the project seen here.  Once I got going I was on fire!

The little bits and pieces left over

Here is how I made my bread bag tag lampshade, which by the way, most of those tags are from friends and family that have helped me collect them.  It gives me so much JOY to know that people collect these for me.  If only that they think of me as they toss that tag into the drawer or ziploc bag.  Thank you to all who have contributed to my very long term project. 


Sourcing the Tags

Tags can be sourced in a few ways - friends and family can save the tags for you and send them to you every so often.  You can find some being sold on Etsy and right at this moment there are a few rolls of blue tags for sale on eBay.  I have been told that if you ask some restaurants that use a lot of bread or veggies that come with those tags, they might save them for you.  (Think diner/breakfast places)  I had a friend in a restaurant that would gather them when she worked, but she only gave me white tags.  You may have other ways to gather the tags and I welcome your suggestions in the comments.


Finding a Lampshade

The Pinterest photo that I was using as my inspiration, had the bag tags definitely attached to white lampshade.  You couldn't see through to the other side of the shade, so it had to be laying against something.   I also realized that the shade had to be the same dimensions at the top and bottom if I wanted to do a pattern.  I also wanted the shade to be round or oval so that the tags would easily go around, instead of trying to conform to a hard edge, like a 90 degree angle.  So I found a 9" round linen shade and it turned out to be perfect.


Assembling the Tags

I had several misses when it came to punching holes in the tags, but my success came from a wood burning tool.  The tags splintered when I tried punching holes in them so I knew I needed something hot.  A basic woodburning tool had a long thin attachment that I thought would be perfect and it was.  Thankfully the tags I used for this project were big enough for my fingers to hold the tag and put holes into the sides without burning my hands and fingers.  The plastic cooled fast enough that when I flipped the tag around to do the other side, it wasn't hot anymore.


I purchased jump rings from Amazon and used those to attach the tags to one another.  


In order to keep my fingers and hands from being all cut up and sore, I used two different tools to open and close the jump rings.  I already had a pair of needle nose pliers so I used those and I purchased a pair of pliers that had a hollowed out area for the rings to fit into and make it easy to clamp them shut.   Sometimes I pushed too hard and closed the rings into a tiny spiral, but after a few tries, I found the perfect pressure to use to get them to just touch together.


Finding a Pattern

I followed the pattern that was the Pinterest inspiration, but not the colors, as I didn't have all those colors.  I used the colors that I had the most of and then tried not to repeat the same color way again as I went around.


My lampshade is 2 of the same color with a one tag shift as it proceeds down the lampshade.  It creates a nice diagonal line.  I thought about doing mostly white (since that's the color I have the most of) with the colored pieces randomly placed in the design, but I really wanted this first one to be as precise as possible.  I think my next project will be mostly white, so I can continue to play with the bread bag tags and not have to worry about running out of the colors I need.


Order of Operation

1. Separate the tags into colors. Further separate to size and shape, although I didn't do that.  It would be helpful though to know exactly how many of the shape/color you have available for your shade.

2. Start!

Decide how you want your tags to line up.  There are tabs that protrude out and corresponding places that go in to accommodate those tabs.  I discovered when looking through my tags that most had writing on a specific side, so I chose to have the writing be on the backside.  There were enough pieces that had the writing on the front side to make the shade look interesting.  So that's how I decided which way to face the tags.


3. Heat up burning tool and make it just hot enough to go through the tag but not smoke. Carefully push the heated element through the tag in six different areas.  Two at the top, two in the middle and two at the bottom.  I did one side first, then flipped it around and did the other.  I poked the wood burning tool through the backside of the tag so that the front facing side would be without scratches or blemishes from the tool or from scraping the wax off.
I used the pliers with the rounded shape to take the plastic off of the tags after the burner went through it.  The little plastic bits popped right off.  I usually did three or four tags at a time.


4. Attaching the tags together was fairly easy once I got the hang of it.  I opened up the jump ring by holding one side and using the flat pliers to force the ring open.  Then I put the tag on and attached to the next tag and closed the ring.  I held on to the left side of the jump ring with the needle nose pliers and held the right side with the flat pliers.  Then I used the flat pliers to gently squeeze together the ring.  Sometimes I had to squeeze on two different sides to get it to come together perfectly.


5.  Continue.  

For my 9" diameter lampshade I ended up with 28 tags across by 6 rows in length.  I haven't done the last several rows on my lampshade as I ran out of a couple of colors, but if I do end up completing the shade, I figure it will end up being 9 rows.


6. The holes on the very top row will be the only ones that are actually secured to the lampshade.  They are secured by pushing through an open jump ring (as open as you can) through the shade right underneath the top wire of the lampshade.  Secure one of the tags and push the jump ring closed with pliers.  Continue all the way around the lampshade.

7.   I had to change out a couple of rows to make the diagonal pattern I had come together perfectly.  Since I purchased the lampshade after I had the tags together, I really didn't know how many I needed.  Now I'd get the lampshade first so I would not have to redo a bunch.  However, the two ends came together perfectly and there is no hitch in the pattern or colors.  It looks like one continuous pattern.

8.  Put shade on lamp, plug it in and behold your own bread bag tag lamp shade!


Monday, July 12, 2010

Don't get caught in the rain

Favorite Things


Mrs. 4444's Favorite Things Series is wrapping up today with the Lawn-Garden-Garage Edition.  I immediately thought that I wouldn't have a thing to talk about since I haven't had a yard or a garden in quite a  few years.  I had a yard when I lived in Daytona Beach, but I had a lawn service, so it was like I had a view and not a yard :)

However!  

Today as I was driving home from my outing I realized that I do have a WONDERFUL product to showcase for the Garage Edition.

I have been known to have a panic attack while driving in a rainstorm.

A serious panic attack.

Hyperventilating, sweating, crying...a danger to society.


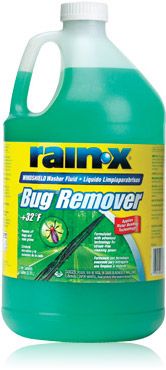
I used to put Rain-X on my windshield to help bead the water up and make rainstorms less scary for me.  The problem is that it's a real chore to put that on your windshield and I'd have to bring a ladder out to the car so I could get the whole windshield.  So, needless to say,  I didn't get this accomplished often and when a strong rainstorm would catch me during an off week, I might not have the product on my windshield.


My entire life changed the day that Rain-X came out with a windshield washer fluid that puts the power of Rain-X on the windshield effortlessly.  You pour it into the washer reservoir in your car and use it as you would any other washer fluid.

Now that I live in Florida we have some mighty heavy rainstorms nearly every day in the summertime.  Today's storm was a doozy!  There were dozens of cars parked alongside the expressway to wait out the storm and cars driving with their wipers on the highest setting still barely creeping along.  Me on the other hand, I had my wipers on normal speed and I was traveling at a safe speed (I think I was driving 40 MPH during the storm on the expressway) and was able to see through my windshield nearly effortlessly.

No more panic attacks.

I love love love this product.  I keep a jug of it on hand at all times and I only fill my washer fluid reservoir in my car with this product.  (Psst, it also comes in a de-icer for all of you Northern folks that go through winter.)  I make sure that my oil change guys don't fill the washer fluid because I don't want my Rain-X diluted - either that or I fill it up to top so they can't top it off :) 

 Have a wonderful day and enjoy the other folks who have joined up with the Favorite Things Lawn-Garden-Garage edition.

Have a Wonderful Week!!
Kristin

Tuesday, June 29, 2010

Favorite Things

Favorite Things - Pantry!

Half Past Kissing Time - Favorite Things - Pantry Edition is this weeks theme. You can join in any time and show off your favorite staples in the food category. Just head on over to Mrs. 4444's place to see who has joined in and what goodies they have in their pantry!


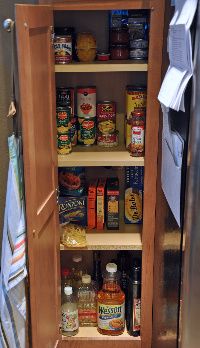
I honestly don't have a lot of food in my pantry.  The space available for my pantry is tiny so I've just gotten used to buying everything I need the day I need it.  I could obviously fill up my pantry a bit more, but then I lose things.  So this is pretty much what I keep on hand.  Flour and sugar and other assorted baking items are in the cupboard above this one.


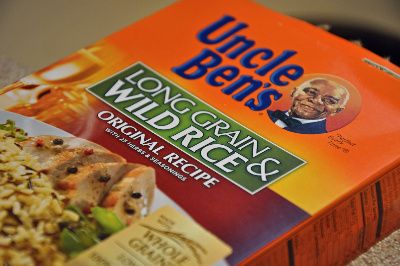
One thing that I keep on hand, always, is Uncle Ben's Long Grain and Wild Rice - Original Recipe.  You never know when you need to make some Rice Salad.

Rice Salad contains some of my favorite foods -  rice, mayo, yogurt and cucumbers.  Oh goodness, yum!

I discovered the other day that I don't have a tutorial for my Rice Salad, so this is the perfect time.  My friend, Bob, calls this Corlett - Michigan Rice Salad, but you can just call this Rice Salad. 


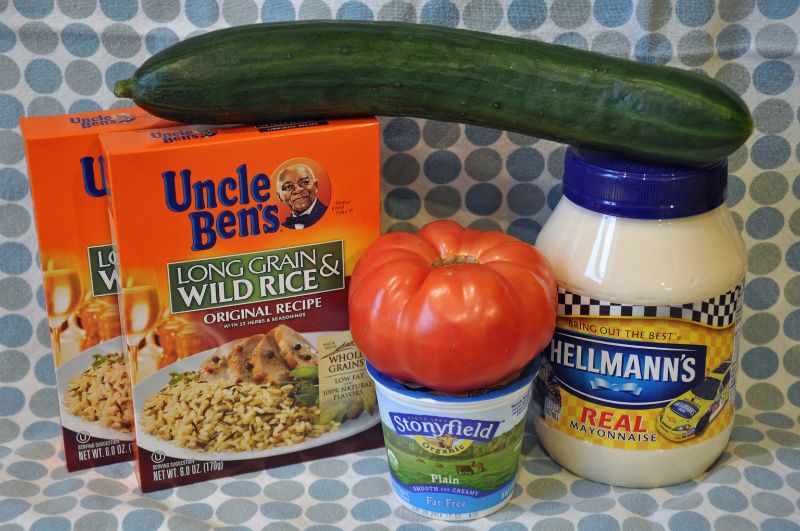
Here are the main characters of this symphony.


Two boxes of Uncle Bens Long Grain & Wild Rice - Original Recipe.
Hellmans Mayo
Plain Yogurt
Cucumber
Grape tomatoes (in this case I've used an Ugly Ripe tomato in place of the grape tomatoes - I'll explain later)

That's it!


Cook as directed on the back of the box (using the Prepare Two Boxes instructions) but omit the butter or oil.  It just isn't necessary with the way it's being served.


Get out a nice big pot and for two boxes of rice you will need 4 cups plus 1/4 cup of water.  That extra 1/4 must be needed because I've never forgotten it and I've never had crunchy rice :)


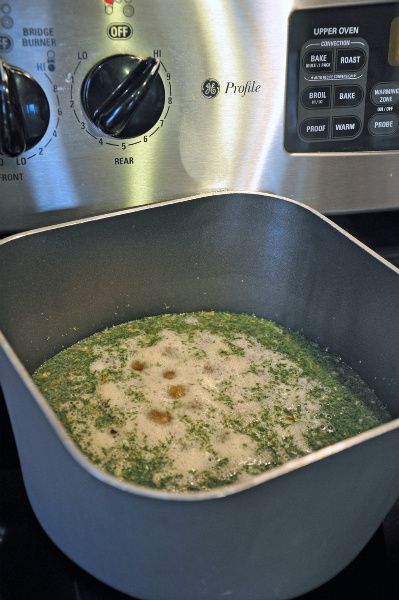
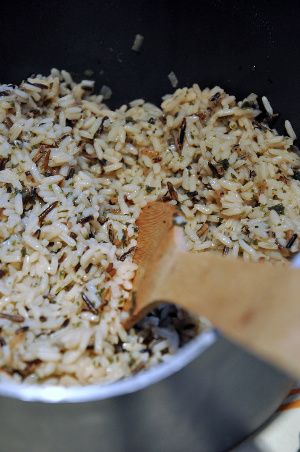
Put the rice and the seasoning packets from both boxes into the water, stir, let it come to a boil (about 3-4 minutes) and then cover when it comes to a boil and turn down the heat to low-simmer.  Set your timer for 25 minutes.  After 25 minutes come back and take a peek (it nearly always still has water in it) I give it a quick stir, put the lid back on, turn off the heat and set the timer for another 20-30 minutes.  I've left it this way for several hours before, so there is no rush as long as the heat is off.


When all of the water has been absorbed, stir in...

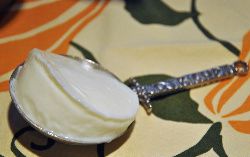
1/4 cup of plain yogurt. 
(I had an 8 oz cup, so I just used the entire thing, after I took this photo!)


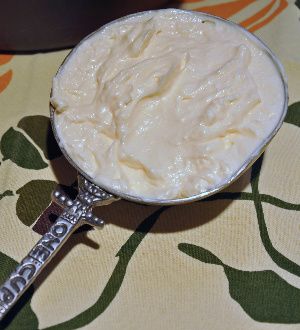
and one cup of Hellman's Real Mayonnaise.
(I took out about a 1/4 of a cup of mayo since I used more yogurt. Once again, after the photo.)


Then I taste test it several times at this point.  It's warm and creamy and so yummy.  It takes nearly all of my effort not to eat more than a few bites.


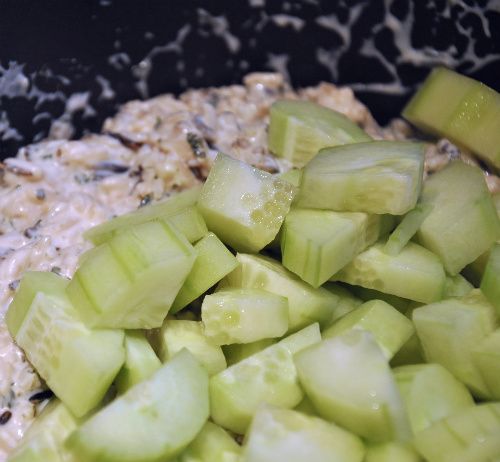
I add in the cucumbers, peeled and sliced.   You can also add in grape tomatoes at this point.  I slice them in half and stir them in.  I'm not a huge fan of tomatoes for the most part but they make the dish so colorful that I have to add them when I take this to events.

Stir everything up and put it into a container for the fridge or put it in the dish that you want to use to go to a picnic or potluck.  Sometimes I bring this salad warm - by making it just before the event or I bring it cold - by making it a day ahead.


The cucumbers will release a bit of water after a day, so the next day you may need to drain off a little bit of water, but other than that, it tastes great many days later if it lasts that long!

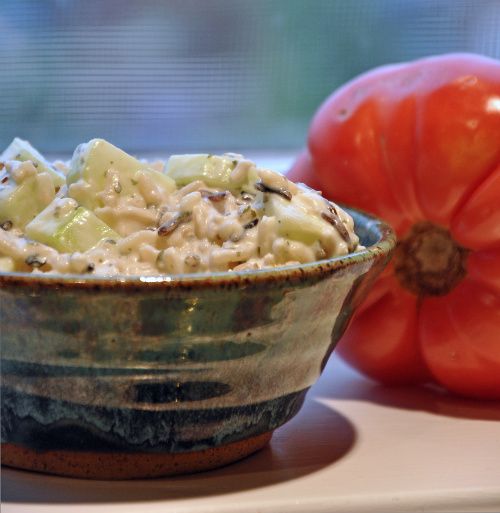
Here is the completed dish.


The Ugly Ripe heirloom tomato is looking on longingly - it obviously wants to be a part of the rice salad.  What it doesn't know at this point is that sometime next week, when it ripens up more, it will be a part of a BLT.  That's where I love a great tomato.

So my favorite pantry items are those that create Rice Salad.

I hope you have a delightful day.  Please visit Mrs. Fours for more Favorite Things!

Kristin


Rice Sald
(The Corlett-Michigan rice salad)

2 boxes Uncle Ben’s Long Grain and Wild Rice - original recipe  (Fast cook is OK, but I prefer the 25 minute kind, it has a much better texture)
1/4c plain yogurt
1.c Hellman’s Real mayonnaise
1c. cucumber peeled and sliced (I like the English cucumber - just use the whole thing)
1c. tomatoes
**Optional*** a few sprigs of fresh parsley. (I don't ever put parsley in mine, but some do,this is true.)

Cook the rice as directed, omitting the butter. After the rice has cooked, mix in yogurt, mayo, cucumber, tomatoes, parsley and serve warm or cold.


***Mrs. 4444 asked if she could use Miracle Whip instead of Mayo.  Since I don't use MW I really don't know how it would affect the taste.  My initial feeling is shouting out NO! but that's just because I love Hellman's Real Mayonnaise.  I guess try it with Mayo and try it with MW and decide which is the one for your family.

Thursday, June 24, 2010

Favorite Things

Favorite Things


My Favorite Things is in the kitchen this week. Mrs. 4444 is hosting this new blog carnival and is keeping Mr. Linky open for several weeks so that you can join in, even if you haven't arrived on the day it started. I was in Michigan when she announced that we were in the kitchen this week, so I'm just getting to it now.

I have an unusual obsession with doing dishes, so my top favorites are all dish related.


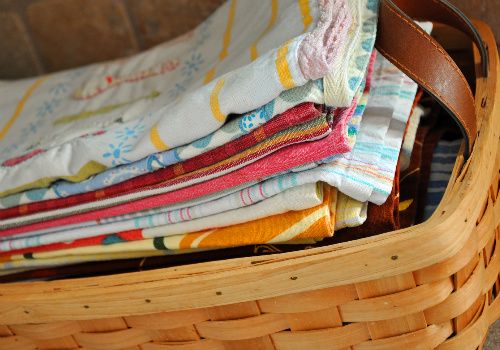
My number one all time, hands down favorite in the kitchen is my basket of dishtowels. I use at least two a day. Fairly recently I had to retire several of them because after 20 years of wonderful service, they came out of the dryer with several large holes in them. Yep, they were literally worn out.


I am allergic to nearly everything that is scented, but these two items in my cupboards have never caused me a moment of trouble. Regular, original Ivory dishsoap and Method's Grapefuit liquid handsoap.

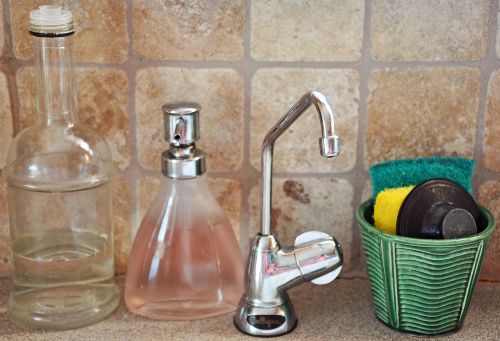
Which leads me to my next favorite thing - This little line up.


Left to right -

A recycled olive oil bottle with the pouring insert intact. I pour in my Ivory dishsoap and about 1/4 cup of water and I have an easy pouring soap dispenser.

My Umbra dispenser for the Method Grapefruit handsoap.

The faucet for my Culligan Reverse Osmosis Filtered Water. I've now had this in two homes. I love the faucet and the reverse osmosis water. This faucet sits close to the sink so you can fill up a water bottle in the sink or move the faucet to the side and keep your glass on the counter and fill it there. Love it!

My McCoy pottery planter that holds my scrubbies and sink stopper. It's pottery and it's McCoy and it's green. Three of my favorite things :)


My favorite Kitchen time saver is my antique, made from steel, won't bend even with the hardest Parmesan Cheese, grater. It is one of my best investments - $8.

I love using these little glass bowls when I'm making things that have a lot of little bits of ingredients and I want to prep everything first.


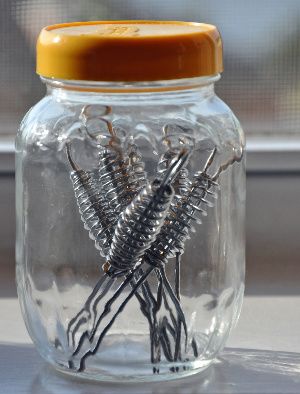
My Frenches Mustard glass jar that holds corn on the cob holders. It makes me smile each time we use this and I think it's just because of the bright yellow cap! Sometimes it truly is the little things.


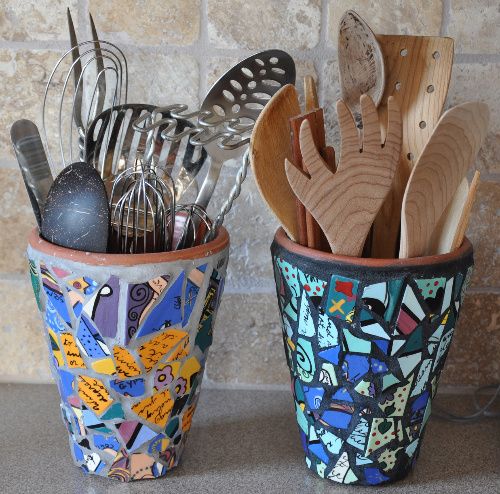
Last but not least are my mosaic planters (I have three total) that hold all of my long handled and not easy to store in a drawer utensils. I have one planter for spatualas and scrapers (not shown), Shiny Silver in the form of whisks, spoons and a potato masher and finally the planter that holds all of the wooden items.

Just like in the post I did for My Favorite Things Bathroom Edition - I have a few dozen more items that I would love to feature but I don't want to bore you :)  Thanks again to Mrs. 4444 for hosting this carnival!

Have a great day!
Kristin

Sunday, June 13, 2010

Favorite Things

Favorite Things

My blogging friend Mrs. 4444 from Half Past Kissing Time has come up with another idea for a carnival.  It's called My Favorite Things and she will periodically have different editions.  This week's edition is all about the bathroom.

I have a lot of favorite things all over the house, so I'm excited to be a part of this.  She has stated that the things we talk about must be items that we have not received compensation for from a sponsor.  Since I have never been sponsored, I think I'm pretty much free to talk about anything :)


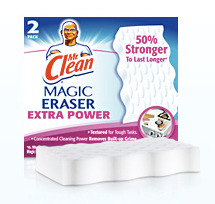
Magic Erasers - Oh my goodness, I love my MEs.  We are so close that I've been able to shorten his name to ME.  I do not use any knock offs, I use the original Mr. Clean MEs.  I do however, like the extra power MEs as they seem to last a bit longer and I can scrub a bit more vigorously and get the job done in moments.

MEs can clean a tub in a minute.  That bathtub ring can be wiped right off with hardly any pressure. If you know me, you know that I tell everyone about a cleaning product that works.   I can hardly talk about a bathroom without talking about cleaning products :)


In keeping with the cleaning product theme, I have to talk about my secret weapon.  The Absorber - a sponge like cloth that is like no other.  I love love love it.  I wipe down my shower/tub area with the absorber after each shower.   I don't spray my shower down with any chemicals, I don't ever scrub it and I certainly don't spend more than a minute cleaning my bathroom shower area each time. 

Before I turn off the water I get my absorber wet and ring it out.  I turn off the water and wipe down the walls quickly, wringing the absorber out a few times.  The shower is now dry, no streaks and no water spots.  Once a week (or two) I bring a Magic Eraser into the shower and wipe down the tub before I turn off the shower.  My shower never gets cleaned when I am fully dressed :)  What's the point when I'm in there so often each week!


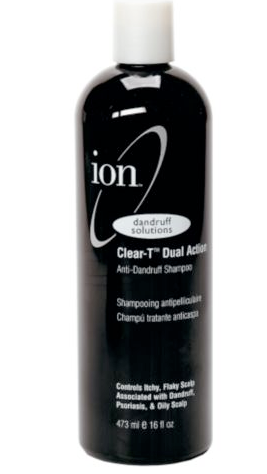
Ion Dandruff Solutions Clear-T Dual Action Anti-Dandruff Shampoo - My sisters told me about this product and it has completely made the flakes I get from psoriasis go away.  For a long time I only used the shampoo once a week or so, but once I started using it each time I shampooed I haven't had flakes.  Honestly, I never really had flakes, I had snowstorms.  The storms have gone somewhere else because they aren't here!  I am now a true blue believer in this ion shampoo.  You can find it at Sally Beauty Supply.


 I mentioned the other day that I bought a new shower curtain - I love it, too.  It's a new love, but a love nonetheless.

Oh, I could go on with all the things that I find to be favorites in the bathroom, like my turby twists, but I'll end now.  I could go on for a few days.

Thanks Mrs. 4444 for coming up with another great idea and I've always wanted to have a Julie Andrews blog carnival button! 

Have a great week!
Kristin

Sunday, July 26, 2009

Landmarks

Before this whole blog thing that I've been doing, it really never occurred to me to photograph the buildings and signs of my favorite places. Some business signs aren't even my favorite places to shop but I love the signs nonetheless. I noticed as I was driving through East Lansing, Lansing and Grand Ledge (all in Michigan) last week, that I wanted documentation of everything. I wanted to have that sign in my photographic possession before it got taken down, remodeled or went out of business.

I went to my old high school and it has been remodeled, added on to and renovated so extensively that I couldn't even find a portion of the building that held my memories.

I didn't take too many pictures of those signs because I was always on my way to somewhere else, but I got a few. I'll get more on the next trip.


This is El Azteco at the corner of MLK Blvd (which I will forever call Logan Ave) and Saginaw Hwy. I worked here for three whole days. I actually liked it, but the owner and I had a difference of opinion and I quit. I continued to eat there though. They have the best mexican food. Actually, there is this salad called a Topopo (ta-poh-poh) that is to die for... my friend Bob used to work there. I'll have her give me the recipe and edit this post to add it in. hint hint Bob. :)

 EDITED - Topopo Salad post

I had a Topopo while I was in town. We had it To Go, so it wasn't as grand, but it was great.

Look at that sign though - it's a disaster. It's falling apart, peeling and has lost so many of its bright lights, but it's perfect. The newer location in East Lansing has a totally different sign, different lettering and is crazy colorful. I love this sign in its simplicity. Black, White and Broke all over :)

Curious Books is a used bookstore on Grand River Ave, right across the street from the campus of Michigan State University in East Lansing, MI. I actually can't go into this store because I start sniffling and sneezing just about the moment I step through the door...but I've been in there once and I will never forget loving it. The sign always makes me smile and I hope it stays around for a long long time.


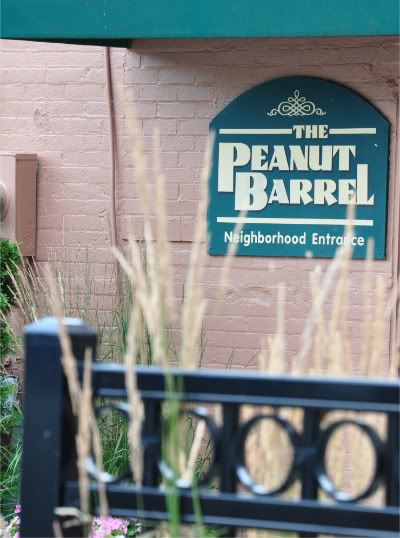
Ahhh, the The Peanut Barrel. I went to the PB with my friend Steve several times. We used to sit at a table with a pitcher of beer between us and talk and laugh and catch up. We would eat peanuts and sweep the shells on the floor.

I went to lunch at the The Peanut Barrel with a girl I'd just met a few hours earlier - and we became fast friends within minutes! (It's another Bob story -- I have hundreds)

I had several fun evenings with coworkers from our coffeehouse, The Goat, on the patio of the Peanut Barrel and I've spent many wonderful afternoons also on the patio with family and friends during the nice summer days.

I always liked the neighborhood entrance sign. Ever since the alley got a makeover, it's much more pleasant to enter this way.

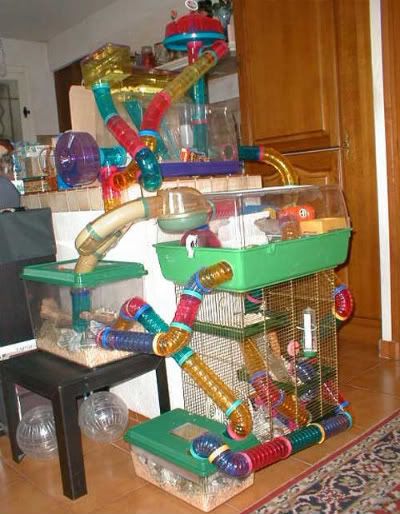
Have you ever seen something like this? It's an extreme case, granted, but this is a habitrail. A colorful, modular playplace for mice or hamsters.

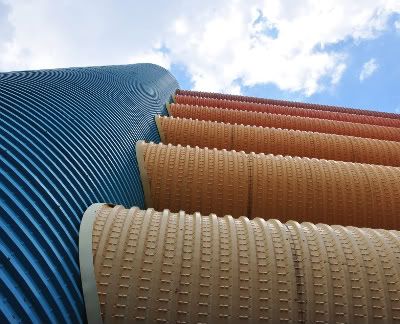
In East Lansing, MI a new parking structure was built in the 80's or maybe the early 90's, I can't find the correct time period right now - anyway the city of East Lansing asked for a unique design for a parking structure that was festive and did not use brick. What was approved and built was something that looked like the fun little habitrail above.


Personally, I LOVE the habitrail. I love the name, too.

It's so interesting to look at from all perspectives.

It brings a splash of color above the one and two story buildings that surround it and I always smile when I see the "festive" colors of the parking ramp that looks like a habitrail.

I hope to document to many other meaningful, to me, landmarks of my home town. I may even start documenting more in my current town.

Have a fabulous week!
Kristin