Showing posts with label How to. Show all posts

Friday, May 29, 2020

Bread Bag Tag Lampshade

Bread Bag Tag Lampshade
by Kristin Corlett


This is my bag tag lampshade!

Bread bag tags. An obsession?  Prolly. Not really, but I do think about what I can do with them very often.  I've been a collector of bag tags for a decade or more and have recruited many family and friends to help in the collection as well.  I just recently asked my neighborhood to help me collect so I can finish the lampshade. 

What started this whole idea of a lampshade was this photo on Pinterest.  I was completely drawn in.  I needed to make it.  I had to!  I have scoured the internet and the only thing I have found is that this was from the Concordia student design show 2006.  Just this photo, no instructions on how to make it, nothing.  In fact I don't even know if it is a lampshade.  Looks like I'm going to have to do it myself.  


This is the Pinterest photo -- I found it on flickr

I think if there had been a How-To for making the lampshade I might have started this project about 4 or 5 years earlier.  Since I had to start from scratch I spent a lot of time thinking about what would work. How much time you ask?  Years.  I have been teased by many that I was never going to do anything with all those tags.  I want to do a lot of projects and never do them, so I can see why this one would also be a lost cause.

But... it wasn't!

I had several unsuccessful attempts to get holes punched through the bag tags.  The tags are strangely brittle when a hole is punched into it and they end up splitting or breaking.  I tried heating them up so that the punch might not split the plastic, but that didn't work either.  I finally decided that a wood burning tool was going to be the ticket to small holes and no breakage.  Turns out I was right!  I spent only a few days on the project seen here.  Once I got going I was on fire!

The little bits and pieces left over

Here is how I made my bread bag tag lampshade, which by the way, most of those tags are from friends and family that have helped me collect them.  It gives me so much JOY to know that people collect these for me.  If only that they think of me as they toss that tag into the drawer or ziploc bag.  Thank you to all who have contributed to my very long term project. 


Sourcing the Tags

Tags can be sourced in a few ways - friends and family can save the tags for you and send them to you every so often.  You can find some being sold on Etsy and right at this moment there are a few rolls of blue tags for sale on eBay.  I have been told that if you ask some restaurants that use a lot of bread or veggies that come with those tags, they might save them for you.  (Think diner/breakfast places)  I had a friend in a restaurant that would gather them when she worked, but she only gave me white tags.  You may have other ways to gather the tags and I welcome your suggestions in the comments.


Finding a Lampshade

The Pinterest photo that I was using as my inspiration, had the bag tags definitely attached to white lampshade.  You couldn't see through to the other side of the shade, so it had to be laying against something.   I also realized that the shade had to be the same dimensions at the top and bottom if I wanted to do a pattern.  I also wanted the shade to be round or oval so that the tags would easily go around, instead of trying to conform to a hard edge, like a 90 degree angle.  So I found a 9" round linen shade and it turned out to be perfect.


Assembling the Tags

I had several misses when it came to punching holes in the tags, but my success came from a wood burning tool.  The tags splintered when I tried punching holes in them so I knew I needed something hot.  A basic woodburning tool had a long thin attachment that I thought would be perfect and it was.  Thankfully the tags I used for this project were big enough for my fingers to hold the tag and put holes into the sides without burning my hands and fingers.  The plastic cooled fast enough that when I flipped the tag around to do the other side, it wasn't hot anymore.


I purchased jump rings from Amazon and used those to attach the tags to one another.  


In order to keep my fingers and hands from being all cut up and sore, I used two different tools to open and close the jump rings.  I already had a pair of needle nose pliers so I used those and I purchased a pair of pliers that had a hollowed out area for the rings to fit into and make it easy to clamp them shut.   Sometimes I pushed too hard and closed the rings into a tiny spiral, but after a few tries, I found the perfect pressure to use to get them to just touch together.


Finding a Pattern

I followed the pattern that was the Pinterest inspiration, but not the colors, as I didn't have all those colors.  I used the colors that I had the most of and then tried not to repeat the same color way again as I went around.


My lampshade is 2 of the same color with a one tag shift as it proceeds down the lampshade.  It creates a nice diagonal line.  I thought about doing mostly white (since that's the color I have the most of) with the colored pieces randomly placed in the design, but I really wanted this first one to be as precise as possible.  I think my next project will be mostly white, so I can continue to play with the bread bag tags and not have to worry about running out of the colors I need.


Order of Operation

1. Separate the tags into colors. Further separate to size and shape, although I didn't do that.  It would be helpful though to know exactly how many of the shape/color you have available for your shade.

2. Start!

Decide how you want your tags to line up.  There are tabs that protrude out and corresponding places that go in to accommodate those tabs.  I discovered when looking through my tags that most had writing on a specific side, so I chose to have the writing be on the backside.  There were enough pieces that had the writing on the front side to make the shade look interesting.  So that's how I decided which way to face the tags.


3. Heat up burning tool and make it just hot enough to go through the tag but not smoke. Carefully push the heated element through the tag in six different areas.  Two at the top, two in the middle and two at the bottom.  I did one side first, then flipped it around and did the other.  I poked the wood burning tool through the backside of the tag so that the front facing side would be without scratches or blemishes from the tool or from scraping the wax off.
I used the pliers with the rounded shape to take the plastic off of the tags after the burner went through it.  The little plastic bits popped right off.  I usually did three or four tags at a time.


4. Attaching the tags together was fairly easy once I got the hang of it.  I opened up the jump ring by holding one side and using the flat pliers to force the ring open.  Then I put the tag on and attached to the next tag and closed the ring.  I held on to the left side of the jump ring with the needle nose pliers and held the right side with the flat pliers.  Then I used the flat pliers to gently squeeze together the ring.  Sometimes I had to squeeze on two different sides to get it to come together perfectly.


5.  Continue.  

For my 9" diameter lampshade I ended up with 28 tags across by 6 rows in length.  I haven't done the last several rows on my lampshade as I ran out of a couple of colors, but if I do end up completing the shade, I figure it will end up being 9 rows.


6. The holes on the very top row will be the only ones that are actually secured to the lampshade.  They are secured by pushing through an open jump ring (as open as you can) through the shade right underneath the top wire of the lampshade.  Secure one of the tags and push the jump ring closed with pliers.  Continue all the way around the lampshade.

7.   I had to change out a couple of rows to make the diagonal pattern I had come together perfectly.  Since I purchased the lampshade after I had the tags together, I really didn't know how many I needed.  Now I'd get the lampshade first so I would not have to redo a bunch.  However, the two ends came together perfectly and there is no hitch in the pattern or colors.  It looks like one continuous pattern.

8.  Put shade on lamp, plug it in and behold your own bread bag tag lamp shade!


Tuesday, November 29, 2011

Corkboard transformation


This cork board was not working for me.  I had everything off of it before I thought about blogging about it - so there is no before shot, but just imagine stuff tacked up.  I had pared down the quantity of stuff months ago, but I still never looked at it.

If I wanted this board to work for me, I needed to enjoy looking at it.  I decided that all I really needed to do was to change the color of the background and I had an easy idea.


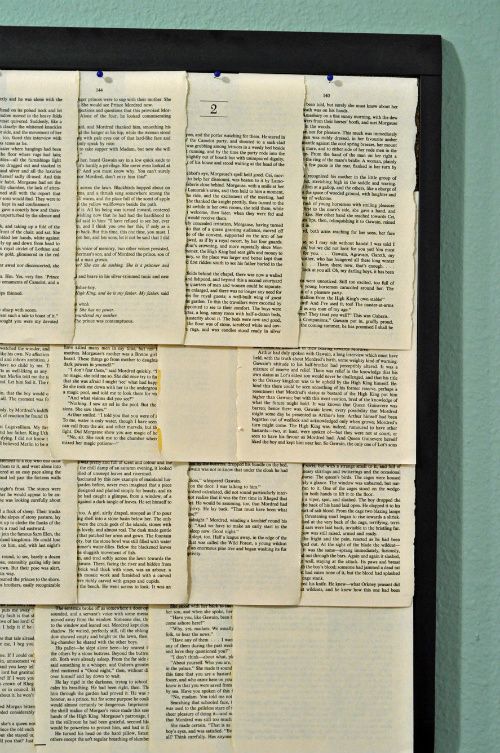
So I cut off a bunch of small strips of blue painters tape and lined them up along the side of the board.


And I started taping up pages from an old book.  Don't worry, the book wasn't valuable as reading material. 


Here is the whole board covered in pages.


The top row I taped the side that was covered up and then placed a map pin at the top of the page.


Then I placed a few items back on the board.  It's my Vision Board, so I need to actually put the things I want to focus on in my life, up on the board - but since I wanted to take a picture of the board with stuff on it, I just added a few things.  The Hello Kitty coloring book pages and the sticker envelope are from my nieces :)

I really need a storage solution for those plastic leis.  I've used them several times at our monthly potluck, so I'm not throwing them away.  Maybe just a clear box with a lid?  That might be the easiest.  Any suggestions?


I like this board so much better now.  I might put a ribbon around the edges, but I really like the simplicity of the background.  It's not dark, it has texture but it's not distracting.  I now notice the board when I walk in that room, as opposed to never seeing it before.  I think a vision board needs to be seen in order for it to do its magic.

Do you have a space that has been needing a change?  A one dollar book from a thrift store may completely change the way you feel about your space.  It sure did mine!

Have a great day!
Kristin

Friday, September 11, 2009

How to create your own blog

Just Start
Blogging for a Newbie

I'm a big fan of blogging.  I think it is a fabulous way to put my thoughts down on paper (virtually of course) along with photos, to document the world the way I see it and to invite others, some that I have never met, to join me in my journey.   One of the coolest things for me, is to be a part of the blogging community.  I've met so many people that are so incredibly interesting, talented, silly, hysterically funny and real.   I have more friends now than I've ever had before and I get a chance to get to know these folks without having to do anything but leave a comment.  I can talk to them at three in the morning and they can respond at 6am and I don't get woken up :) 

Getting started blogging is so easy. I swear, the hardest part is picking the name that you'd like to use.  The name of my blog URL is "ttelroc" which is my last name spelled backwards.  The name I've used to title my blog is "The Goat,"  explained here.  So don't worry if the URL name isn't exactly what you like, but think carefully so you don't end up with the URL "I love bacon" and you end up mostly talking about cooking vegetarian foods!  If you aren't sure if you want to spend money on a domain name, web hosting and all that goes along with that, you can find a bazillion free blogging platforms.  The ones that come to mind right off the bat are Blogger, Live Journal, or Wordpress. You can start blogging here and move your blog later if you feel you want your own domain name later. Get your feet wet before shelling out the cash :)

I use Blogger. I use one of their free templates. I don't have ads or stat counters and even though I really should figure out how to use a custom template, this way is just so easy that I haven't taken the time to learn how. I just wanted to get my thoughts and photos online and that's what I've done.

I take my camera everywhere with me. I snap photos in the grocery store, at stop lights, on a walk, at my mailbox, everywhere. I started blogging by using my small 5 megapixel camera and that worked out real well. I recently upgraded, but having a camera that isn't a cell phone (just for the quality of photos) is all that is needed. I download my photos from camera nearly every day onto my favorite online site for photos - Photobucket.

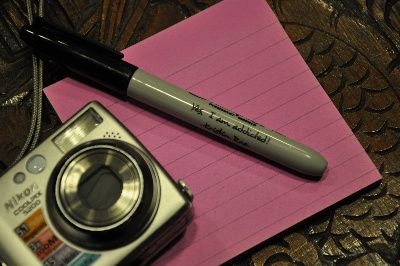
One thing that every blogger shouldn't be caught without is a piece of paper and a writing instrument. I can't begin to tell you how many times I have been caught without anything to write on when I think of a great blog topic or am part of a situation that is just too funny to forget. It's best to write it down and expand upon it later rather than try to remember what happened.

One of my friends, Leigh, writes about the places she visits, the restaurants and shops in her community and she gives tours of her town via her blog.  She gives the restaurants name, website, hours of operation, owners name - she really gives them the full treatment.  She does this because she truly wants to promote businesses that give great service, however, a side benefit is that when someone Googles about that particular store, they might get to her blog.  She may gain a new reader, just because she gave a review of a place she frequents. I've even visited a place that she reviewed and had a really great time!


Blogs can help you keep in touch with your family, help you advance your career as a fashion journalist, or can be a way to vent away the frustrations of having 4 children all in diapers and a husband who travels.  Blogs can be a place to show of your DIY skills and even sell those DIY creations. I've met so many people who say that they don't have a thing to say, but honestly, I think everyone has something to say.  Our lives are all unique and our lives are indeed fascinating.  You can even meet your blogging friends when you travel!!


One of my keys to a successful blog is to update your blog often.  If you decide to blog 5 days a week, keep up that pace.  People who start reading your blog will get used to your schedule and will keep coming back for more.  If you blog once a week or two, it's really hard to create any enthusiasm, but it can be done.  Personally, I blog every day.  I like making it a daily part of my life.  I do it mostly for me, but sharing my life with my blogging friends is something that I truly enjoy.  Thank you friends :)

Thank you to those that come here and read my stories.  Thank you to those who read my stories and comment.  Thank you for those that give me something to read each day and something to comment on just as often.  I love being a part of your community.   If you have any additions to my Just Start, Blogging for a Newbie, please post your comments and suggestions.

Thanks!
Kristin Corlett