Showing posts with label Food. Show all posts

Wednesday, November 04, 2020

Family Cookbook & Beef with Basil

A flavorful, fast, new favorite dish of ours.  Beef and Basil with a splash of soy sauce.  Serve with rice and a favorite vegetable side and you are done.      

My cast iron skillets are the best.  I have had this one for a few decades and nothing sticks to it.   I have a 14" cast iron pan that I got a few years ago, we call it the big ass pan!  It's so heavy! But it has seasoned up so nice.  


We made the beef and basil in the smaller 10" pan and put the rice in the rice cooker while I was gathering up the ingredients for the dish.   The rice was done just about the same time the hamburger was done.  The rice stays warm for a long time after cooking, so no need to try to time it perfectly.  


After this batch, we added a lot more basil to the finished dish.  Of course, I didn't take a picture of that dish, but oh well.  Just imagine more green! 


In 2016, Steve and I wanted to create a little recipe book for our families.  The idea was to include as many handwritten recipes from family members as possible to help keep the memories of those who had passed still alive in those pages.  We gathered recipes from our immediate family, scanned and deciphered as many as we could.  

We quickly discovered this was a huge undertaking for even a small book.  The recipes from grand parents sometimes had no instructions only ingredients or had just a list of ingredients and no measurements.  We had to pour through online recipes to figure out the proper measures, baking times and even modern day ingredients.  Some of the recipe cards were so stained and soiled that you knew it was a family favorite.

I called on family to send in original recipe cards, made some of the dishes and photographed them for the book but the hardest job was putting it altogether - the cards, text, photos, etc.  The brunt of that work was done by my husband.  I have to mention that because he worked tirelessly for over a month to get that recipe book gift ready.  The cookbook making site we used (Heritage Cookbook) is a membership site but gives a month free.  So we hustled our fannies to get that book perfected and done in that month!  


Of course I made sure that some of my favorites were included and I love that they are now all contained in that book. I don't know about you, but I have a hard time trying new recipes.  Even though these were family favorites, I still didn't venture past the ones I knew very often.  The other night however,  Steve suggested we try one from his brother in law.  Goodness, how did I miss this recipe?  Beef and Basil.  So easy and it sounded great. 

Well, it's in our rotation now and I really love the simplicity and flavor.  I think we've made this a dozen times already.  


Recipe:  
Ground Beef with Basil 
1½ pounds ground beef
½ cup fresh basil
2 -3 cloves of garlic
1t soy sauce 

Brown hamburger in your pan.  Add crushed or sliced garlic (I've done it with both) when hamburger is close to being done.  Then add in chopped basil and soy sauce.  Stir. 
Serve over rice. 


...for the leftovers we added in some chopped green onion.  Next time I think we'll fry them up with the ground beef, maybe near the end.


I know, you had to read all that to get to the recipe.  You probably already make a version of this, but adding in the fresh basil is wonderful.  It's so fragrant and completely makes this dish.  I made a salad and we had that, too.

Fresh basil is usually easy to find in the grocery store, if not in your garden.  Fry up some hamburger and add it in.  You will love it. 

Have a great day,
Kristin 

P.S. I had written this months ago, but never posted.  Basil was growing like crazy in gardens around the country, but now that it's November, it's not as easy to find in your backyard.  So go get some at the grocery store.  This recipe is a nice, warm meal for a chilly day.  Enjoy! 

Sunday, August 02, 2020

Mushroom, Ricotta and Gruyere Sandwich

Mushroom, Ricotta and Gruyere Sandwich


This pandemic has kept me busy in the kitchen, that's for sure.  My husband and I used to go out to eat at least once a week with friends, I was a trivia host twice a week right at the dinner hour, and there was always some reason to stop by some place else for a dinner to go.  We always seemed to have leftovers in the fridge - really good leftovers. 

Now all of that has changed.  As it has for many of you, I'm sure.   I have spent hours looking through Pinterest, Foodgawker and other assorted places looking for new ideas on what to eat.


I have a giant library of great recipes, but with my MSG and L-glutamic acid avoidance, most of those recipes have to be tweaked a lot or I need to find new recipes.  The past month I have been researching ricotta cheese recipes. I picked up a 3 pound tub of ricotta and gathered together all of the recipes that used it.  I can't have any kind of tomato sauce, so white cheese all the way around. One of my first ricotta recipes we tried was this one - Mushroom, ricotta and Gruyere sandwiches. 


The above picture shows the middle of my prep -- the mushrooms and onions are almost done, the ricotta has been stirred and is ready to be put on the bread, and the Gruyere has been grated.


I didn't find any hearty rustic bread when I went to the store, so I opted for French bread.  I cut the bread in a long diagonal to get as much surface area as I could.  The 5th piece in the photo above, the one in the middle is the end slice that I couldn't just throw away, so I added all the fixings on it.  I thought it might tip over in the baking process since the bottom was rounded, but it stayed upright. 


Here you can really see the layers.  I tried not to overwhelm the bread with the toppings, mostly so we could pick these up and eat them and not have to use a knife and fork.  

I put a big dollop of ricotta mixture on the bread, spread it to all sides then took the bread to the pan with the mushroom mixture.  I used a spatula and gathered up some of the mixture and poured it over the top.  What didn't stick fell right back into the pan.  If more was needed, I did it again.  Doing it this way saved a lot of spilled mushrooms on the sheet pan.

Next up, the Gruyere.  I shredded my own and placed little bundles of cheese on top and made sure to spread the cheese to all edges.  

I slid the tray into the oven, on convection, for about 10 minutes and the photo below was the result.  My husband and I ate these for dinner and we loved every single bite.  The warm melty ricotta softened up the top of the bread just slightly, but created a rich, warm, creamy base.  The mushroom and Gruyere mixture gave more texture to the sandwich and so much flavor!  I forgot that we weren't eating a meat based dish.  The bottom of the bread was browned and crunchy. All in all, this was a fairly quick, absolutely delicious meal.  I do wish I had some chives, but sometimes you just gotta make do.  We are absolutely keeping this on our dinner rotation. 


Mushroom, Ricotta and Gruyere Sandwich
An open faced sandwich with sauted mushrooms, ricotta and Gruyere cheeses - then baked for a few minutes to become warm and toasty.

Yields 4+ sandwiches
snack, appetizer, light dinner or even a hot brunch item

Ingredients
1 T olive oil
1 large onion, diced
8 oz mushrooms, sliced
2 cloves garlic, minced (or crushed)
1 c ricotta cheese
2 T chives, chopped
4 slices thick sliced bread (rustic style, French baguette)
1 c shredded Gruyere cheese
salt
pepper


Preheat oven to 425 degrees. Use a non stick liner or parchment paper to line baking sheet.  Or you can use a non stick cooking spray.

Slice French bread diagonally for the open faced sandwiches.  Cut the bread while the onions are cooking.

Heat olive oil in a large skillet - cook onions until translucent and then add in mushrooms.  Stir often until cooked and browned. 

Mix in minced or crushed garlic and cook until full incorporated, about a minute or so, stir constantly. Season with salt and pepper, if so desired. 

Combine ricotta with 1 tbsp. chives, then season to taste with salt and pepper. (I didn't have chives so I minced up some green onion tops)

Brush one side of the bread with olive oil, if you desire, and place oil side down.  I didn't do that for ours.
Spread a spoonful of the ricotta mixture on the bread, top with the mushroom mixture and then top with Gruyere cheese. 

Bake the open faced sandwiches for about 15 minutes, a little less if you are using convection, until the cheese on top is hot and melted.

Top with extra chives if desired.  

Serve immediately.  

adapted from: Hello Little Home

Monday, December 30, 2019

Lemon Basil Dressing - homemade


Lemon Basil Dressing
recipe by Steve Binder

makes 2 cups
2 oz container of basil leaves with small stems* finely chopped
½ cup honey
1/8
 cup apple cider vinegar
2-4 garlic cloves, crushed
1- 2 the juice of 1-2 lemons
¼ teaspoon salt
1½ c light olive oil (mild)


A local restaurant had the most wonderful lemon basil dressing and we always tried to bring home extra.  We would order extra with our meal but they rarely let us buy some to take home.  That would have been extra extra dressing and I guess that wasn't allowed.  

Enough was enough. We had to have that dressing.  My husband decided he was going to create a dressing that was as good or better than theirs and we would always be able to have it in the house! 

Since I no longer can trust premade dressings, this is made without any unnecessary preservatives, additives, MSG, nothing.  All real pure ingredients - as close as we could reasonably get. 

*I can usually find 4 oz containers of basil at our local Lucky's Market.  I take all the leaves off the big stems and leave the little stems with the leaves.  I whirl it up in the Cuisinart and divide it in half.  I usually get about 2½ ounces of chopped basil this way, so just over 1 ounce of basil per batch once it's all cleaned and chopped.

I put the 1+ ounce of whirled basil back in the Cuisinart.  Add in the lemon juice, minced garlic, honey, cider vinegar, and salt. Blend it all together and leave it running while slowly pouring in the olive oil.  The oil should emulsify the entire batch and it shouldn't separate for many days.  

The emulsifying process is new to me, so I'm not sure how long it will stay together.   But when I just whisked everything together, it stayed together long enough to pour onto my salads.  I like to put the dressing into a nice glass bottle (recycling at it's best - I use glass milk bottles or the Silly Cow hot chocolate mix jars.) I store the dressing in the fridge and when I want to use it, I let the contents warm up a bit and shake it real good to mix everything up again. If it's needed immediately I do a quick zap in the microwave.  


This is what the Lemon Basil dressing looks like when it's been just whisked together, no Cuisinart magic, and allowed to sit for a few minutes.  Just shake and pour to use.  


The photo at the top of the page shows the gifts that I'm giving to friends.  It's about 1 cup of Lemon Basil Dressing, in the Silly Cow jars.  They look so lovely, even though I can't for the life of my get the wording off of the jars.  I've tried a razor blade, nail polish remover, hot soapy water, the dishwasher - everything I can think of.  Sooo, the advertising is still on the bottles. That's the way it goes.  

I use the Lemon Basil dressing on so many things other than salad - steamed veggies, fried calamari, fish, chicken, a drizzle on sandwiches, etc.  It really is that good and versatile.


Lemon Basil Dressing
recipe by Steve Binder

makes 2 cups
2 oz container of basil leaves with small stems* finely chopped
½ cup honey
1/8
 cup apple cider vinegar
2-4 garlic cloves, crushed
1- 2 the juice of 1-2 lemons
¼ teaspoon salt
1½ c light olive oil (mild)


Prepare all of the ingredients, chop the basil in the Cuisinart, add the honey, vinegar, crushed garlic, juice of lemon(s) and salt.  Pulse until all is incorporated.  Then take the little lid off the top of the Cuisinart and slowly pour in the oil. When incorporated, stop the machine and taste test.  This is where you can add more lemon or salt if needed.  I use small lemons as they are easier to juice, so I usually need two of them. When taste testing is done, pour into desired container for storage in fridge. 

Tuesday, July 02, 2019

Taco Seasoning - homemade


Would you like a great Taco seasoning mix that's pretty easy to put together and makes ground beef (or turkey or chicken for that matter) taste out of this world?  This homemade taco seasoning mix uses all real ingredients, no fillers, just real 100% spices and herbs.  If you want 100% real ingredients, make sure you read the labels on your spices to make sure. 

Some really great things have come about because of my quest to get artificial chemicals and ingredients out of my life.  Now I rarely if ever used store bought spice packets for my hamburger, so having an envelope of taco mix on hand was foreign to me.  When I made taco meat before this, I'd add in some chili powder and salt and that's about it.  I didn't feel the need to add more to it, but honestly, it was seriously bland.

When I married Steve, he regularly used seasonings to amp up the flavor for his taco meat.  It was only natural for him to want more flavor for his taco meat than just chili powder and salt.  He did occasionally use the taco seasoning envelopes, but was always concerned about the high salt content. We enjoy cooking together so finding something we both liked was important.

It wasn't until visiting my sister in Michigan one year that I saw her recipe for a homemade taco mix, that I realized we could make our own mix.  I took a picture of it and shared it with Steve.  He reminded me that he had a homemade mix, too, but hadn't made it in awhile.  Here I had thought that a homemade mix was an "ah ha" moment!  WOW!  We can do this at home! 

Clearly, at this point I wasn't much of a cook!


As it turned out, we liked Alison's taco mix very much and have been using it ever since.  Definitely a hit!

There are a lot of ingredients, but this mix is so good it's worth it to keep all of these spices in stock.  It's not overwhelmingly salty or sweet or peppery or hot.  For me, it's just right.   I do have to admit though, I do not use the full amount of black pepper as in the recipe, but that's because I am not a pepper person.  But I will give the recipe as written and not my wimpy version.

A few years ago Steve and I created a cookbook for our families and in it we included this taco seasoning recipe.   One version is nearly equivalent to a single package of a store bought taco mix envelope and the other is the recipe x4 (times 4), so that you can have some on hand whenever you wanted it. 

The photos are of the x4. I took these photos in my kitchen just a few days ago.  Who knew it would turn out to be so gorgeous.  I put the chili powder in the dish first, so all that you can see is just the little red top right in the middle. 


Taco Seasoning
(equivalent to one envelope of store bought)

1 T chili powder
¼ t garlic powder
¼ t onion powder
¼ t dried oregano
½ t paprika
1½ t ground cumin
1 t sea salt
1 t black pepper


Taco Seasoning  x4

4 T chili powder
1 t garlic powder
1 t onion powder
1 t dried oregano
2 t paprika
2 T ground cumin
4 t sea salt
4 t black pepper

(2 Tablespoons of homemade taco seasoning = one store bought 1.25oz packet.)


*Most of the spices I use come from Penzey's Spices in Wisconsin.  We had a local brick and mortar store up until recently.  I am seriously bummed they closed but the rent just got too high for them to stay. They have an awesome online website and I can just order from there, or when traveling I look for a store.  I have no affiliation with Penzey's, I've just been buying from them for a few decades and believe they are the best. 


Thanks for stopping by.  Have a great day!
Kristin


Wednesday, November 14, 2018

Roasted Green Beans with Parmesan and Panko


Roasted green beans with Parmesan and Panko bread crumbs was a new recipe to me, but no more.  (I changed the recipe just a little from what I used in the photo.)  The absolute ease in preparing this delicious smelling and tasting side dish was so noticeable.  I had almost zero dishes to wash and I had everything in my fridge already.  The longest it took was to clean the beans, but having had that job since I was a kid, it hardly seems like a chore. Snap, toss in bin, snap, toss in bin, snap, toss...

The cast of characters.  Green beans, panko crumbs and Parmesan cheese, garlic powder, salt and a sheet pan with sides.  I purchased fresh green beans today and the remaining ingredients were already in the house.


I broke off the stem end of the green beans, no sense breaking off the other as it's just fine to eat that little tail.  I washed them thoroughly and laid them out on the sheet pan with a dishtowel over the top and dried them as best as I could.   Drying the green beans makes sure the beans roast and not steam.  It also helps the oil stick to them.


Here's my Parmesan Cheese, I always keep some handy as it's a versatile ingredient and it keeps such a long time in either the fridge or freezer. I have shredded, ground up (like above) and whole wedges.  A shape for any purpose!

 I recently purchased an Oskar chopper.  I used one when I lived with a boyfriend and when we went our separate ways, in 1994, he gave me Oskar.   When I separated from my husband in 2013 he asked for Oskar and I thought, Sure!  It's from an ex-boyfriend, I might as well have the soon-to-be ex-husband take it.  Maybe it will be good mojo to pass it along.

HOWEVER, I really, really missed him!  Oskar, that is.  I was really regretting giving him away.  When I started having to cook more and more at home I was almost in a panic that I didn't have the versatility of Oskar.  Since giving Oskar away I had used several different kinds of small electric choppers and for me, they didn't work like I wanted them to.  When I met Steve he had a Cuisinart Food Processor, the large one, the awesome one and I really enjoyed using it, but I really missed having a smaller version for smaller tasks.


I went on a mission.  I did a little research and you know what?  Those Sunbeam Oskars are very much sought after.  The Oskar hasn't been made in quite awhile probably because these devils don't die!  Seriously, how many appliances have you had for several decades? There's one on eBay that's over $300.  I certainly wasn't going to pay that price.  Searching wasn't too difficult as there were several online for sale, as well as a bunch of parts available to fix old ones.  When it was all said and done I paid about $60 for the whole shebang including shipping.

 All of this talk about Oskar was just to say - the Parmesan that's in the bowl was chopped in the Oskar.  I didn't do anything but chunk it up and put it in and whirl.  Small little pieces of parm, easy to use, store, refrigerate and freeze.

before roasting
after roasting

Back to the roasted green beans.  I roasted them and then  immediately plated them for us.  I wanted them right off the sheet pan.  No waiting.

The Panko was a little salty and crispy because the Parmesan melted right into it.  The green beans were still a bit crunchy and roasting always brings out such a different flavor than just plain boiling.  Roasted, rustic, nutty flavor with some crunch.

YUM!
You have to try this.

Come back and let me know what you thought of it.


Roasted Green Beans
with Parmesan and Panko

Ingredients
1 lb fresh green beans, stemmed and washed
1 T olive oil
2 T grated  Parmesan Cheese
2 T Panko bread crumbs
½ t salt
½ t garlic powder


Instructions
Preheat oven to 400° F

Combine all ingredients in a large mixing bowl; toss to coat. If you need more olive oil, add in just enough.  You don't want the entire dish to be too oily.

Spread green beans on a large baking sheet with sides.

Roast for 15-20 minutes; turn the beans halfway through.

Eat as soon as possible, they cool off quickly but don't worry, they are good cooled off, too.


Have a great day!
Kristin

Monday, November 05, 2018

Hungarian Potato Soup

Hungarian Potato Soup


This potato soup recipe has been in my family for as long as I can remember.  I know that my Mom added the cauliflower to the soup, probably to make it a bit more healthy.  It may make it healthier but it gives the soup a great crunch.  I love it.  My husband wasn't too thrilled about having cauliflower in the soup, but he loved it too.  The soup doesn't taste like cauliflower, I promise.


 Here are most of the ingredients that you need for making the soup.  My goal in making food is to use ingredients that have as few additives as possible.  This is so I can minimize the free glutimate acid and MSG that is found in so many prepared or manufactured products.

The Daisy sour cream is made with one ingredient - cultured cream.  Compare that list to others and you will see a huge difference.  Fairlife 2% Milk also has very few ingredients and no thickeners.  Tabasco Sauce is made with peppers, vinegar and salt.
For having several manufactured products, it's a great soup for me.

The onions are being cooked in butter

This soup is as pure as it can be and still be more than just potatoes and water!   The photo below is the mixture of sour cream, paprika, salt, and flour.  I added the Tabasco in there as well because I knew I was going put it in and I wanted it to cook in a bit.  You can add it later or not at all, it's totally up to you.

Sour cream and the spices

I used flour in today's soup but when I take it to potluck, I always make it with corn starch to make it gluten free for those that may have a gluten sensitivity or Celiac disease.

This soup cooks up pretty quickly, doesn't need to simmer for very long at all before it's ready to eat.  It's just as good the day it's made as it is the next!


Hungarian Potato Soup
½ c onion
2 T butter
4 med potatoes, diced
½ t salt
1c water
¼c flour
1½ t paprika
1c sour cream
2½c milk
½ head of cauliflower, chunked into bite sized pieces
Add Tabasco and garlic powder as needed

Cook onion in butter until tender - add potatoes, salt and the water.
Cover and cook 15 minutes or until tender.
Blend four, paprika and sour cream until smooth.
Stir into potato mixture.
Add cauliflower and milk.
Heat to boiling while stirring.
Let simmer until cauliflower is tender.
Taste and add Tabasco sauce and garlic powder as needed.
Serve hot with a sprinkle of paprika on the top of the soup as garnish.

ENJOY!

Have a great day!
Kristin

Saturday, November 03, 2018

Little Cookbooks from the Michigan State University Library


Do you ever look for the original recipe or the old fashioned way of making something?  Sometimes recipes get so manufactured or low fatted, sugar freed and skinny that it in no way resembles the original dish. 

In my quest to become MSG free and eliminate nearly all processed foods, I am constantly looking at vintage recipes.  It's back before Cream of Mushroom soup that the cook in the house made everything from scratch.  (Obviously that's not entirely true, but it's certainly easier to find an entire cookbook with everything made from scratch from that era.)

For example, lately I've been looking for a cake recipe to take to one of my monthly potlucks.  Just a plain cake to add to make an "easy" dessert.  Those ubiquitous dump cake mixtures are pretty good, but I can't have the regular cake mixes anymore.  I have found plain cake recipes, that aren't vintage, but they aren't in the middle of an old cookbook.  I'm having more fun looking at the old photos, I bet. 


Front cover of Kate Smith's book

All the photos in this post are from the MSU Library - Kate Smith's Favorite Recipes.  It's one of the small cookbooks, just 48 pages long, from the Brocker Collection.  

Lately on Pinterest I have been finding a bunch of vintage cookbooks and many of them have linked back to Michigan State University.  MSU has an extensive digital library of cookbooks and I keep finding more and more of them.  The books have been scanned from the front cover to the back.  If the books aren't useful to you, they sure are an interesting look at life in that time period.  I've been entertained for several hours on the ins and outs of how to dig cellar and store crops for winter.  After reading that one, I know for sure that I wasn't cut out for that life! 

Back cover of Kate Smith's book

sponge cakes

Brownies, economical cupcakes and more

If you would like to see what other digital subjects are available at the MSU digital library, you can search here.

I haven't found the perfect cake mix yet, but I'm sure it won't be long.  I'll be sure and tell you all about it when I do.  For now, I keep all of my vintage handwritten recipes and vintage cookbooks on my Recipes board in my Pinterest.  You are more than welcome to peruse and pin at your leisure.  

If you have any leads on some awesome digital cookbooks let me know!  

Have a great day!
Kristin


Thursday, November 01, 2018

Mini cupcakes


Have you ever gotten a pack of those mini cupcakes?  Our local Publix Supermarket has these all the time and usually around a holiday they come decorated in the current theme.


At our monthly potlucks, someone always seems to bring a pack of these and they are so good -- but I can never figure out how to get them out of the plastic without picking up the whole thing or getting my fingers into all of the surrounding cupcakes.

I know it may not seem like a big deal, but I was thrilled to pieces when I discovered how to pick them up!  We had a pack of these mini cupcakes left at our house from our Halloween party last weekend.  We had so many desserts that this little mini pack was totally ignored and wasn't opened.

So here I was, at home and looking for a treat and those mini cupcakes were just staring at me.  Since I was home and not in public, I was able to make a mess trying to get the first few cupcakes out of the plastic container.  At some point, after dinner a few days later, I had a fork in my hand while going by the cupcakes.  I realized I could stab my fork into one and pull it right out!!


I swear lightning struck.  The cake came right out.  I didn't have to try to push from the bottom, touch other cakes or get frosting all over my knuckles.  It was pure genius.  Even if it took me three tries to spell genius, it was a genius move.  Trust me.

The next time we have potluck - I'm going to put a couple forks into the mini cupcakes and I bet it will catch on and there will never me any leftover minis.

Enjoy your day!
Kristin

Tuesday, October 30, 2018

Southern Pecan Bread

Kristin's homemade Southern Pecan Bread

Pinterest can really get you into some deep spirals of craving and the past few weeks I have been craving pecan bread.  I just looked at one recipe and the next thing I know Pinterest is showing me every form of pecan bread, pecan pie, pecan bread pudding, pecan cookies and so on until I absolutely HAD to make one of them.  I picked two recipes for a sweet pecan bread and proceeded to bake.

The photo at the top of the page was taken on my patio and was the result of the recipe below.  I am pretty sure that top piece never made it to the freezer.

The first recipe I made was very good.  Steve and I ate it up.  Then I froze the rest of what was left that night so as not to eat the whole thing.  I thought the bread was real good but it sort of stuck in my teeth a bit and seemed a bit chewy.  None of it was bad, because the taste was fantastic, but I thought I'd try another recipe to see if maybe a small shift in ingredients could make it even better.

Well, I'll tell ya, this recipe, below, is some fine pecan bread. It doesn't stick in my teeth, has a nice chew but doesn't need any effort to eat.  It has fewer pecans than the first bread by just a little and the sugar ratio is different.  It is so much better in my opinion.  I bet this would be real good warmed up with a scoop of vanilla ice cream.   Hmmm, why didn't I think of that earlier?

I certainly picked a winner from the hundreds of recipes on Pinterest.  The recipe states that it's good sitting on the counter for up to 3 days.  That's all well and good if you can keep out of it!  It might not last that long.  This bread freezes beautifully, too.  Make now, eat at Thanksgiving!

No sense keeping you all waiting -- here is the recipe!


Southern Pecan Bread
adapted from Cookies & Cups recipe
350°F - 9x13 baking dish

Ingredients
1 1/2 c light brown sugar
1/2 c granulated sugar
1 1/4 c butter, melted
4 eggs, lightly beaten
1 t vanilla
1 1/4 t kosher salt
1 1/2 cups flour
2 1/4 t baking powder

1 1/2 c chopped pecans

Instructions
Preheat oven to 350°F. Spray a nonstick cooking spray into a 9x13 baking dish.

In a bowl combine both the sugars and butter, mixing on low until combined with either a stand mixer or hand held mixer. Add in the eggs, vanilla, and salt and mix at a medium speed for 1 minute until smooth.

Turn mixer to low and add in the flour until just combined. Fold in the pecans by hand.

Transfer mixture to your prepared pan and bake for 30-35 minutes, or until the center is just set and the edges are lightly golden.

Cool completely in the pan, and then cut into squares.

NOTES
*Store, airtight at room temperature for up to 3 days.
*If you want to use self rising flour - Omit salt and baking powder, then add back in 1/2 teaspoon kosher salt.
*If you want to make several batches, line your baking dish with parchment paper to lift right out of the dish to use again. You could also freeze the whole batch this way, too.  Lift out, wrap in foil, freeze.


Let me know if you try this recipe. 
Have a great day!
Kristin

Monday, February 12, 2018

Shredded Chicken

Photo by Hello I'm Nik on Unsplash

Do you cook and freeze chicken in batches?  I do.  Those buy one get one deals that come around every so often are just too good to pass up. Anyway, I cook up about 6 - 12 chicken breasts in my pressure cooker and then I usually shred all of it.  Most of the time I buy chicken breasts with skin on and ribs because the meat is so much more flavorful when cooked altogether.  The stock is real good, too.  I keep that, freeze it in ice cube trays and use later.


Shredding chicken is one of my least favorite tasks.  It takes forever, even when it's hot as heck just out of the pot, and my poor hands are so sore after shredding half a dozen chicken breasts.  I usually clear off a spot at the dining room table and set up a little shredding station so that my back doesn't hurt from standing, hunched over the counter.

I've seen on Pinterest that by using an electric hand mixer, a couple chicken breasts can be shredded in seconds.  If you know me, you know that I probably have no idea where my hand mixer is and that I like to do things the hard way.  I wash all my dishes by hand, for crying out loud, when I have a perfectly good dishwasher just sitting there in the kitchen.

Well, over the holidays I had my electric hand mixer out from the dungeon and I had a dozen chicken breasts that I needed to shred.  I was exhausted and just wanted to be done with the day.  So what a better time to try out the too-good-to-be-true Pinterest story that says chicken can be shredded in seconds.  Oh my goodness!  It was crazy wonderful!


The photo above is 6 chicken breasts and it took me approximately 30 seconds to shred all of them, at the same time.  The chicken was cooled, not cold.  The beaters on the mixer were hardly even messy.  It took me just a few moments to wash them.  All of the things that I thought would make getting out the electric mixer a hassle was erased when the task was finished. No mess, fast clean up, and 30 seconds to shredded chicken!

I honestly can't believe I waited so long to try out such an easy shortcut.  Now that you know, don't you wait so long to try it out. If I only had ONE chicken breast to shred, I would get out the electric hand mixer.  It is seriously that wonderful.

Shredded chicken is so good in Mexican Chicken and Chicken Salad.  I have written a blog post about each of them.  I make chicken salad as often as I can, so I keep plenty of shredded chicken in the freezer.

Enjoy!

Have a great day!
Kristin

Sunday, January 28, 2018

Bacon and Green Onion Pasta Salad


We've been making this pasta salad for a few years now and it's absolutely delicious.  In the original recipe it calls for a dozen slices of bacon.  I commented on the blog post to see if it was a mistake, as I couldn't imagine anything needing 12 slices of bacon but I was assured that it was not a mistake.  Steve and I use thick sliced Wright Brand Bacon and I know I haven't used a dozen slices, but I bet I've used 9, because that's what my tray holds.  OK Maybe only 8 slices makes it into the pasta, I'm sure we sample a piece.

Eating has become a chore of late, for me anyway, because I have discovered that I am extremely sensitive to MSG and its counterpart Free Glutamic Acid.  I will be talking more about it in future blog posts, but for now I'm putting it out there -- this dinner, however, is nearly perfect.  We added some crunchy veggies on the side, extra cucumbers, some sweet peppers and fancy tomatoes. The pasta has balsamic vinegar in it and can be a trigger for some people as it's fermented, but so far I haven't had any problems with it, except when it's been heated.  So if you have a sensitivity, do not mix the vinegar into the hot pasta -- let the pasta cool first.


Bacon and Green Onion Pasta Salad
adapted from Erren's Kitchen original recipe


  • 9 strips applewood smoked bacon, thick sliced, cooked and chopped
  • 1-16oz box Cavatappi pasta, cooked and drained
  • 3-5 green onions, sliced into rounds
  • 1 cup chopped cucumber
  • 1/2 teaspoon mustard 
  • 2 Tablespoons balsamic vinegar
  • 1/2 cup mayonnaise plus more to taste, if necessary
  • 1/2 teaspoon salt
  • Freshly ground black pepper, if desired


In a large bowl combine the bacon, pasta, green onions and cucumber.  In a small bowl whisk together the dressing - mustard, balsamic vinegar, mayonnaise, salt and pepper.  Pour the dressing over the salad and stir to combine.  Cool in the refrigerator a few hours before serving.   Store in the fridge, covered for up to three days. 

Have a great day!
Kristin

Monday, April 27, 2015

Spinach and Bacon Quiche


Thanks to Pinterest, I finally made my first quiche.  I kept seeing all of these great recipes for quiche, but I was intimidated.  I thought it was going to be difficult for some reason and I just never had the nerve to make it.   My eyes finally had had enough of the beautiful quiche photos, I had to make one and now.  I looked in the fridge and realized I had nearly everything I needed to make a quiche.  All I really needed was the pie crust.

I asked Steve if he liked quiche and he sort of gave me a "well it isn't my favorite but OK" kind of look. So with that burst of enthusiasm from him and my apprehension to make it, I was off to the store to buy a pie crust and make us some dinner!

It turns out that quiche is pretty fool proof!
I didn't have whole milk, so I used what I had - half and half and 2%.  I didn't have any mushrooms, so I used onions.  I didn't have Parmesan cheese, but I had Dubliner.  Quiche is a good way to use up leftovers.

I baked the quiche for 50 minutes and it was so beautiful - it rose up like a souffle about three quarters of an inch over the top of the pie crust.  The top was golden brown and creamy yellow.  I pulled it out of the oven and let it cool down.  Then the quiche settled.  It wasn't as beautiful as the big puffy, just-out-of-the-oven version, but it looked good.

I served us each a quarter of the pie.
We studied it a bit before biting into it.
Then tentatively we each took a bite.

OMGoodness!
It was heavenly!
Steve loved it.
I loved it.

We ended up eating the whole thing that night!
We were stuffed to the gills!
(We've since learned to only eat half and save the other half for lunch or dinner the next day or so)

I combined several different quiche recipes into this one with lots of variables.  It really is foolproof.

Here is the Kristin version of

Spinach and Bacon Quiche


I premade 9 inch frozen deep dish pie crust

5-10oz frozen spinach, thawed, drained, squeezed nearly dry
1 or more of the following
*fresh mushrooms, sliced, sauteed
*sliced green onions
*onion, sliced, sauteed
*chopped fresh dill
*1 teaspoon minced garlic (or chopped roasted)
2 slices bacon cooked and crumbled

5 large eggs
1 cup whole milk - (or 1/2 cup Half and Half, 1/2 cup 2% milk)

1 cup shredded cheese (Cheddar, Gouda, Mozzarella, Swiss)
1/3 cup grated Parmesan cheese or Dubliner
salt and pepper, to taste


Preheat oven to 350 degrees
Place frozen pie crust on a baking sheet in case of overflow and to make the transfer in and out of the oven more stable.

Whisk together the eggs, milk, and the seasonings you decided to use, as well as the salt and pepper.  Set aside.

Blot and squeeze the rest of the water out of the thawed spinach. Spread spinach on the bottom of the frozen pie crust. Add the mushrooms and onions and then 1 cup shredded cheese. Place the bacon crumbles on top.  Pour the egg mixture over everything leaving 1/4" to the top of the crust. Top the whole quiche with the 1/3 cup Parmesan or Dubliner cheese.

Bake the quiche until it is golden brown on top and the center is no longer jiggly. Depending on your oven the time will vary.  Mine takes 50 minutes.  Allow to cool for 5 minutes before slicing and serving.

The quiche makes great leftovers.


Enjoy!
Kristin


KNS Gear has not only created designs for organ donation and transplant, but we also are coming up with designs that are just for fun.  This is one of my favorites.  Of course, I'm not the reason why we are late, if we are - that's all Steve's fault!  Or at least that's what I'm saying since he's not editing this!

The words "I'm the reason we're late" with the hint of a clock behind the design.  You can see the first and second hands as well as the 12 and 3.  The design will look great on nearly every color shirt.  Be sure to check out the new designs.  We're adding new items weekly.

Tuesday, April 14, 2015

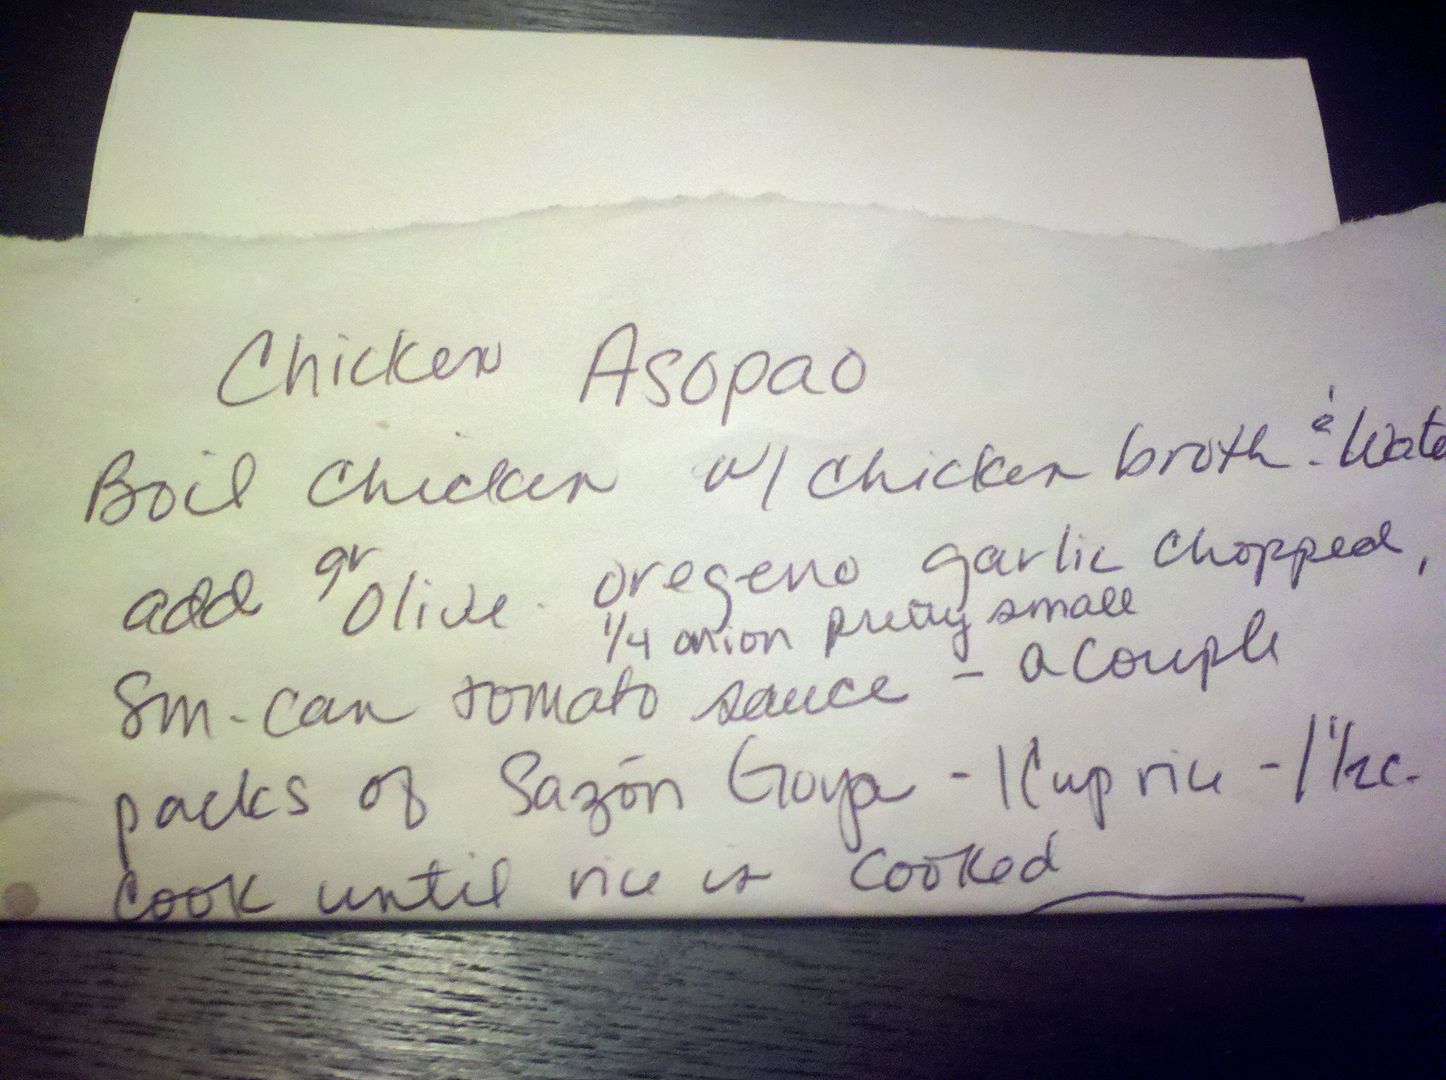
Chicken Asopao - aka Sazon Goya


I had never used Sazon Goya spice packages before, so when I was introduced to this recipe I ended up nicknaming it Sazon Goya - Also, I wasn't exactly sure how to say Asopao.  Now that I know there are a dozen different Sazon Goya combinations, I see the error of my ways.  Too late though, this dish is our Sazon Goya.


My Mom and I visited with a cousin one weekend and she made us this delicious meal.  I think everyone in my family likes soup - everyone but me.  I like the occasional creamy soup, but broth soup...ugh.  I'll tolerate it.  So you guessed it, she made us a broth soup.

Oh Goodness!  This stuff was so good!  It was so good that I asked for the recipe.  It was so good that I came home and made it the next day.  It was so good that I now make it at least once a month.  It was that good.  Thank you dear cousin for making this for us.

The first thing you do is get yourself a whole young chicken at the grocery store.  I made the mistake of getting a hen one time - I wasn't paying attention and that was one tough chicken!
Don't make that mistake.


Get out your soup pot, put in the chicken, add water and chicken stock, if you'd like.  Then give the chicken a good boiling.  I usually boil the gizzards and neck along with it, to give it more flavor.  When the chicken is cooked, take it out of the pot to cool and fish out the gizzards.

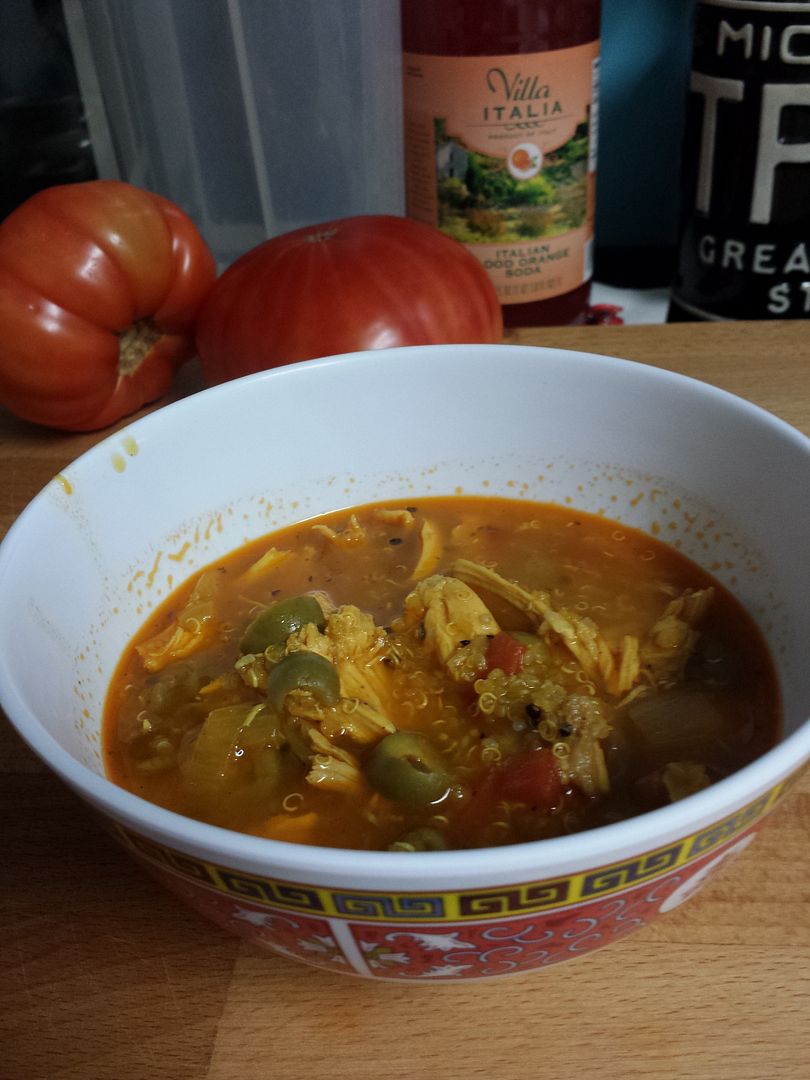
 I usually let the chicken cool for an hour or so and then I take it all apart, shred the chicken into bite size pieces and add it back to the pot.  Turn the heat back on because you've waited the sufficient amount of time so as not to burn-your-fingers-to-a-crisp pulling apart the chicken.  Add a chopped onion, a jar of sliced green olives and all the liquid, a small can of tomato sauce and Sazon Goya to taste.  Bring the soup to a boil and add in 1 - 1 1/2 cups of rice or quinoa. The soup is done when the rice or quinoa is done, about 30 minutes.


My cousin used rice and I did the first couple of times, too.  The leftovers though became more like casserole than a soup.  The rice had soaked up all of the broth.  So I used quinoa and found that it did not continue soaking up the broth and stayed a lot more soupy.  We now use the quinoa all the time.


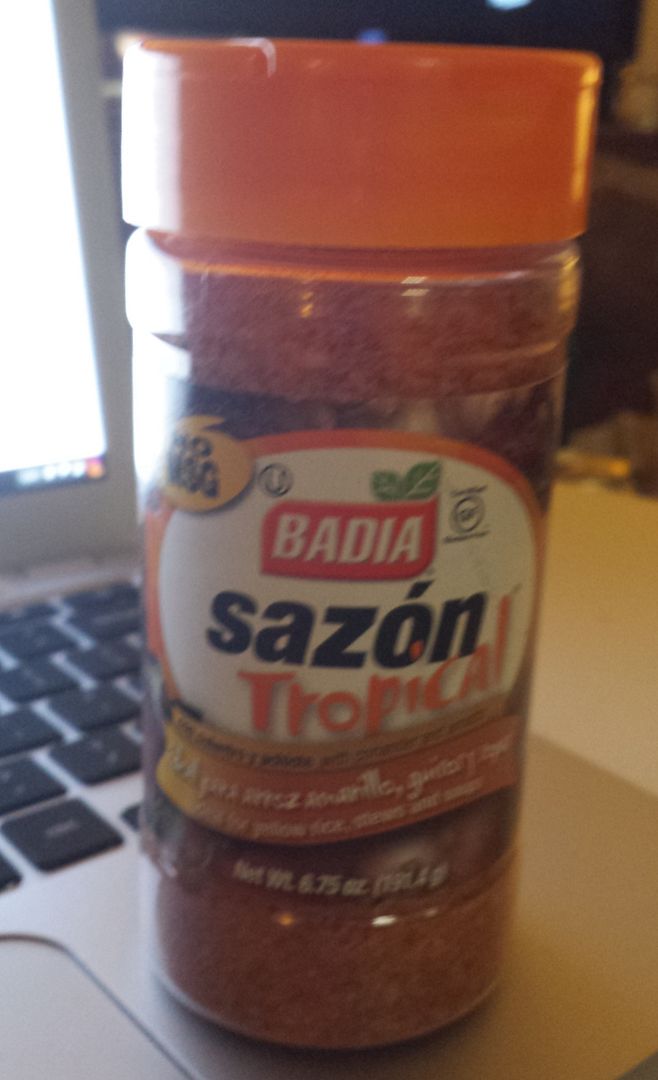
The last change that I made was to the Sazon Goya.  I discovered that the regular Sazon Goya has MSG in it.   I sometimes have issues with MSG so we decided to trade it out for another spice mix without MSG.

The original


The trade

If you don't have a problem with MSG, then I'd get one of the Sazon Goya spice mixes just because that's the way this was introduced to me.  The one we used was the Coriander and Annatto.  The Badia, no MSG was their Sazon Tropical.  Both are delicious.


Chicken Asopao


1 young chicken
water and stock to cover chicken
1 small jar of sliced green olives plus the liquid
1 onion chopped
2 cloves of garlic chopped
sm can of tomato sauce
2 pkgs Sazon Goya or 1 - 2 T. Sazon Tropical
1 - 1 1/2 cups rice or quinoa

Boil chicken in a large soup pot.  Cover with water and chicken stock.  When the chicken is cooked, take out, bone and shred.  Put the shredded chicken back in pot.  Add in the green olives and the liquid from the olives, the chopped onion and garlic, a small can of tomato sauce and the Sazon.   Bring the soup up to a boil and add in the rice or quinoa.  The soup is done when the rice/quinoa is fully cooked, about 25-30 minutes.

Serve it up!


Let me know if you try this.  It's great for a crowd and also for leftovers.  We usually freeze about a third of what we make for later in the month.

Have a great day!
Kristin

Wednesday, May 21, 2014

Crockpot Mexican Chicken with cream cheese


Food has always been a part of my life, but now it's become something other than just getting something on the table.  My boyfriend Steve and I cook together most of the time.  That's something that my ex-husband and I rarely did, so it kind of made cooking a chore.  Steve and I look up recipes, talk about them and stand in the kitchen together creating them.  He's got a huge list of potential dinner ideas from all of the dishes we have made together this past year.  If we find something interesting that neither one of us has made before, it doesn't matter!  We forge ahead anyway.  We are comfort food people, not necessarily adventurers when it comes to our dinners.  We make things like salisbury steak, pork chops with grilled onions, meatloaf, flatbread pizzas, leafy green salads chock full of veggies and kielbasa and sauerkraut.   Steve has introduced me to Vietnamese and Thai food (when we go out to eat) and I have introduced him to high quality bacon, for the best BLTs at home!  It's win win, that's for sure, and we have such a good time.

Some of the things we find that we'd like to try are of a quantity that's too much for just the two of us, so the potlucks that we go to each month are the times when we pull out the crowd pleasing meals.  Usually, these crowd sized recipes are untried -- yes, yes, we experiment on our friends.


At our latest potluck we made it a Mexican theme.  I am a fan of Mexican food, but I don't like anything hot, so I have to carefully order my food at restaurants.  No hot stuff, no salsa either.  My goal for our potluck was to make something that had  great flavor, tasted like it came from a Mexican kitchen and would still be stove hot and tasty when everyone finally got ready to eat.  If you want something to stay hot for a potluck, it's gotta be made in a crockpot.

My Mexican food repertoire includes chips and cheese, chicken nachos, chicken taquitos and tacos.  Not really innovative or exciting, right?

What does a girl do when she's short on talent?

Google!

Pinterest!

I searched both for "Mexican crockpot meal" and only found a few that fit my no-hot-stuff, no-salsa requirements.  The one I ultimately chose seemed really iffy for some reason.  I couldn't quite put my finger on what I thought was wrong with it, but I was just sure it was going to be bad.

This is real good news to all of you that have stayed with me this far into my ramblings, huh?!

As I mentioned earlier, I do tend to bring brand new, never been tested recipes to potluck.  Thankfully I have only had one fail in all the years, but I was positive this was going to be fail number two.

In actuality, we were lucky to bring home any at all!


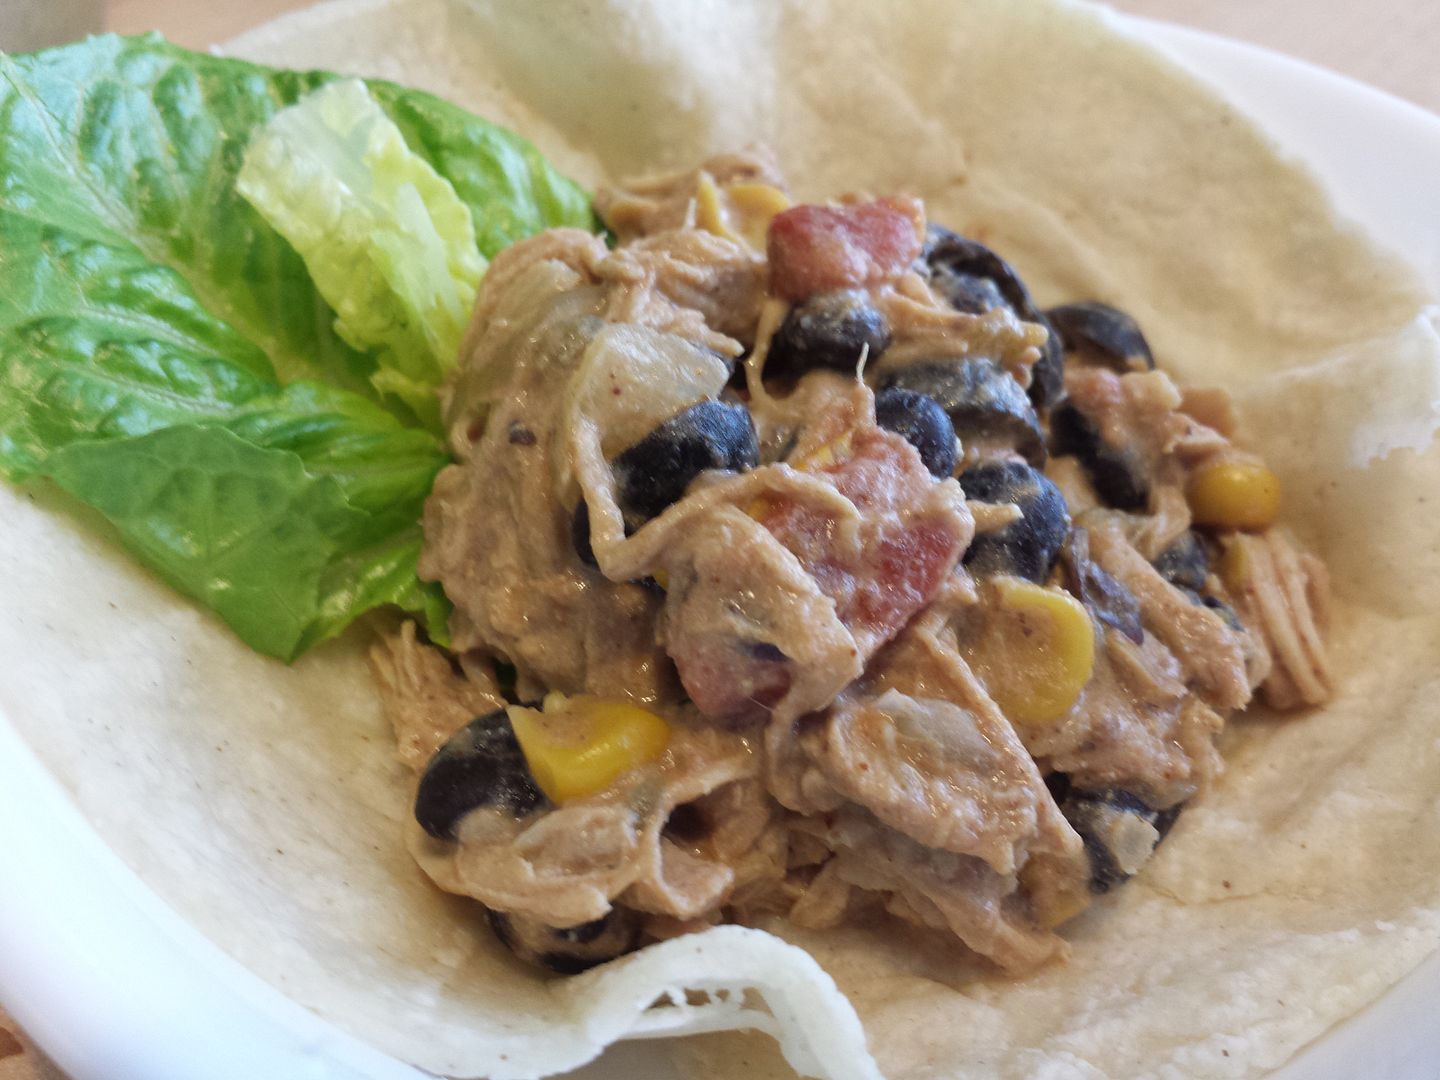
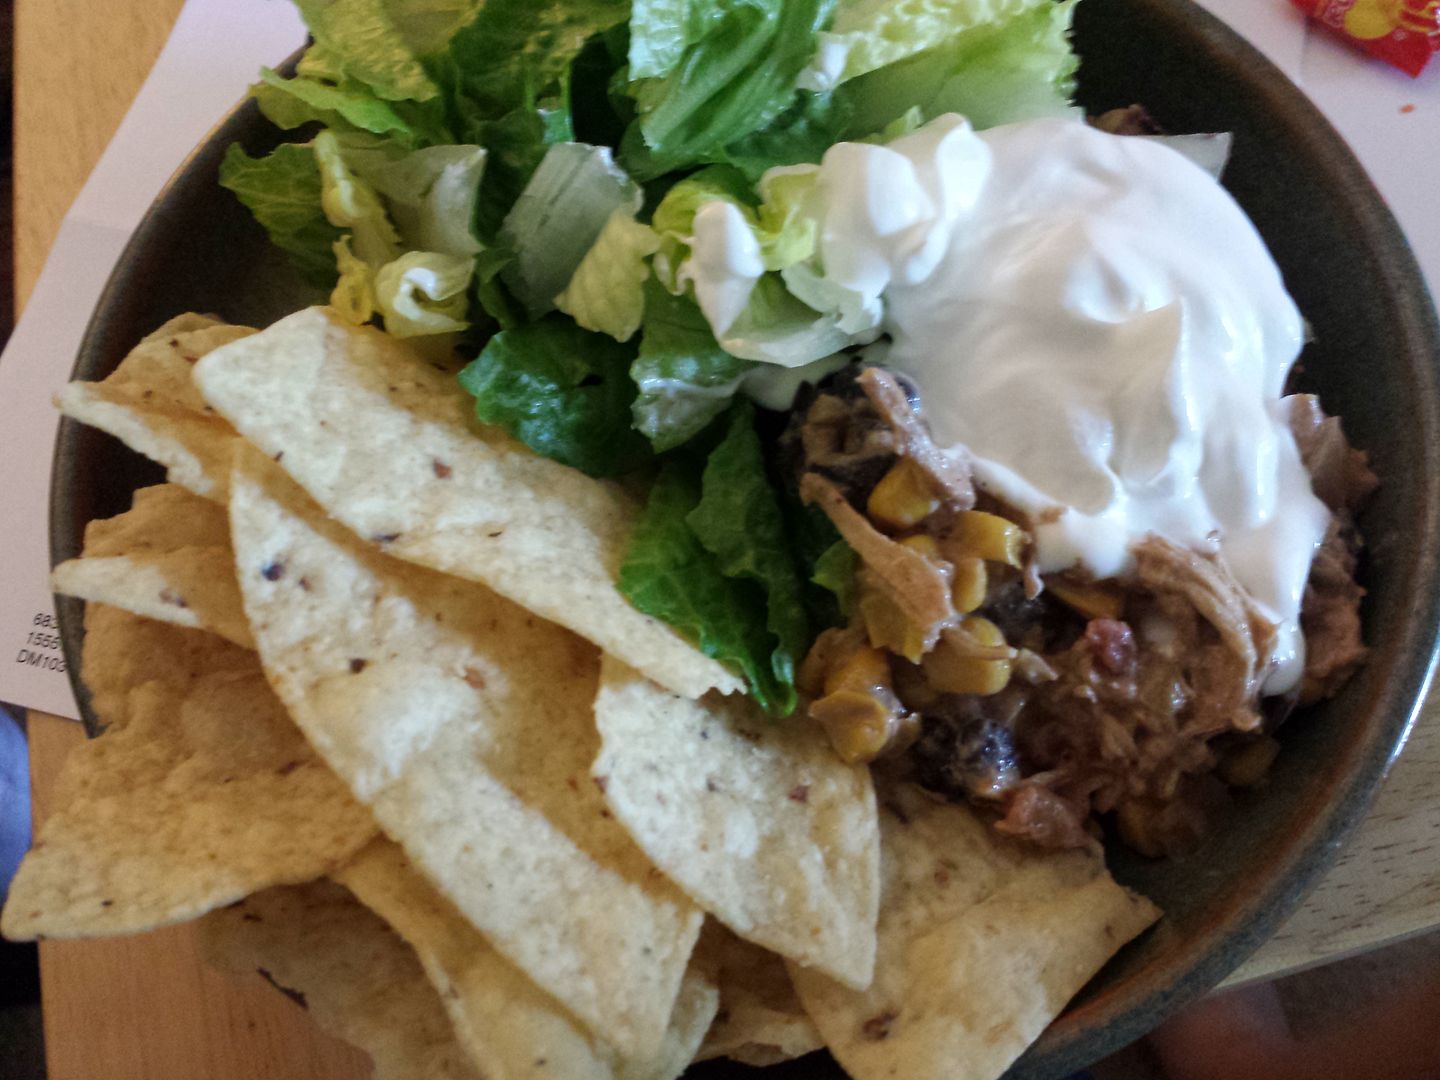
I got a little carried away with the sour cream in this photo! This is the way we ate the leftovers - sort of a deconstructed nacho.  Chips, lettuce, sour cream and the crockpot chicken.

Mexican Cream Cheese Crock Pot Chicken

2 Chicken Breasts, boneless/skinless
1 (15 oz) can Black Beans, drained
1 (7 oz) can Green Chiles, chopped
2 (15 oz) cans Diced Tomatoes, undrained
1 (8 oz) can Corn, drained
1 (6 oz) can Sliced Black Olives, drained
1 yellow Onion, chopped (about a cup)
1/2 an envelope Taco Seasoning
8 oz Cream Cheese, cubed

***Now that we've made this a few dozen times we have altered the recipe.  Now we add these -- an additional 15 oz can of black beans, an additional 8 oz can of corn (or frozen), a 20 oz can of chopped green chilies instead of 7oz and 4 more ounces of cream cheese.  We also use additional taco seasoning to taste.

***We have decided to make our own taco seasoning instead of using the prepared envelopes.  2 Tablespoons of taco seasoning = one envelope of store bought (1 1/2 oz)  I will have to post the recipe to the taco mix.  I'll link to it when I get it written.


Now the hard part
Put all ingredients into the crockpot, except the cream cheese.
Turn on crockpot.
4-6 hours on High or 8 hours on Low.

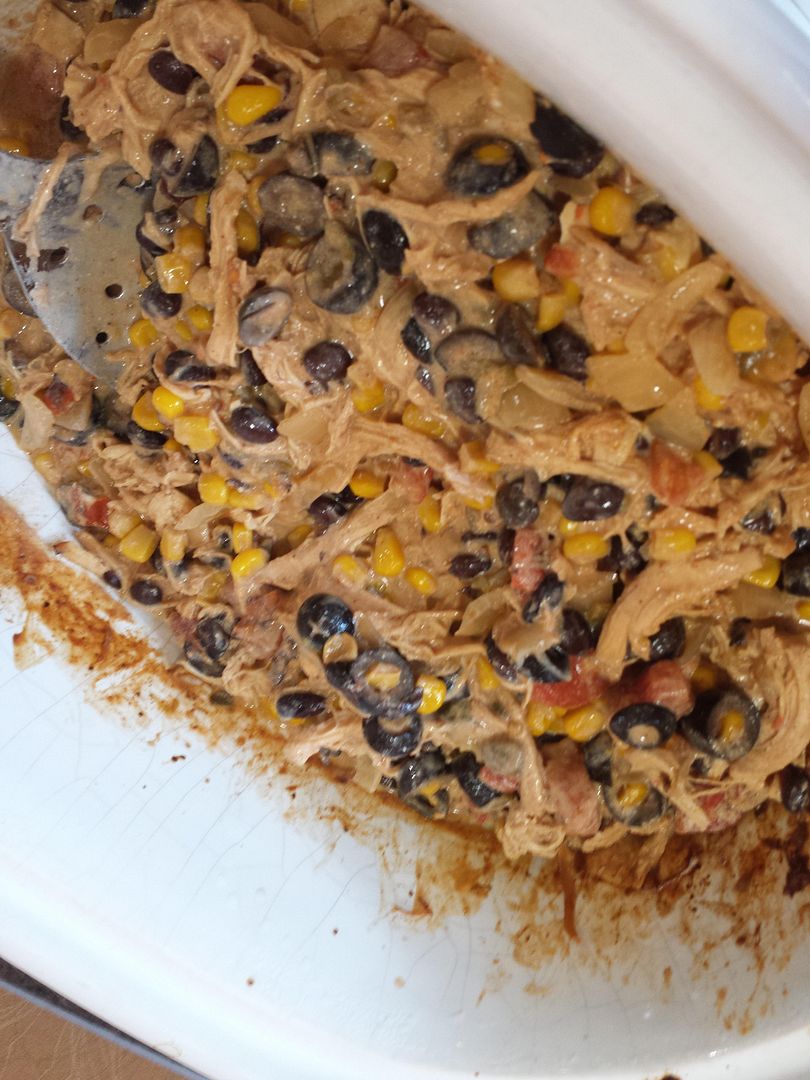
I decided after seeing this photo that we needed to add in another can of diced tomatoes. (It's now reflected in the recipe)  The dish needs just a bit more color.

When chicken is tender, take out of the crockpot and shred.  Add back to pot and add in the cream cheese.  Cook for an additional 30 minutes.

Stir well and serve over rice or quinoa OR serve with tortillas OR serve with tortilla chips.


We used already cooked and shredded chicken, as I had cooked up a bunch the day before in my pressure cooker.  So I added in some homemade frozen turkey stock cubes that I had in the freezer to make up for the lost liquids in already cooked chicken.  I'm sure a 1/4 cup of chicken or vegetable stock would be fine, too.  Since my chicken was already cooked and shredded, I was able to avoid the "burn your hands shredding the chicken" step in the recipe!  It was still full of flavor and tender.

I didn't realize there were so many choices of diced tomatoes, when we went to pick out a can at the store.  I chose the fire roasted diced tomatoes and they gave a nice flavor to the dish, but I'm sure any kind you like will work well.


The dish was a hit and I will make it again.  I might even make it just for us and freeze half of it.  We liked it best as deconstructed nachos with our crispy tortilla chips.  At potluck we served it with corn tortillas so it could be an entire gluten free meal for our GF friends.

Thanks for joining me!
Have a wonderful day!
Kristin