
 I really like to write notes to people. I write out cards and sometimes I write long messages and other times I just write - "I'm thinking of you!" and mail it off.
I used to have piles and piles of cards. Boxes of cards in all sorts of shapes and sizes. Thank You cards, blank cards and birthday cards. The past few years I have watching my money a lot more than I have in the past. I still make impulse purchases, but a lot fewer. I haven't purchased a box of cards this entire year (2008!) and my card collection has been whittled down to nearly nothing! My sister gave me some cards for Christmas, cards that she made, so I'm reluctant to use those right away lol
 This is all leading up to this... I wanted some cards, paper, envelopes - something. The few that I had left had seen better days and I wanted something new.
I was cleaning out my computer room when I came across the DWR catalogs...2 of them.
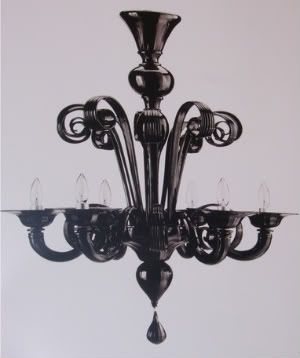
They have so many lovely pictures.
Lots of white space.
 I have used magazine pages before as writing paper, but only occasionally. These particularly wonderful pages tend to have a beautiful picture on one side and then the other side has just a few pictures and plenty of space to write. So I spent about a half hour carefully tearing apart the Design Within Reach Catalogs. I used the full size page and then tucked all of those pages into a large folder.
Those pages are going to be my new notepaper or envelopes.
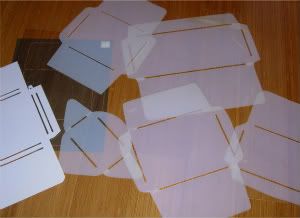
 Envelopes are very easy to make. You can find envelope templates online for free (here and here) or you can purchase templates like I have. I keep them in a folder in my filing cabinet. It keeps them from being scattered all over the place.
My file folder of envelope templates is one of the few things that I can put my hands on even if I don't use them for months. The filing cabinet is a great place sometimes lol
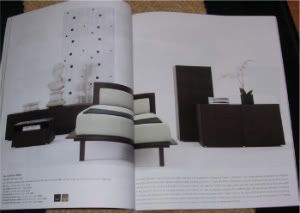
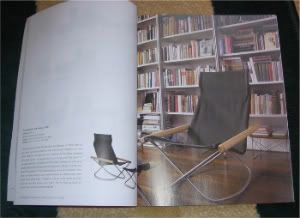
 OK, so pick a template and then pick a magazine page that you'd like to see on your envelope. I liked this one because it had a lot of white area, that I could use as the front of the envelope and then it also had something very unique that would be great for the envelope flap.
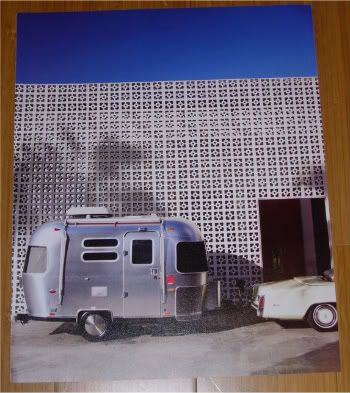 My favorite envelope template is the one I used below, because it has such a large area for the flap. It means that you can have one large image - rather than a regular envelope where the back is divided into a small piece and a larger piece.
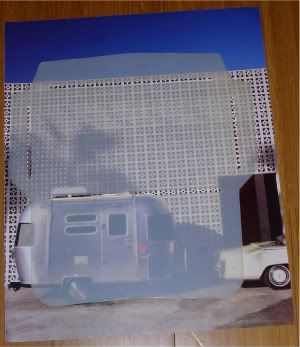
 I place the template over the top of the page and move it around before I trace around the outside. In this case, I have the template upside down - the flap part is on the bottom. Then I cut out the outside and fold the sides in and crease the edges with your finger - or use a bone folder. If the paper is thin enough you really don't need to use a bone folder.
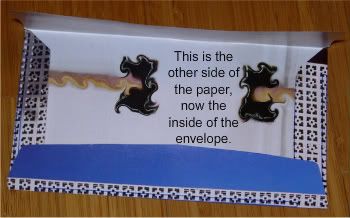 Fold the edges and tape the bottom corners. I've made the mistake of taping the folded over part to the inside of the envelope - there's no way to keep the contents in the envelope if you do that -- so do as I say and not as I do lol
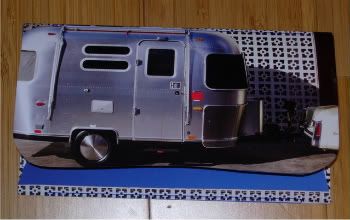 The front of the envelope looks like this. I love the shadow on the wall. I didn't notice as much in the big picture, but it really stands out now on the front of the envelope. The back of the envelope is the airstream trailer. I love how perfectly it fits. This is going to make a great envelope.
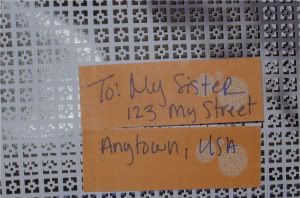 This is an example of how I'd address the front. I don't have any plain white labels, so these are small post-its. I'd use a bit of packing tape to secure the label to the envelope. Just make sure the address stands out from whatever the background is, so that your recipient actually receives the letter.
Also make sure that the back of the envelope is secured. I've used a glue stick before, but not all of them went through the mail and arrived still stuck - so once again, I'd use a bit of tape to seal the back flap.
If you want to reduce, reuse, recycle - this really is a fun way to do that.
The catalogs I used came from this company

I hope you have enjoyed this tutorial. If you would like to read more about how others are Making Do with what they have - head on over to Ann Kroeker's site. She's having a special Make Do Mondays carnival. I wasn't prepared on Monday, so I'm blogging about this today LOL
Have a wonderful New Year!
Kristin
9 comments:
I *love* this idea--what a fabulous, creative, inventive, personal way to make-do and be thoughtful at the same time. I know that if someone sent me a hand-cut/hand-folded envelope with a homemade notecard inside, I'd be delighted! All that effort...for me? I'd say this is a super-big treat for the recipients, and you've turned making-do into a classy step up from storebought.
It only takes a few minutes to make the envelopes - and if I made the envelope, chances are real good that I'd write on a Post-it or just fold a piece of paper and put it in the envelope LOL Fancy and plain - either the envelope or the paper is fancy!
Thanks Ann! to me, this is still Make do -- just a little bit of fun tossed in.
Thanks for visiting my blog. Wow, what a creative way to "make do" as you put it.
Congrats on blogging daily for 6 months even through vacations!!!!
Hi! My name is Sylvia, I'm the editor of the Creative Bliss channel on Blissfully Domestic. This post was forwarded to me by our managing editor and I love it! Would you be interested in joining our fab team of contributors?
If so drop me an email at sylvia{at}blissfullydomestic{dot}com.
I'm planning to run this next week. I'll give you a heads up when I do! Thanks so much!
What a CUTE idea!
Looks like you're about to become famous! ;-)
Sylvia! Thank You! I have sent an email :o)
I've been dancing most of the day over this.
I love showing people how to do things that will improve their lives or just to take a few minutes and have some fun. This was one of the "just for fun" posts.
Thanks everyone.
I love it!!! My 6th grade art teacher would send me cards made from phone book covers, magazines when I left for college!!!! When she moved to our school we were her first class to graduate!!! She was very honored and touched and kept in touch with a lot of us!!!! =)
She was such a GREAT teacher!!!! She made me love art!!!!! I miss her!!! She passed away about 8 years ago!!!!! =( I stayed in touch with her up until she passed away! She had cancer!!!! I remember telling her that God needed his angles and we both cried on the phone!!!!
PS - Congrats on the Creative Bliss channel on Blissfully Domestic!!! =) I seen the comment!!!!!
Let me know how it goes!!!!!
Dance Dance Dance sister!!!!!
PS - Congrats on the Creative Bliss channel on Blissfully Domestic!!! =) I seen the comment!!!!!
Let me know how it goes!!!!!
Dance Dance Dance sister!!!!!
Post a Comment