I love a great idea & Make Do Monday's hosted by
Ann Kroeker is a place where you can certainly find some great ideas on how to make do with what you have.
"It’s a carnival you can visit to celebrate creative problem-solving, contentment, patience and ingenuity," says Ann.

This post also goes right along with
Thrifty Thursdays from Tales from Bloggeritaville. A fun little time to hunt around the house, the garage, someone elses house and garage or even a thrift store or two to dig up some cool finds. Be sure and check out the other Thrifty Finds, too.
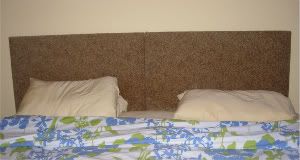
This is my bed. I pulled up the covers and gave the pillows a slight fluff. It's not terribly exciting or fancy, but boy is it comfortable. The duvet cover is from Pottery Barn. I found it on sale and we love it. It isn't a true match for our bedroom, but it is just so comfortable that it's perfect!
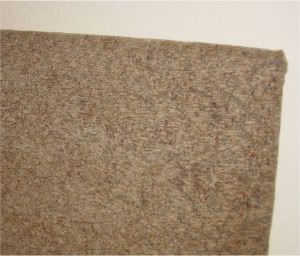
But that's not what my Make Do Monday is all about! My Make Do is the headboard. I've made three of these and they are so easy. I really like a padded headboard because I tend to sleep with one arm inbetween the bed and the headboard. So I like to make sure my arm isn't on a hard piece of wood or against the wall.
Here's how it works.
Purchase one sheet of plywood (4' x 8' - 1/2"thick)
For a King Size bed, I cut the piece into two pieces - each 3' x 4'
A Queen size bed I cut one piece 3' x 5' (but you could go 4' x 5' but I think I was having trouble finding the fabric I wanted for a 4' width, so I went with 3'.)
I purchased upholstery fabric, a very neutral color that went well with my yellow bedroom. Mine was real inexpensive - I think it was $3.99 a yard.
Also purchase batting. I chose a nice quality batting 1/2" thick I think. Honestly, I can't remember, but I know I folded it over, so it was doubled.
Staple Gun. Mine is a manual.
(I actually had my husband cut the pieces of plywood, but you can also ask the lumberyard to cut it for you for just 50¢ a cut. Well worth it if you don't have the tools.)
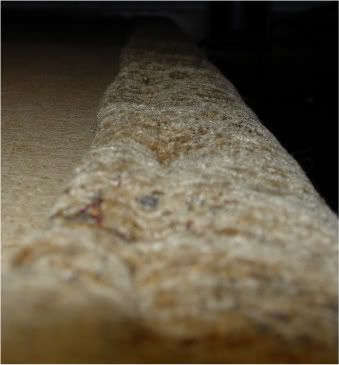
I set up my work station on my dining room table (when I had one) I put the fabric down first (right side facing the table) then the batting, then the plywood. I got it all centered and then pulled the fabric around the plywood and rolled the edges under to trap most of the batting and frayed edges of the fabric - then stapled. I did three or four staples in the middle of each side to make sure I got the fabric straight & fairly taught on all sides.
This strange photo is of the back of the headboard looking from the top down. you can see the rolled edges of the fabric. Some of the batting didn't get rolled in, but I just trimmed it afterwards.
EDITED to add: You do need to staple all the way around the headboard, not just a few in the center of each side. I sort of stopped mid instruction up there. Staple a few times in the middle of each side, then finish up all the way around. The corners can get really tricky with so much fabric and batting, so I cut out almost all of the batting in the corners and folded and stapled a lot. :) As long as it looks fine from the front, you can staple as much as you need to.

The headboard can be hung up like it is here (This was my bedroom in Daytona Beach) I wanted to add height to the bed since the room was so large. But in our bedroom here in Jacksonville, the space is small and the whole building was built using metal studs. I was so tired of dealing with those studs that I just stood the headboards on the floor. The headboards on the king size bed stick up two feet, while the one on the queen sized bed is only about a foot above the bed. This was a Make-Do for sure!
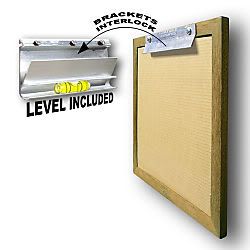
I used these fantastic hangers called
Hangman Picture Hanging System. you can watch the video - at 2:22 is where he talks about this system, which I used on our headboard. These are just fabulous and sturdy and EASY! oh, and did I mention pretty inexpensive? I think they are $5 - $10 depending on the size you need.
I wanted a nice fabric headboard. I wanted it to be warm and soft and beautiful. I wanted it to be inexpensive and I wanted it NOW. I really wanted a new bed frame with the headboard, too LOL But once I realized I really could make the headboard for a lot less than I could buy one, I made it.
Plywood - $15 - $20
Fabric & Batting - $40 - $50
Less than $70 in my case.
My Make Do is a Make and Use! We've had the headboards for 5 years now, so it's been a long lasting Make Do, too.
Have a fabulous Monday!
Kristin
*The Daytona Beach bedroom - The whole bedding thing didn't work. I just want you to know that I'm not oblivious. I was trying to get a nicer looking cover on the bed so I started layering things. The house was for sale when this photo was taken, Tom was getting listed for his transplant, so bed-scaping was not high on my list LOL
The cat on the bench is Maggie. Mocha's sister.

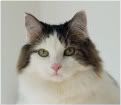 This is Moo. Moo is not my cat, but it's one that I've taken a keen interest in because of it's fun Cat Gymnastics. Moo is Katie's Cat from the blog Color Me Katie. When you click over to see the cat gymnastics, be sure and click on the shower gymnastics link that she has as well. I am totally in love with her cat.
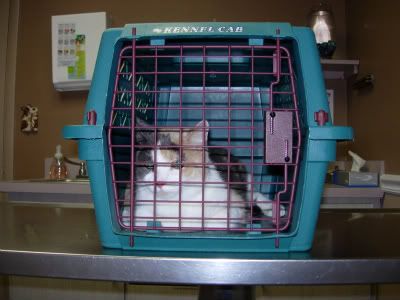 I'm totally in love with mine, too. Mocha wasn't very happy with me in this photo, as you can probably guess. She has been drinking A LOT of water lately. Some nights she drains the entire bowl of water. It's been going on a few months but has been very consistent the past few weeks, so I finally made an appointment at the vets.
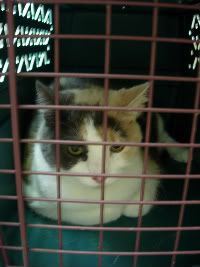 Mocha-darling, as I call her most of the time, made it known to the world that she was very very upset about traveling in the car today and not at home on the couch. She's got some lungs on her.
 She is nearly impossible to get out of the carrier though. She finds all sorts of places to hold onto inside there, but eventually she was freed from the cage she so desperately wanted to get out of just moments ago.
 She was weighed, had blood drawn, had urine drawn, had vaccines and possibly had her temperature taken. The vet looked at her teeth, inside her ears and felt the entire length of her belly. She was very good and let them do whatever they needed to do. The Dr. commented at how well behaved she was. I was so proud. After paying my nearly $500 vet bill we were sent home.
 Today I spoke with the doctor and so far it looks like she is just thirsty. She doesn't have Kitty Diabetes or Kidney troubles. She may have hyperthyroid issues, but those lab results were not back yet. I changed her food several months back from half regular food, half mature food to 100% mature formula. This might be the reason for the increase in water and the weight loss. She has lost 3 pounds in 6 months. She was 15.5 pounds and is now 12.1 pounds. I really didn't think that taking out the regular food would make such a giant difference in her eating and drinking habits and her weight.